
Marshmallow Alphabet-One Die Set, Three Ways with Designer Emily M!
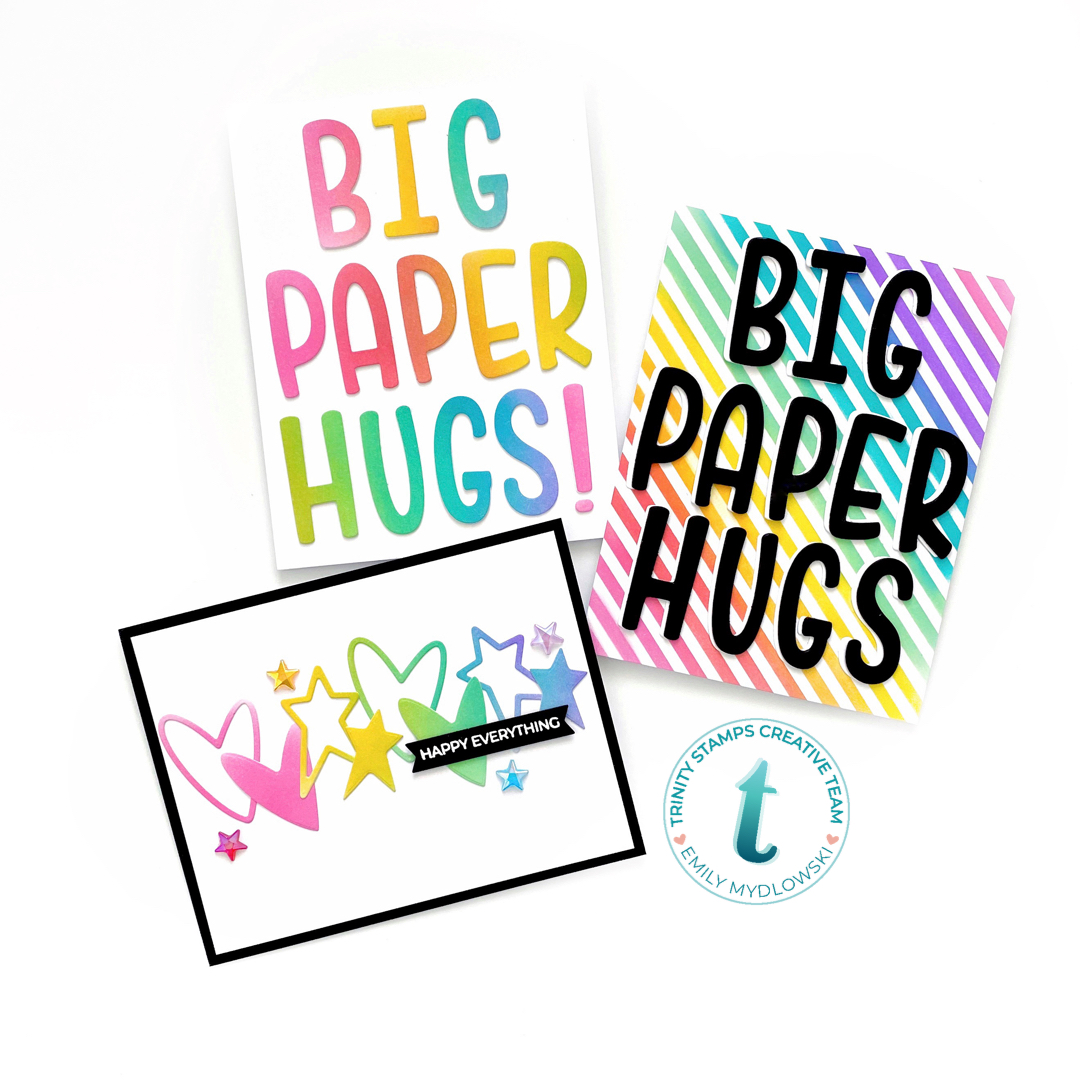
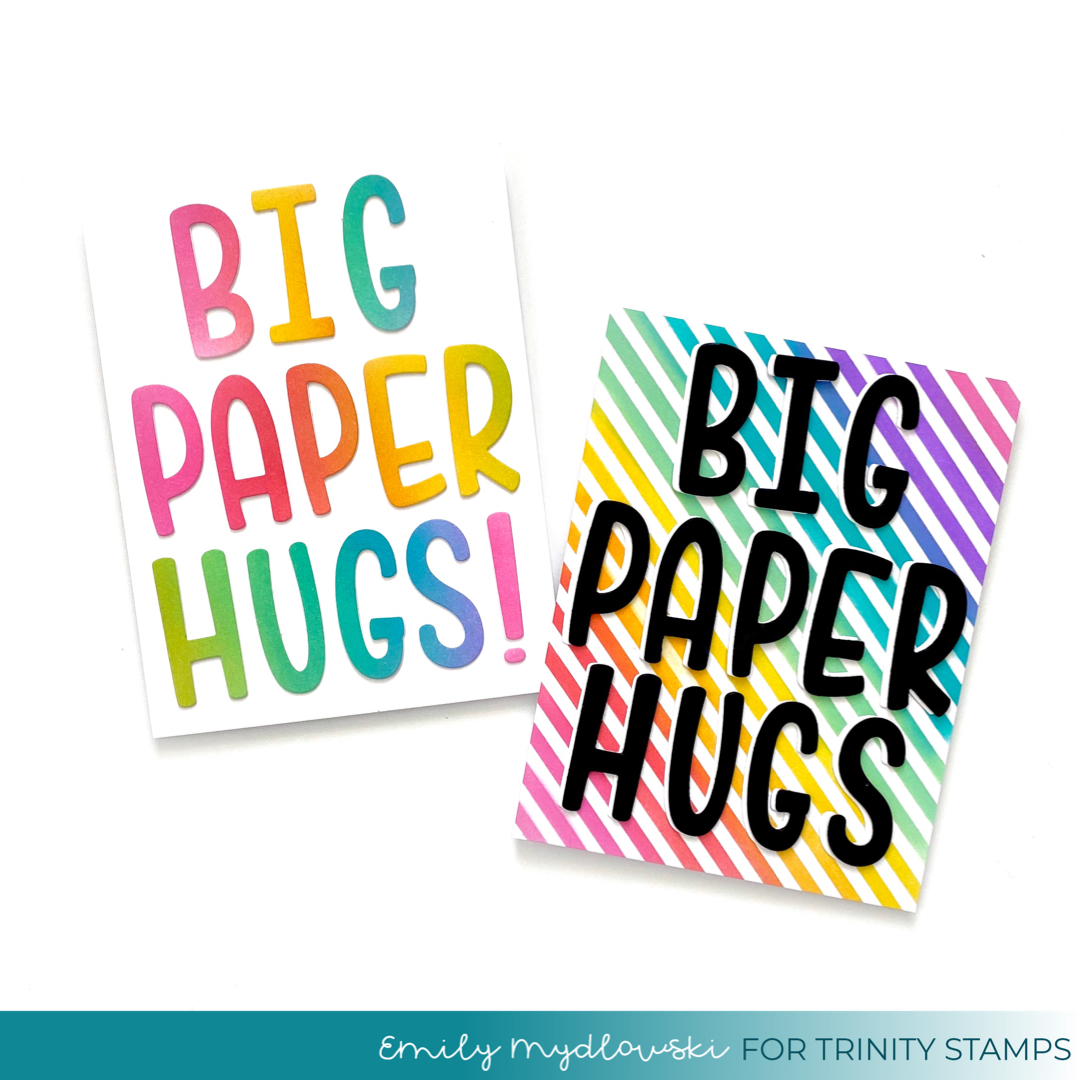
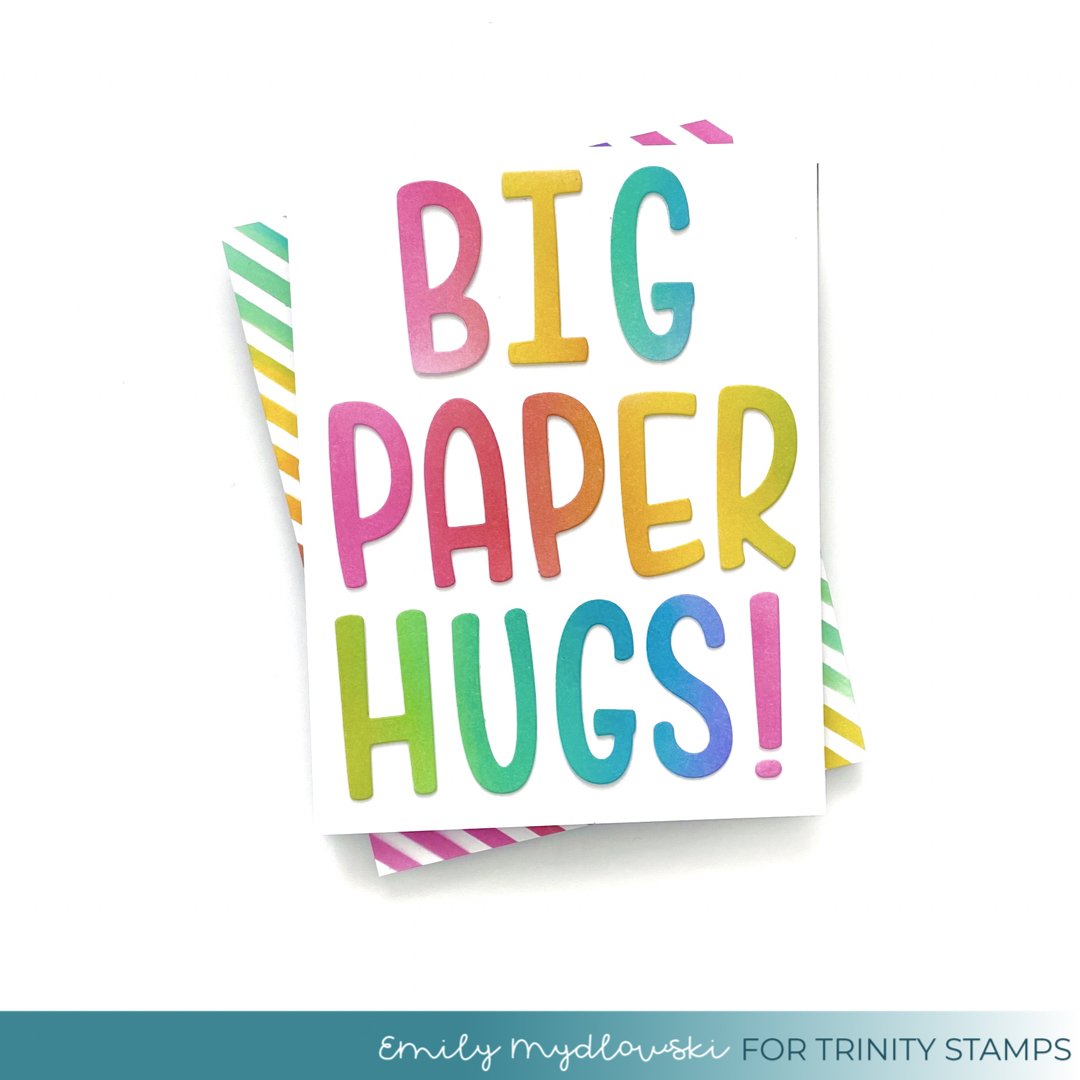
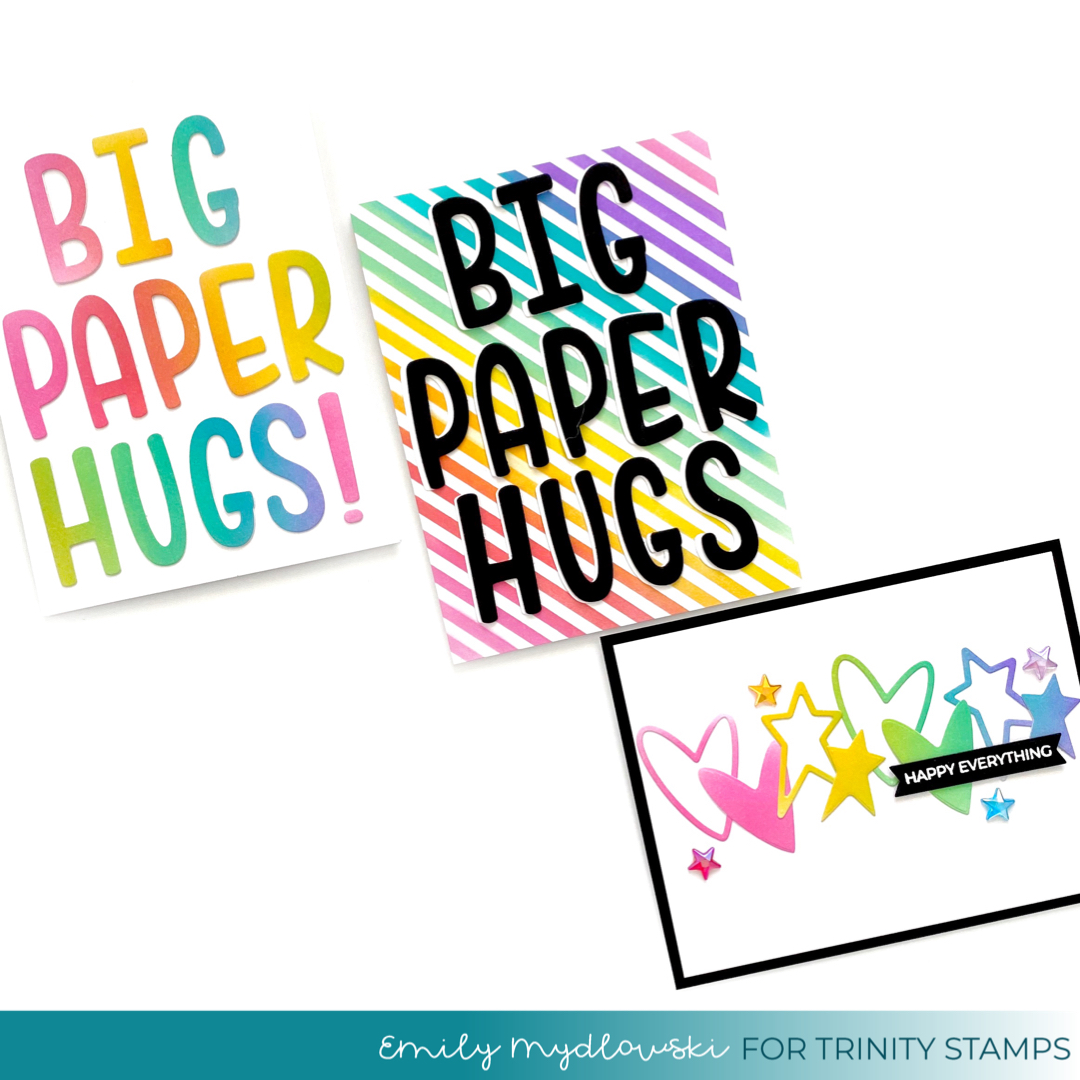
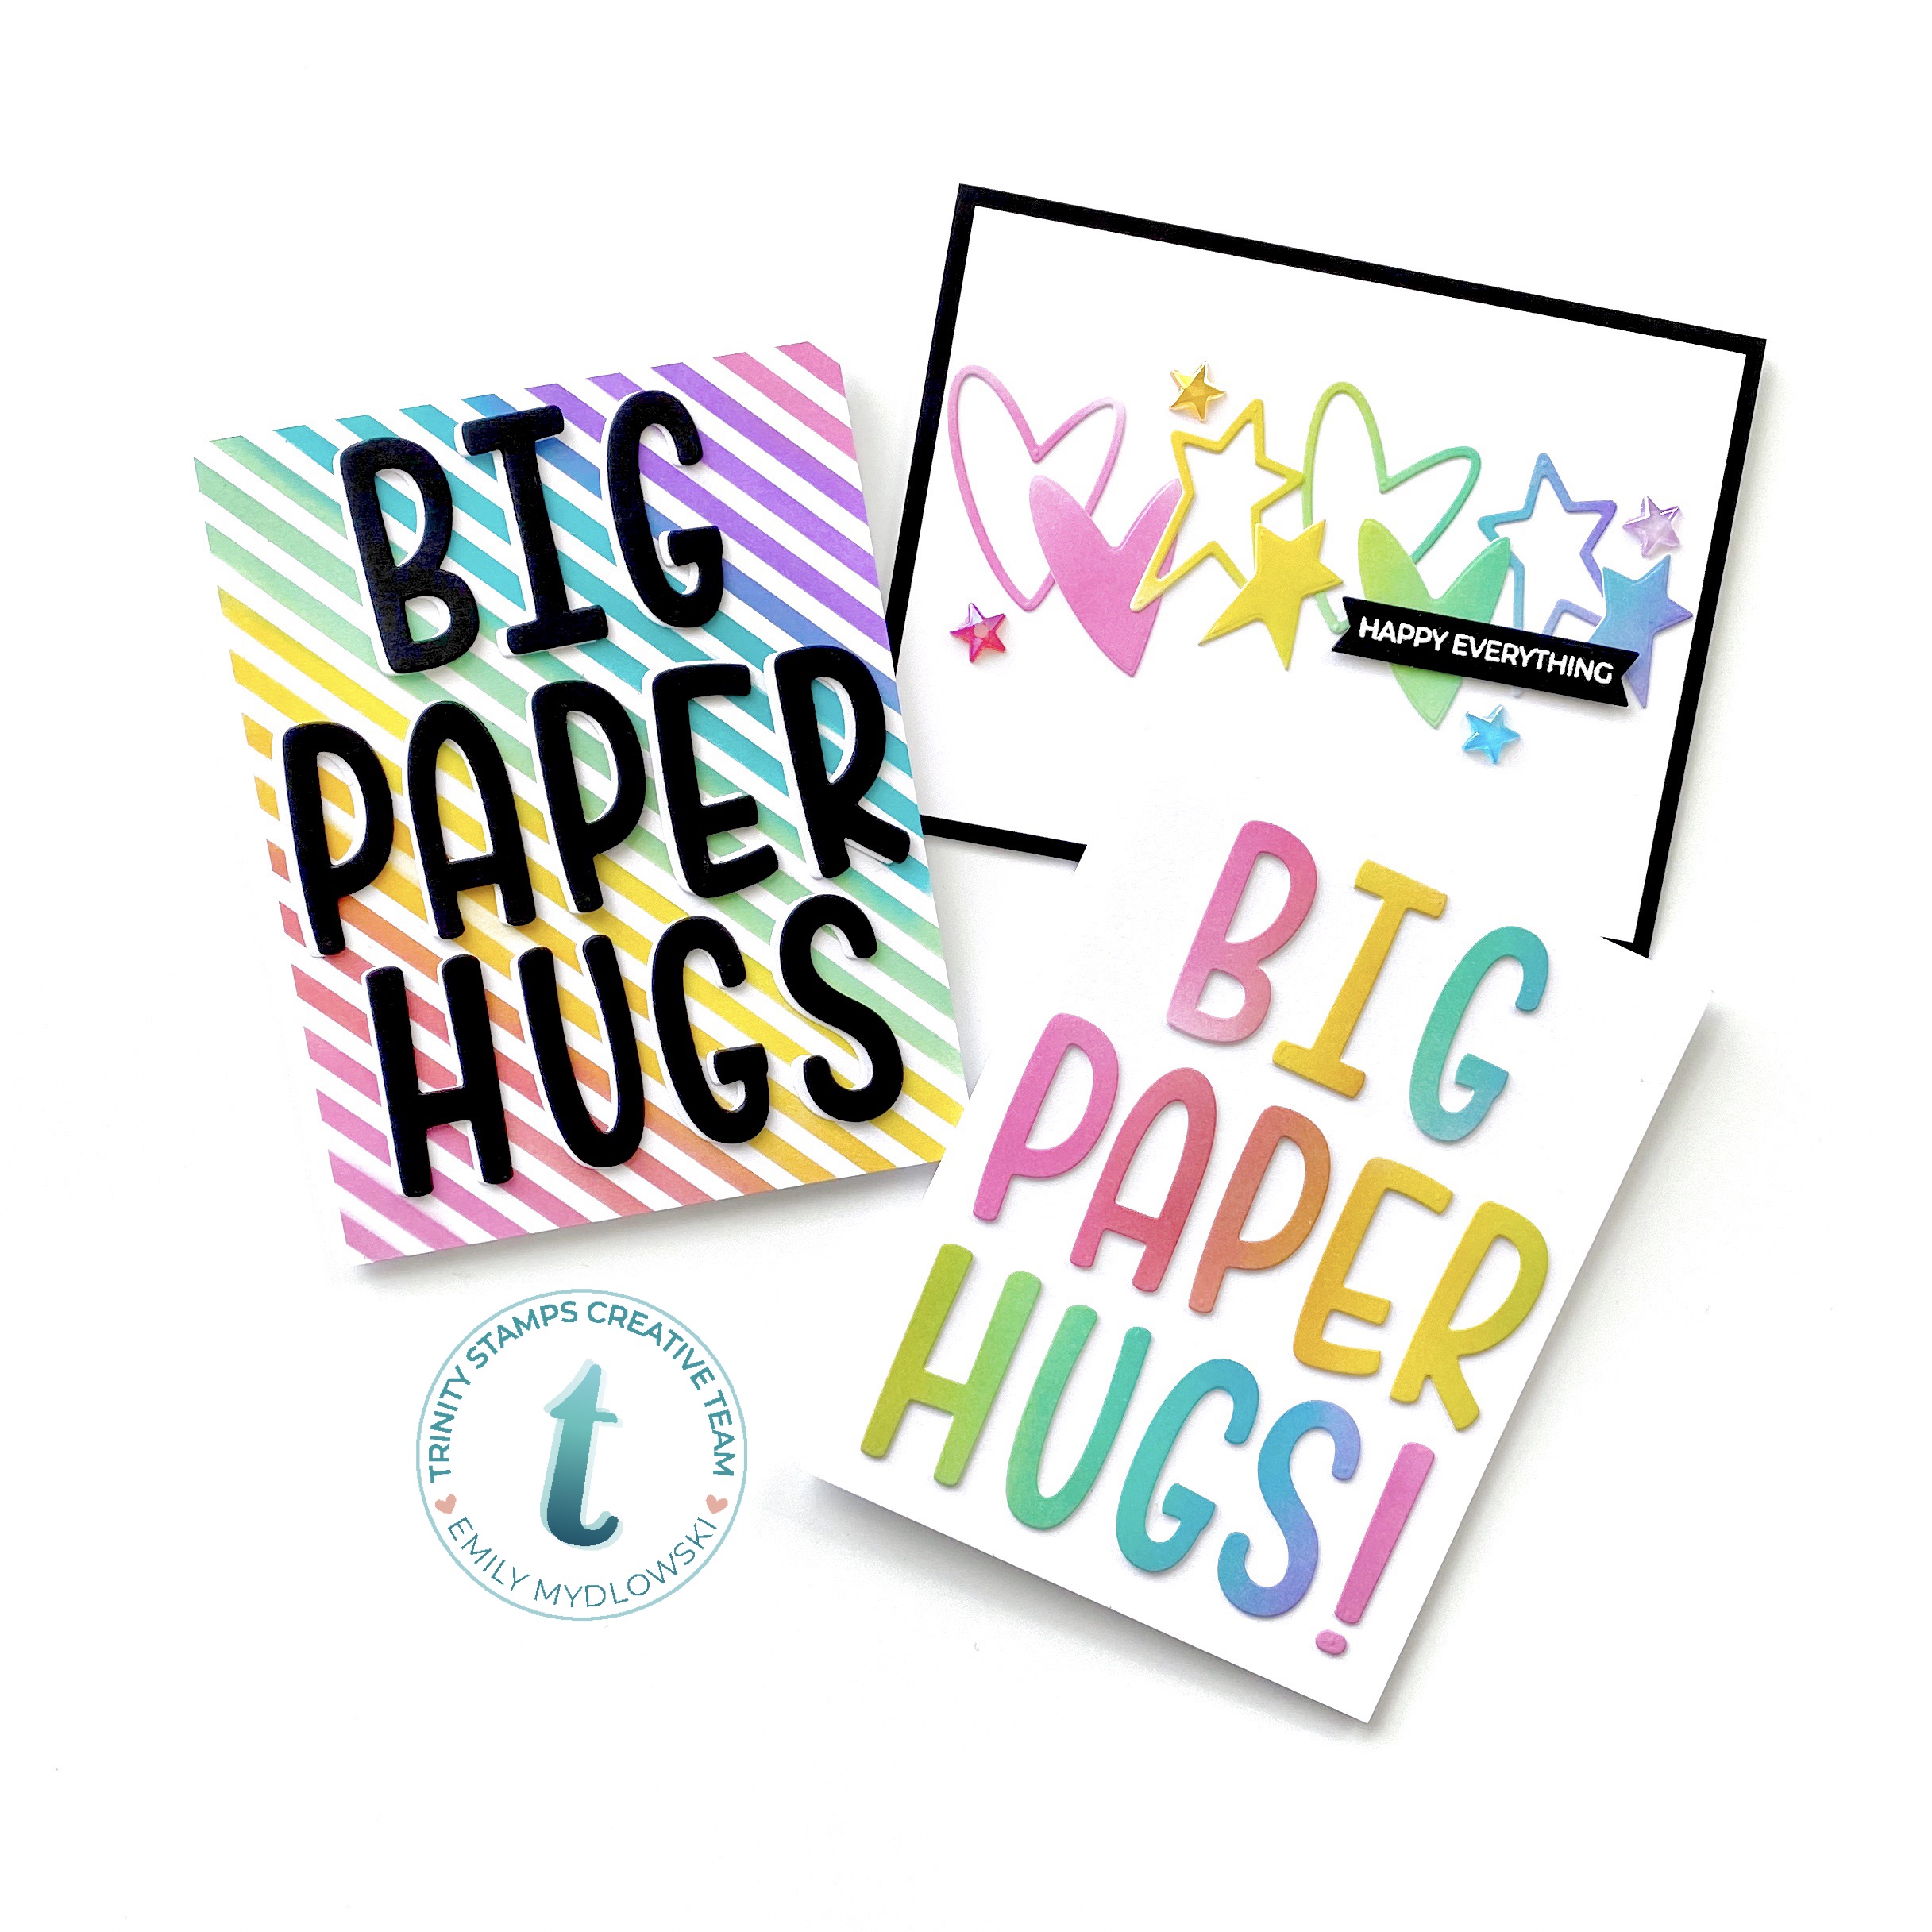
Hello Friends and Happy Monday! Hope you had a wonderful weekend! Emily @popofpaper here today with three Big Paper Hugs Greeting Cards using the Marshmallow Alphabet Standalone Die Set. What is great about this die set is that it not only has a great font but also some fun heart and star shapes that you can use for any occasion.
Alphabet Cardmaking Tips:
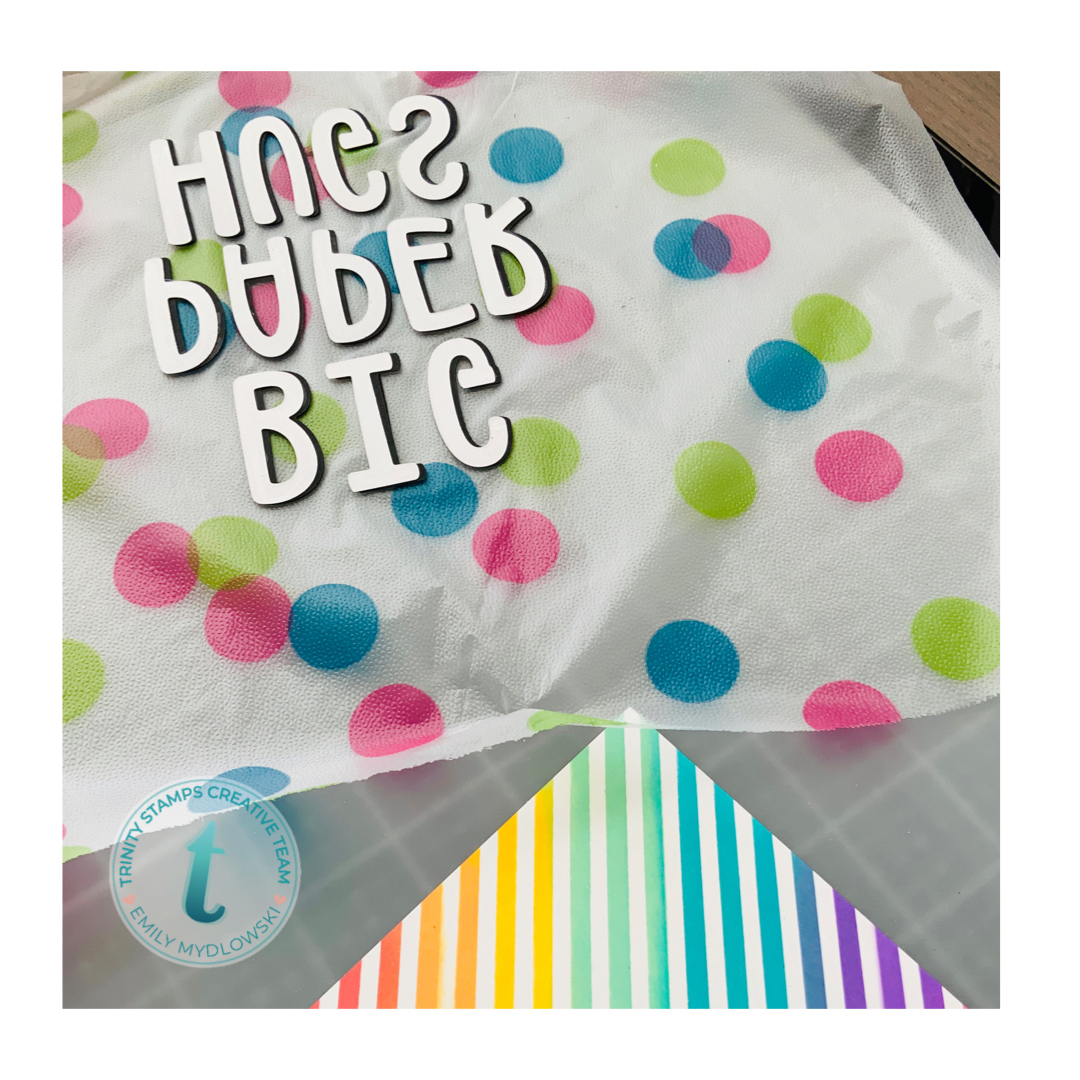
- Press’n Seal Method: Layout your letters on your card panel to create your words and spacing. Then apply Press n’ Seal over the letters. Flip the Press n’ Seal over and apply adhesive to your letters. Then take the entire layout to your card, adhere and carefully pull the Press n’ Seal from the letters for perfectly pasted words.
- Washi Tape Method: Layout your letters on a card panel to create your words and spacing. Attach a long piece of washi tape across your letters. Flip the washi tape over and apply adhesive to your letters. Then take the entire washi-alphabet strip and adhere the letters to your card panel and carefully pull the washi tape from the letter for perfectly pasted words.
- Dimensional Letters: I like my letters to have a little pop off the page. You can use foam adhesive to create this look or you can stack several die cut letters together to create chipboard depth letters. I die-cut extra letters from white or black card stock and then adhere my colored cardstock to the white or black stacked letters.
Rainbow Blended Alphabet, Hearts & Stars
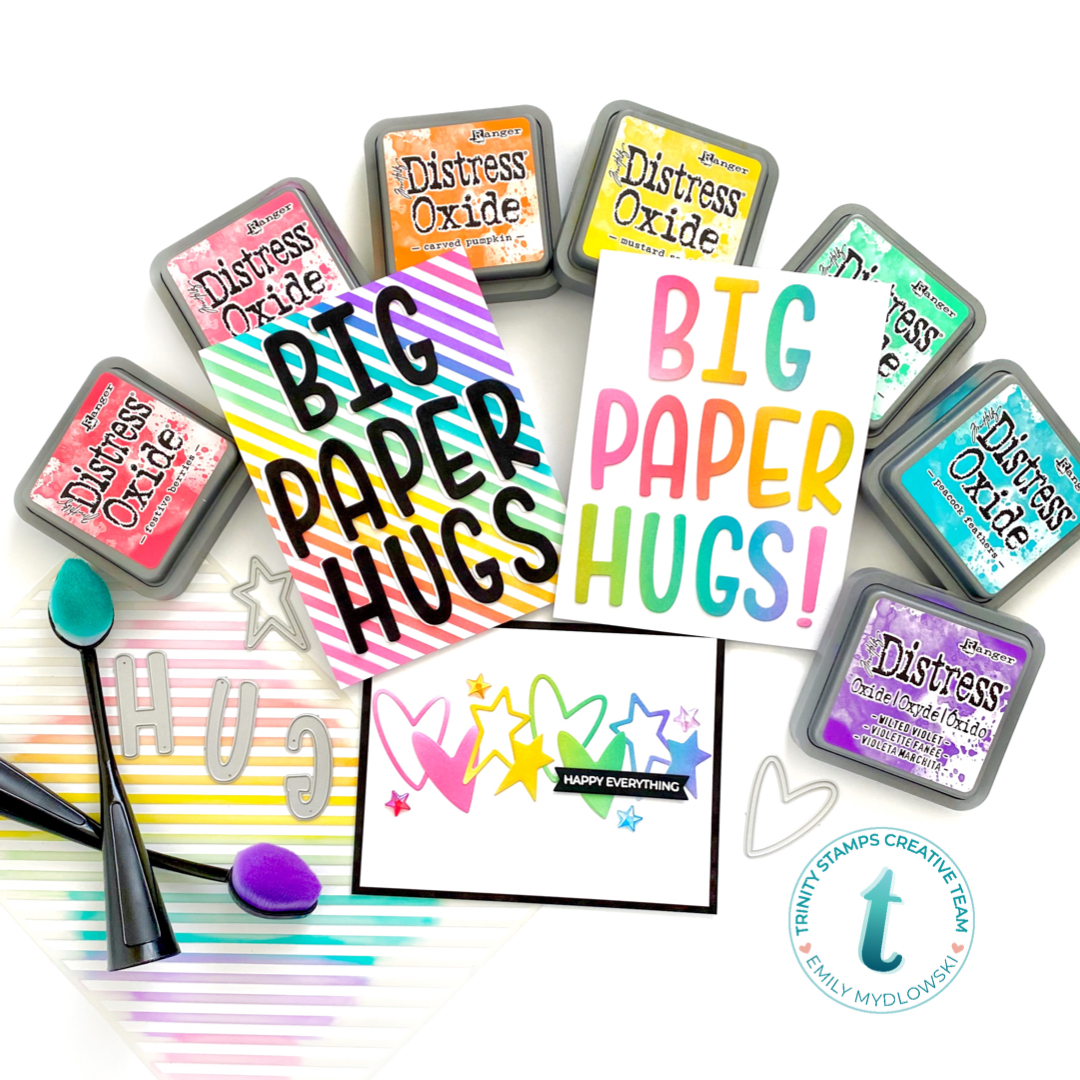
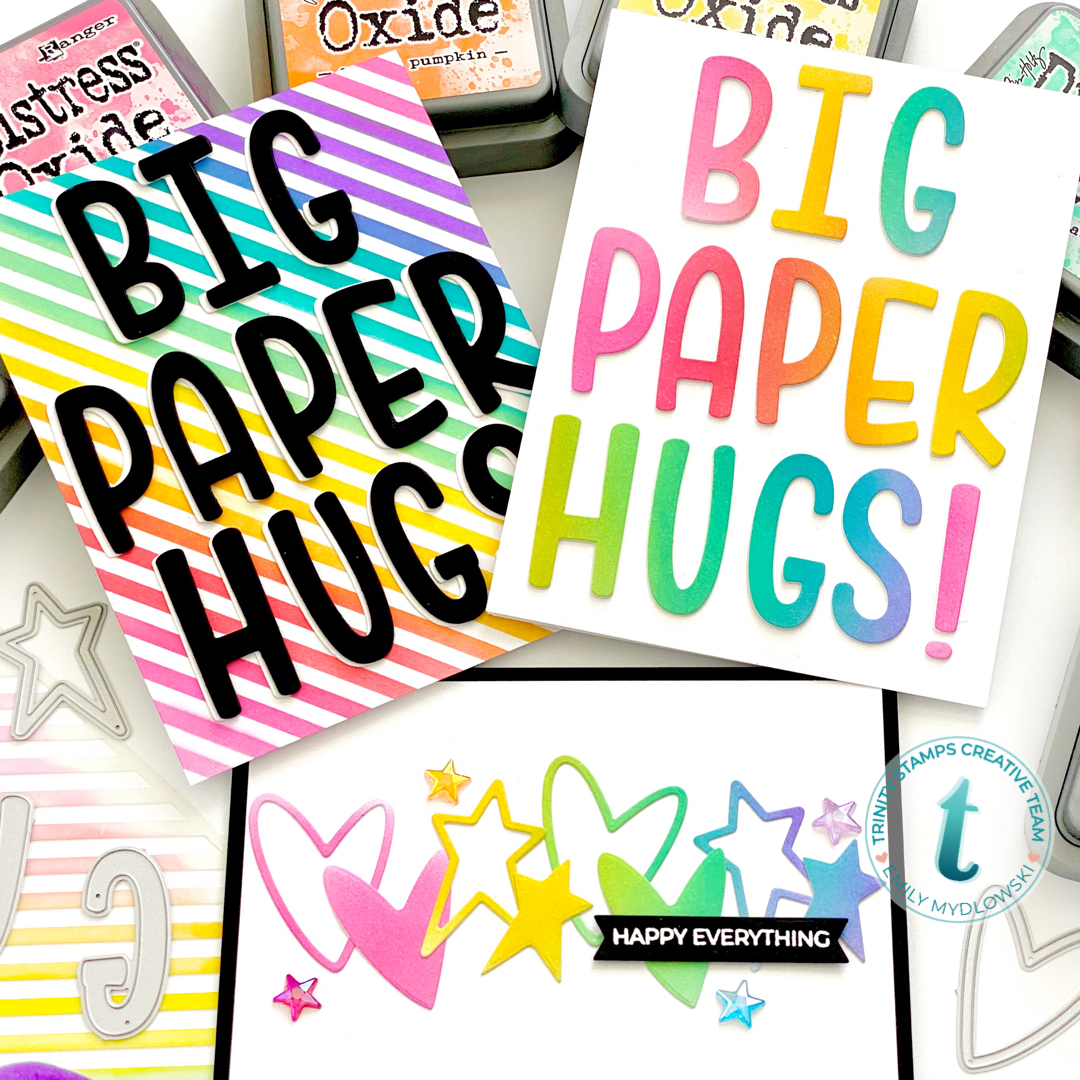
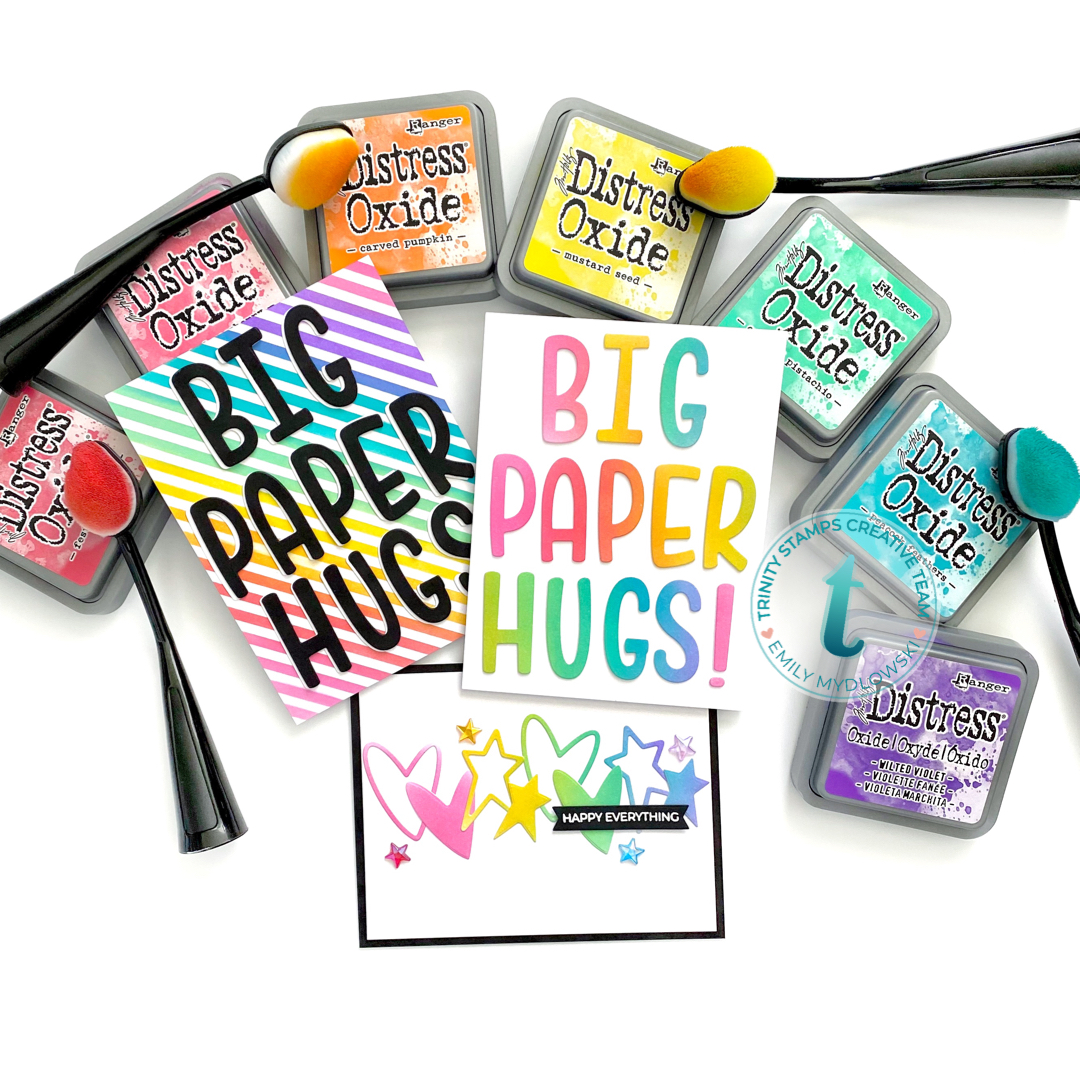
For my first card, I used a colorful selection of Distress Oxide Inks to ink blend a rainbow on white cards stock. After I had a full rainbow, I added the Marshmallow Alphabet letter dies in rainbow and die-cut through my die cutting machine. Then I adhered the letters to my card panel using the Dimensional Letter and Press’ n Seal Method. Easy Peasy!
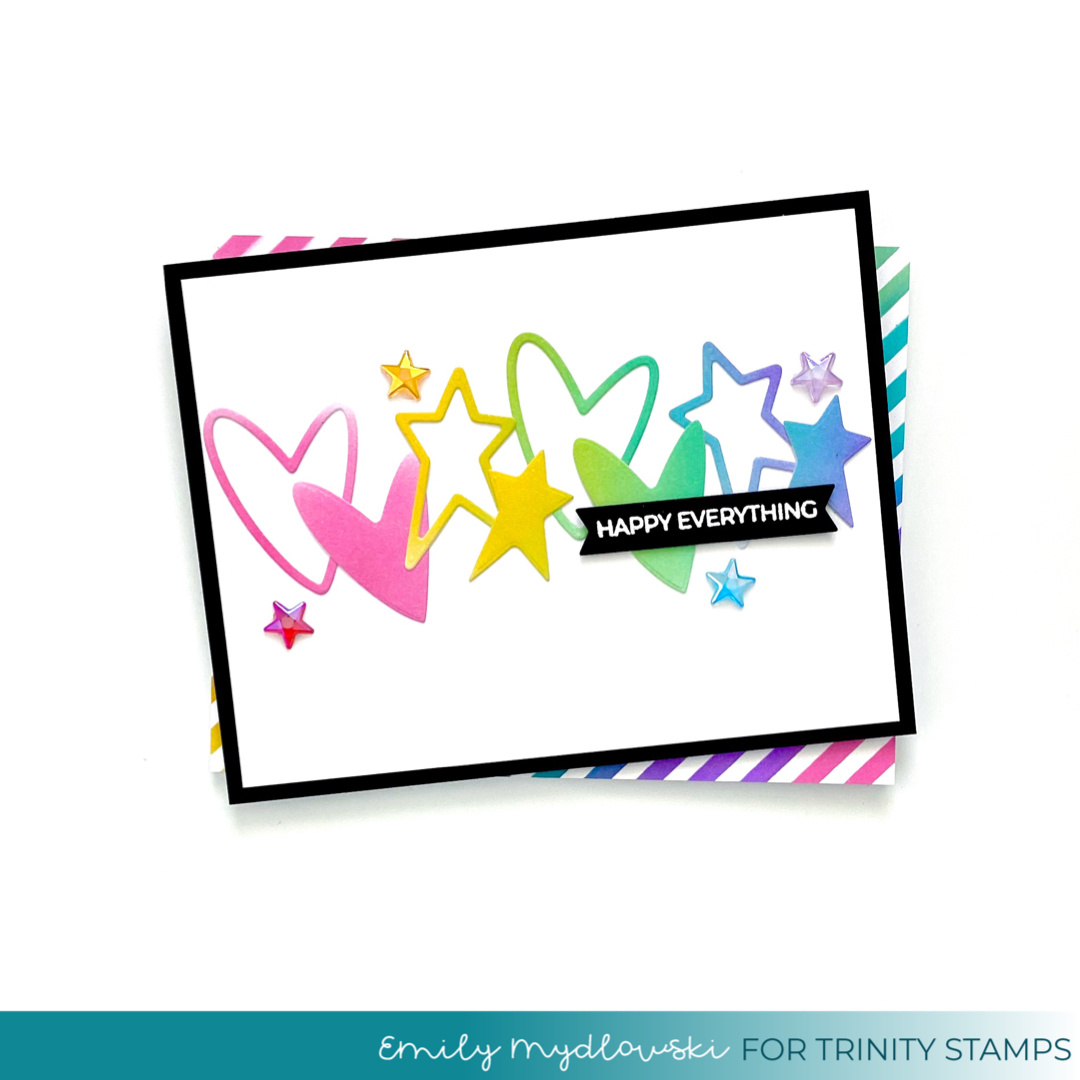
For my second card, I used the same method as above but die cut several hearts and stars in rainbow order. I also used the Press’ n Seal Method to layout the shapes and then adhere them to the card panel. For a little extra sparkle and pop, I added Shooting Sparkle Stars embellishments and a Happy Everything sentiment from the A Sentiment for (almost) Everything stamp set.
Faux Shadow Lettering
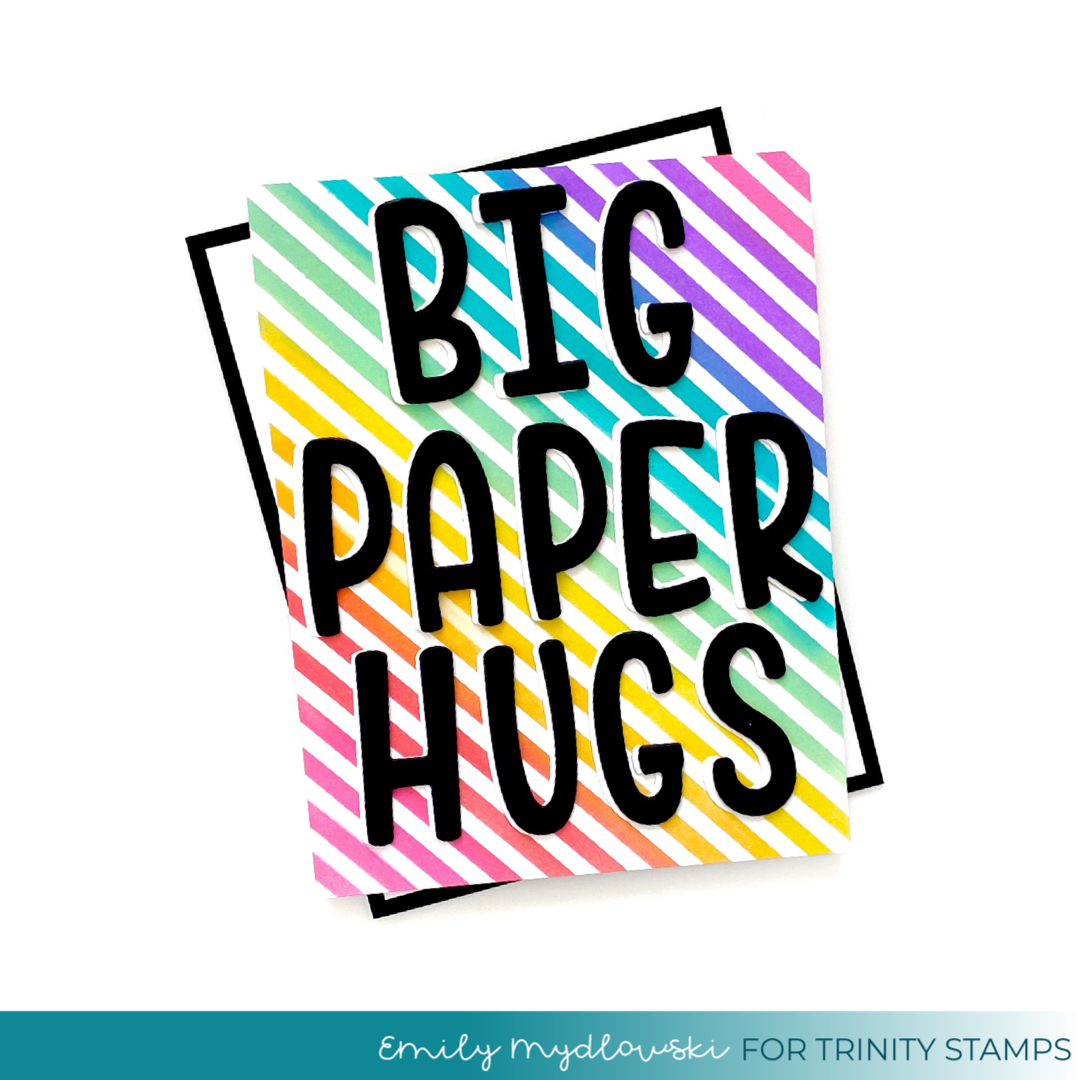
For the third card, I created a rainbow background using the AMAZING Slimline Stripes 6×9 Stencil. Then I cut all of my letters twice with the Marshmallow Alphabet Dies set to black card stock and stacked each of the letters together. Then I die-cut all of the letters in white card stock and glued them to the black letters but slightly offset to create a “faux shadow lettering” effect. Then I used the Press’ n Seal Method to adhere “Big Paper Hugs” to the rainbow striped background.
So there we are friends, three bright and cheerful cards using the Marshmallow Alphabet Die Set. Hope you enjoyed this post today and it inspires you to use your dies and stencils in fun new ways.
Big Paper Hugs!


Beautiful set of cards!
Love them all, great set!