
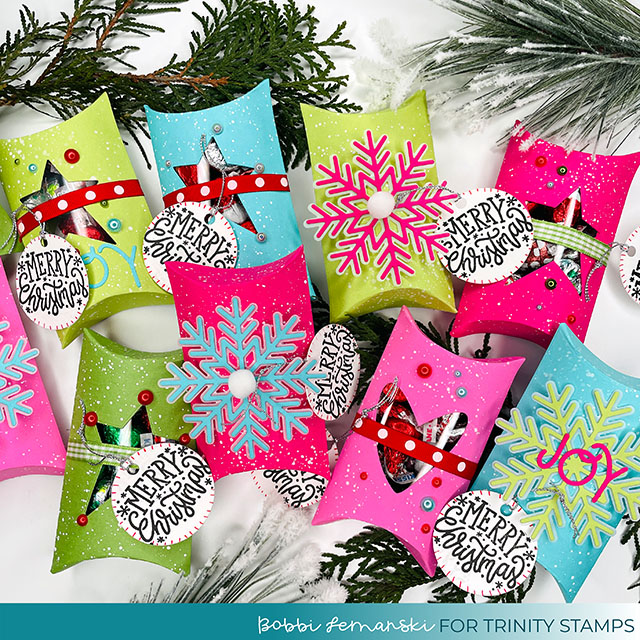
Snow-Covered Treat Boxes for the Holidays
Hello Trinity Stamps friends. It’s Bobbi Lemanski here with a fun way to spread cheer this holiday season. My daughter Olivia, a freshman in college asked me if I could make something special for her to give to her college friends. Every year, I make little treats/gift boxes for her friends. This year is no exception. I used the new Pillow Gift Box die set from Trinity Stamps to create these festive boxes filled with Hershey Kisses candies in five flavors. I’m using the following Trinity Stamps products:
Big Snowflake Cut & Foil Die Set
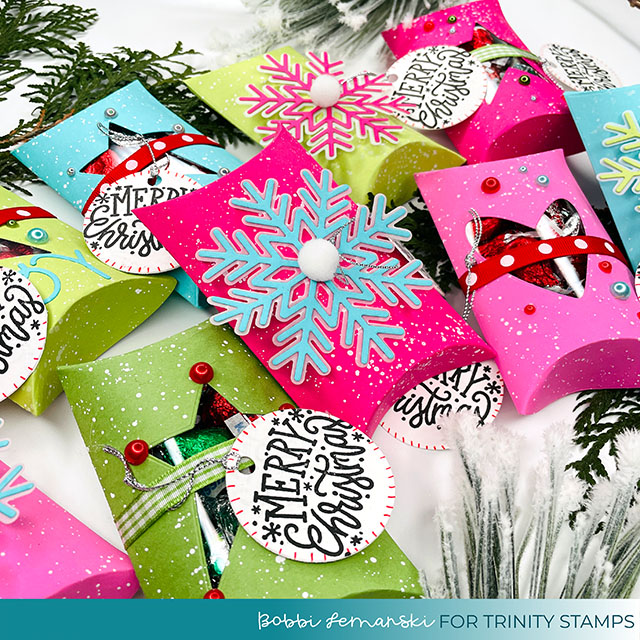
Snow-Covered Pillow Boxes

To make these snow-covered gifts, I started by die cutting the pillow boxes in greens, aquas and pinks and splattering white paint on each die cut. This is a quick and easy way to add “pattern” and design to the backgrounds of each one when mass producing them! I assembled the boxes using double-sided permanent bond tape to the side edge and folding on the scored lines. They assemble quickly. 🙂
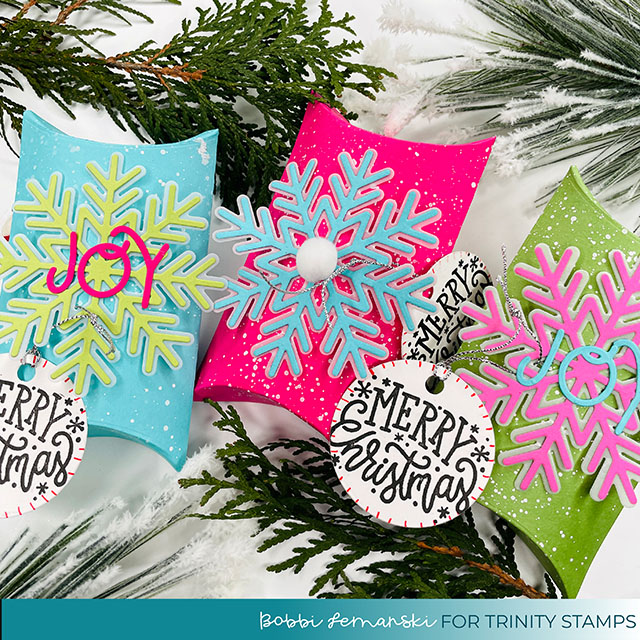
Next, I die cut the snowflakes and their shadows from cardstock and vellum, respectively. Each set was glued together and then glued to the tops of the boxes. I added additional detail such as the “joy” letters from the Holiday Tag Helper die set or a white pompom for the middle. Lastly, I added a 2″ circular tag using the Holiday Tag Helper stamp set and coordinating die set. Notice, I added faux red stitches around each tag to finish the look.
Festive Window Pillow Boxes
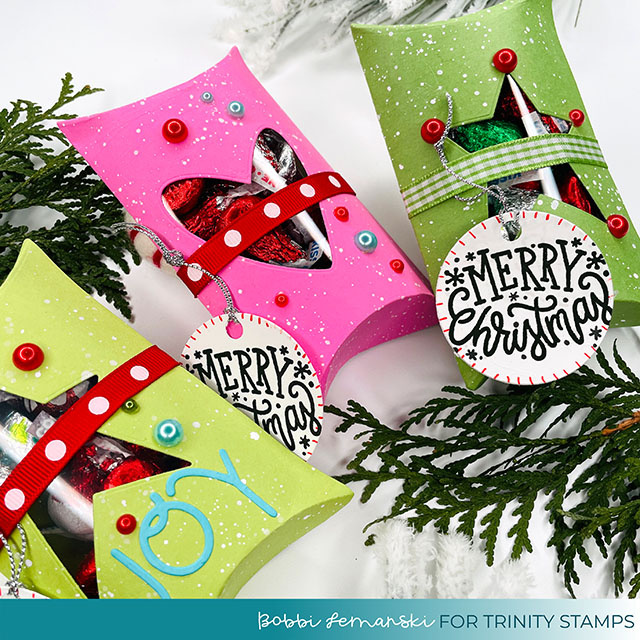
To make the window boxes, I started by splattering white paint, resembling fallen snow on the box base die cuts. I used the star and heart dies that are part of the Pillow Gift Box Die Set. I centered them on the front panel section of the box and die cut the opening before assembling the box.
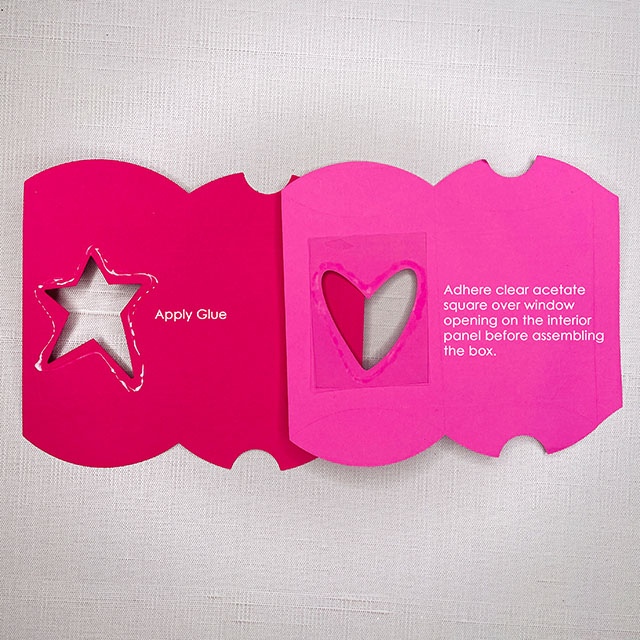
After die cutting the window from the splattered paint box die cut, I adhered a piece of clear acetate to the opening from the inside. To do this, I applied a thin line of glue around the window outline about 1/4″ from the open edge, on the back side of the panel. Next, I attached the acetate square and stacked weight on the top to make sure it sealed completely. I removed the protector sheet from the acetate. I used a glue that dries clear.
Quick Tip: Keep some space between the open window edge and the glue line so that when pressed, the glue does not bleed onto the window area acetate.
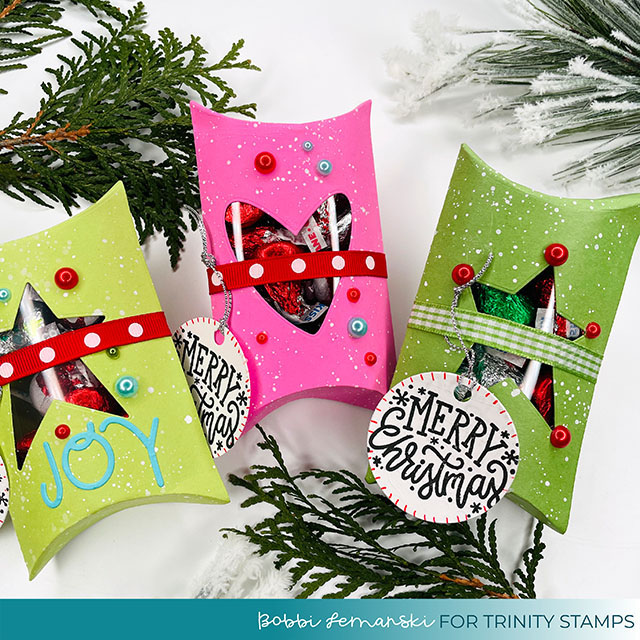
The boxes were assembled. Again, I used permanent bond, double-sided tape to the side edge of the box. and folded in the bottom. I added baubles in Lipstick Red, Forest Fern, and Icy Aqua to the front and a little ribbon band to each one for a festive look. I attached the string tags to the bands using a silver metallic string I had on hand. I have ten gift boxes done and ready to deliver to my daughter at the University of Wisconsin this month!
Thanks for stopping by today. If you decide to place an order, please use the links in this post so that Trinity Stamps knows what inspired you. I appreciate it very much.
If you want to see more ideas and inspiration from me, subscribe to my blog, BobbiHartDesign.com. I’ll send you updates on new posts! You can also find me on Instagram as @BobbiHartDesign and on Facebook as BobbiHartDesign.
Bobbi Hartmann Lemanski,
Bobbi Hart♥ Design, Adding h♥art into every design


Love these! Thanks for sharing!
You are very welcome, Ana! Thanks for stopping by today! Hugs, Bobbi