

Mix it Up Monday: Retro Striped Hearts with a Bold Love You!
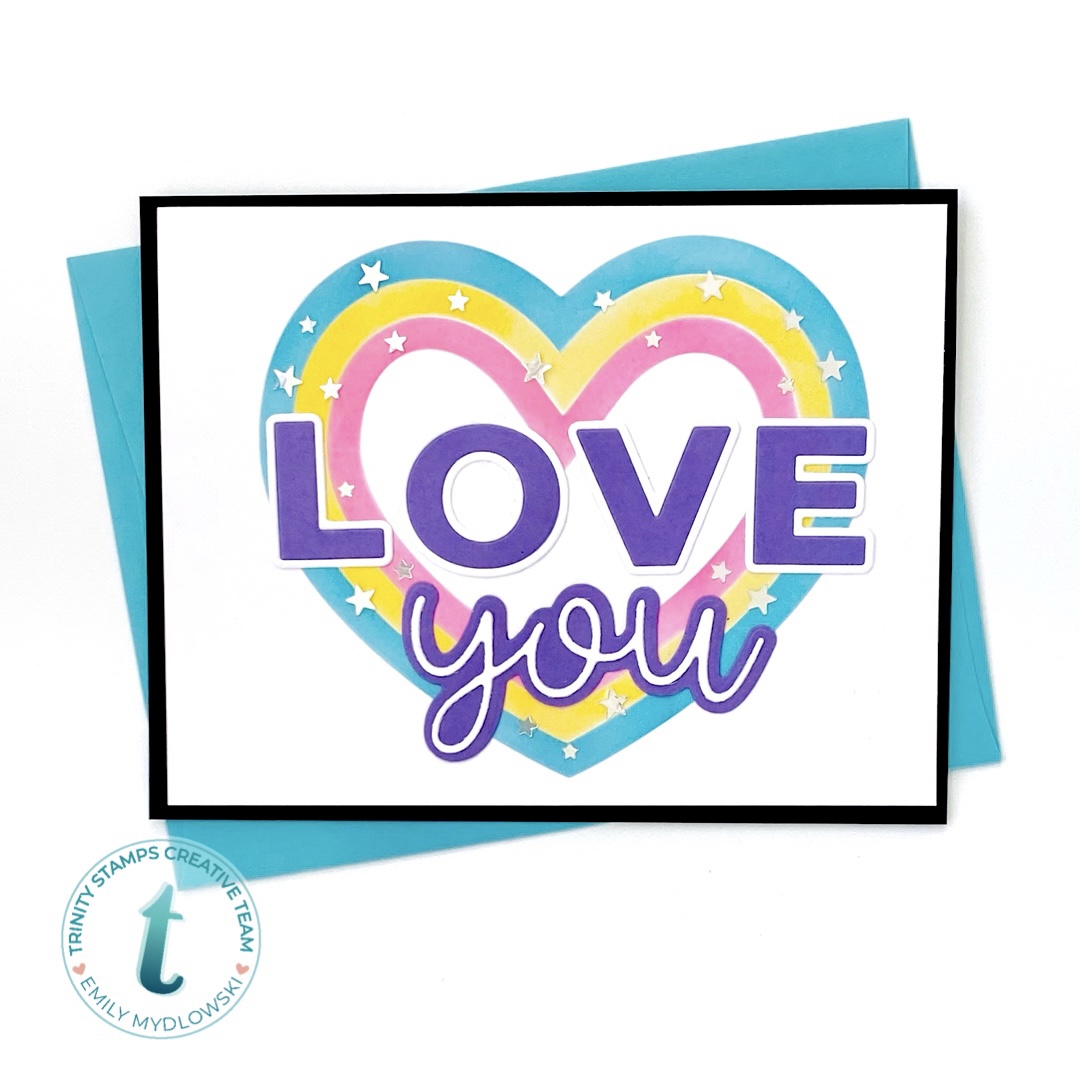
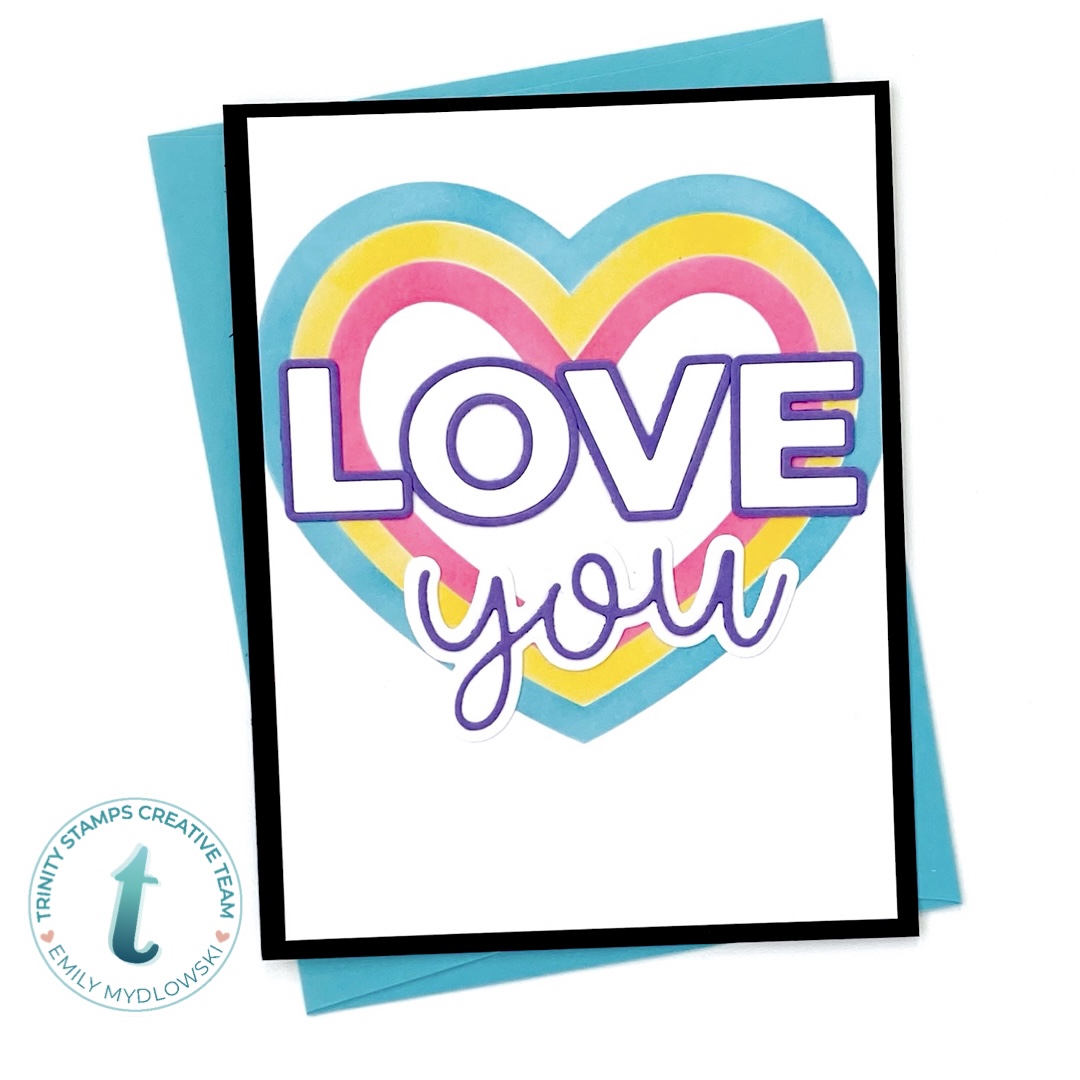
Hi Friends, Emily here and welcome to Mix it Up Monday! Today, I’m mixing up a few of my favorite word metal dies with the Layered Heart Stencil to create two different-but kinda similar Retro Love Themed greeting cards perfect for the Valentine Giving season. Just by changing the direction of the card from Portrait to Landscape and using the same color die cuts but with inverse color assembly you have yourself two similar—but different cards. Bonus—since all the supplies are already out it’s easy easy to pull this set of cards together.
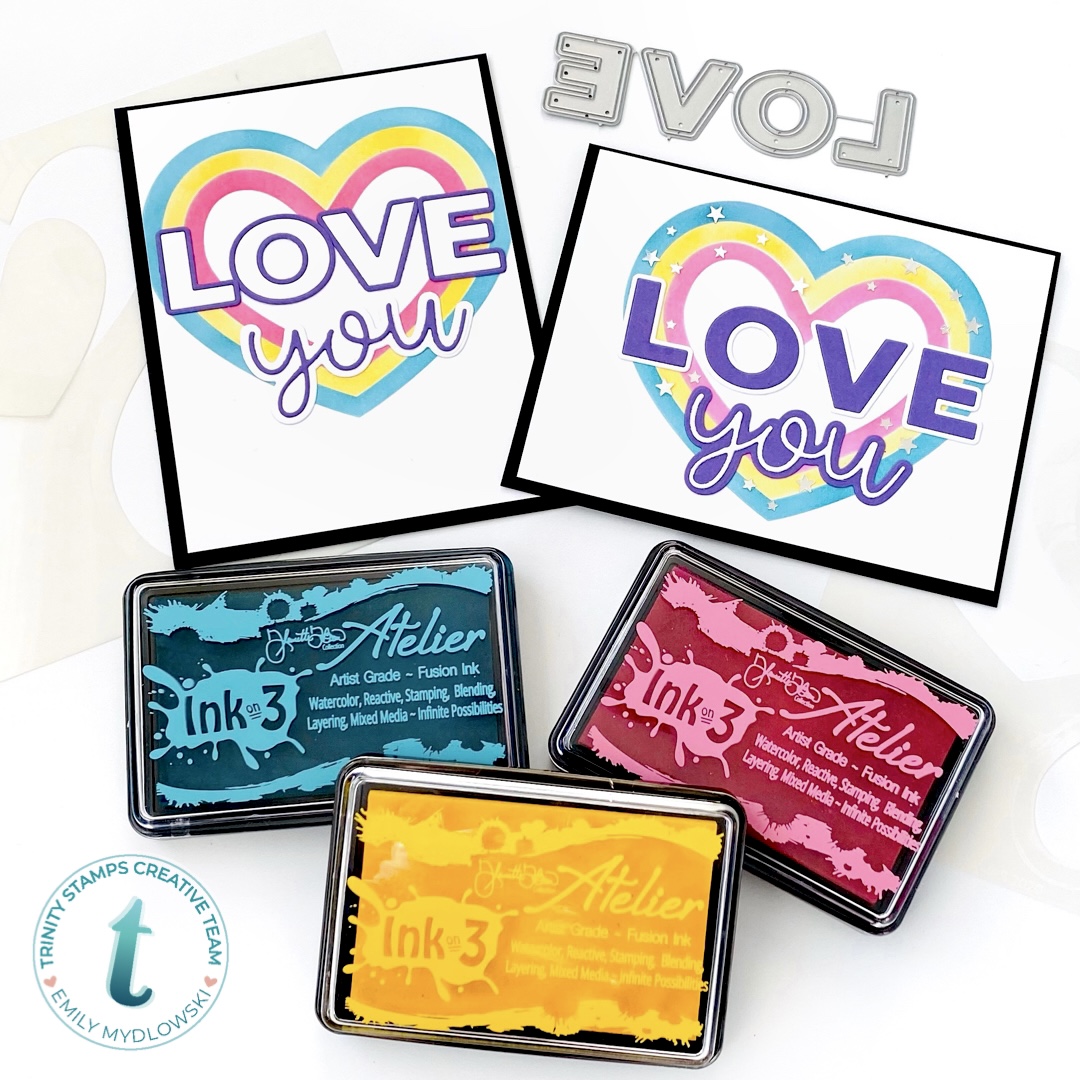
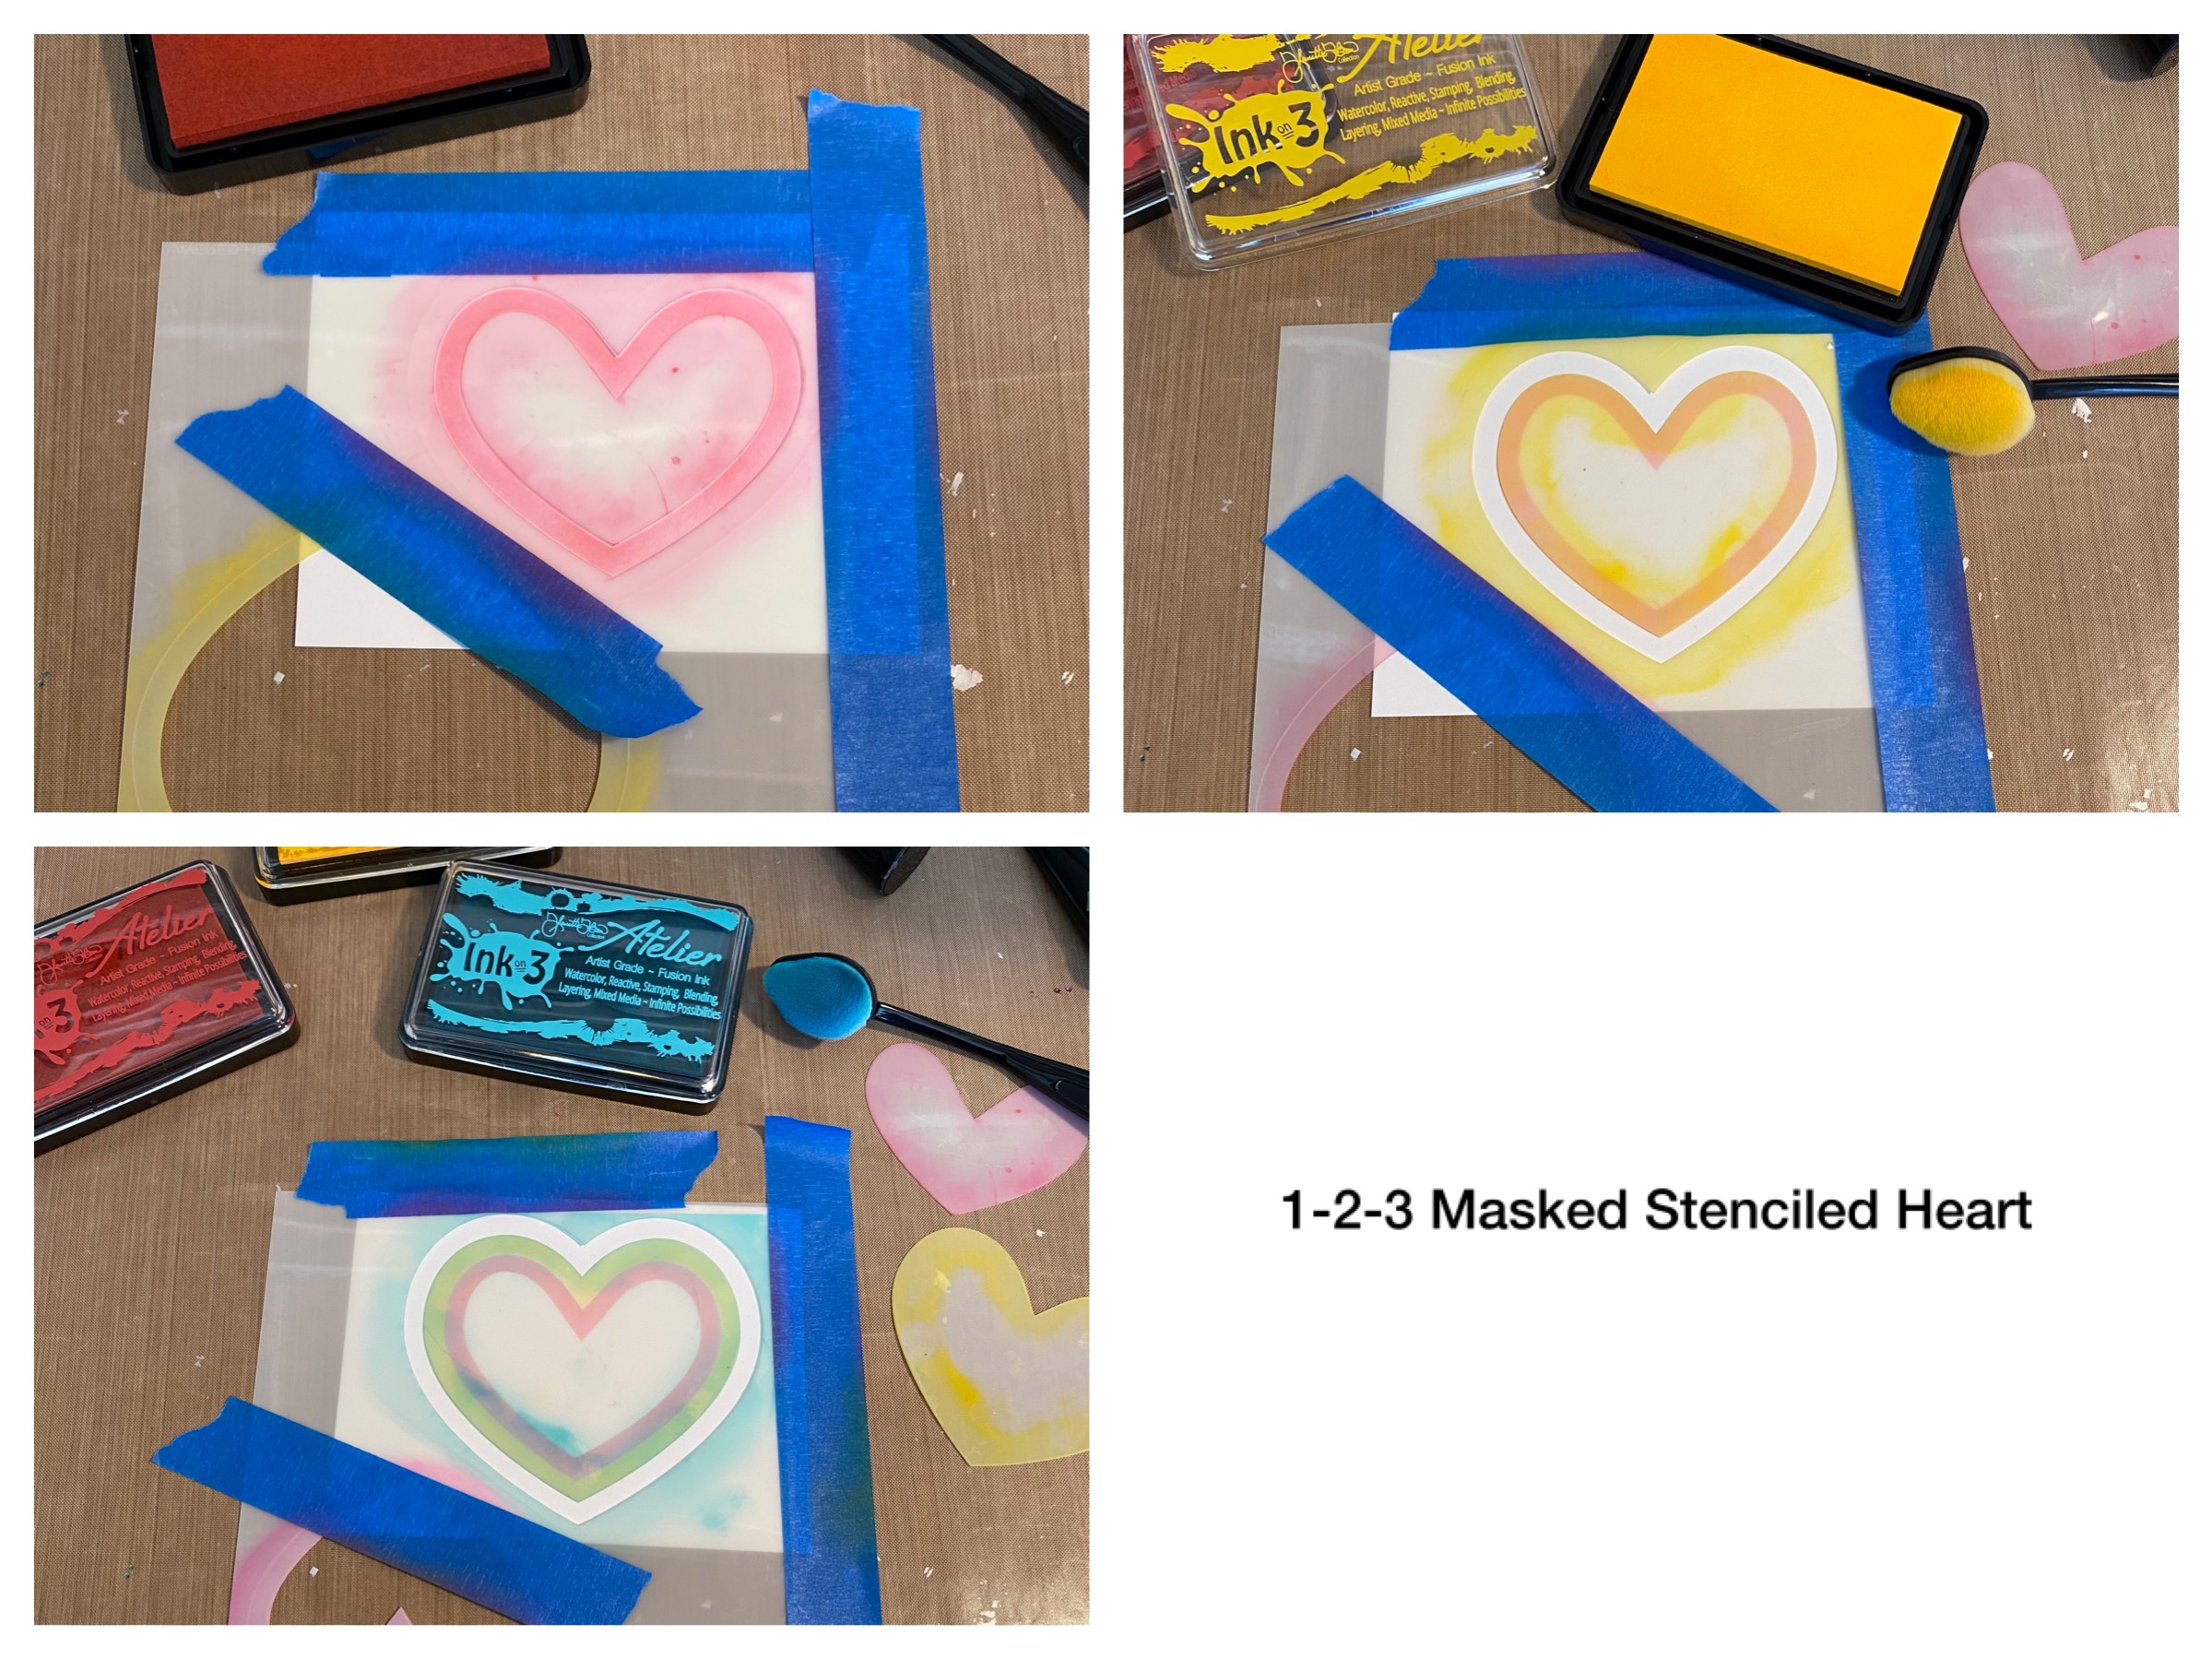
For my cards today, I started with the stenciling. Trinity Stamps has fantastic layering stencils and the Layered Heart stencil contains 4 different size hearts that can be used together or individually for solid stenciled hearts. I used them together along with the negative heart pieces to create the Teal, Yellow and Pink individual layered heart “stripes”. I left the center of the heart white so the die-cut sentiment would stand out and pop off the heart…giving a Retro Puffy 80’s Sticker Vibe.
Stenciling
- Place the smallest negative heart in the center of card and use ink blending brushes to add InkOn3 Sweet Petunia Pink Fusion Ink.
- Remove the smallest negative, add the next layer sized negative piece and add InkOn3 Bee Sting Yellow Fusion Ink.
- Remove the negative piece and add the second to largest negative piece and add InkOn3 Trinity Teal Fusion Ink.
Tip/Tricks:
- To help secure the negative pieces while stenciling, I add a small piece of removable tape to the back of the stencil and also hold in place with my fingers to reduce any stenciling shifting.
- Play with your inks to create different saturation levels of the pigment. By adding or decreasing the amount of ink and the pressure you place on your blending brush you can get both a bold and pastel look from the exact same ink color.
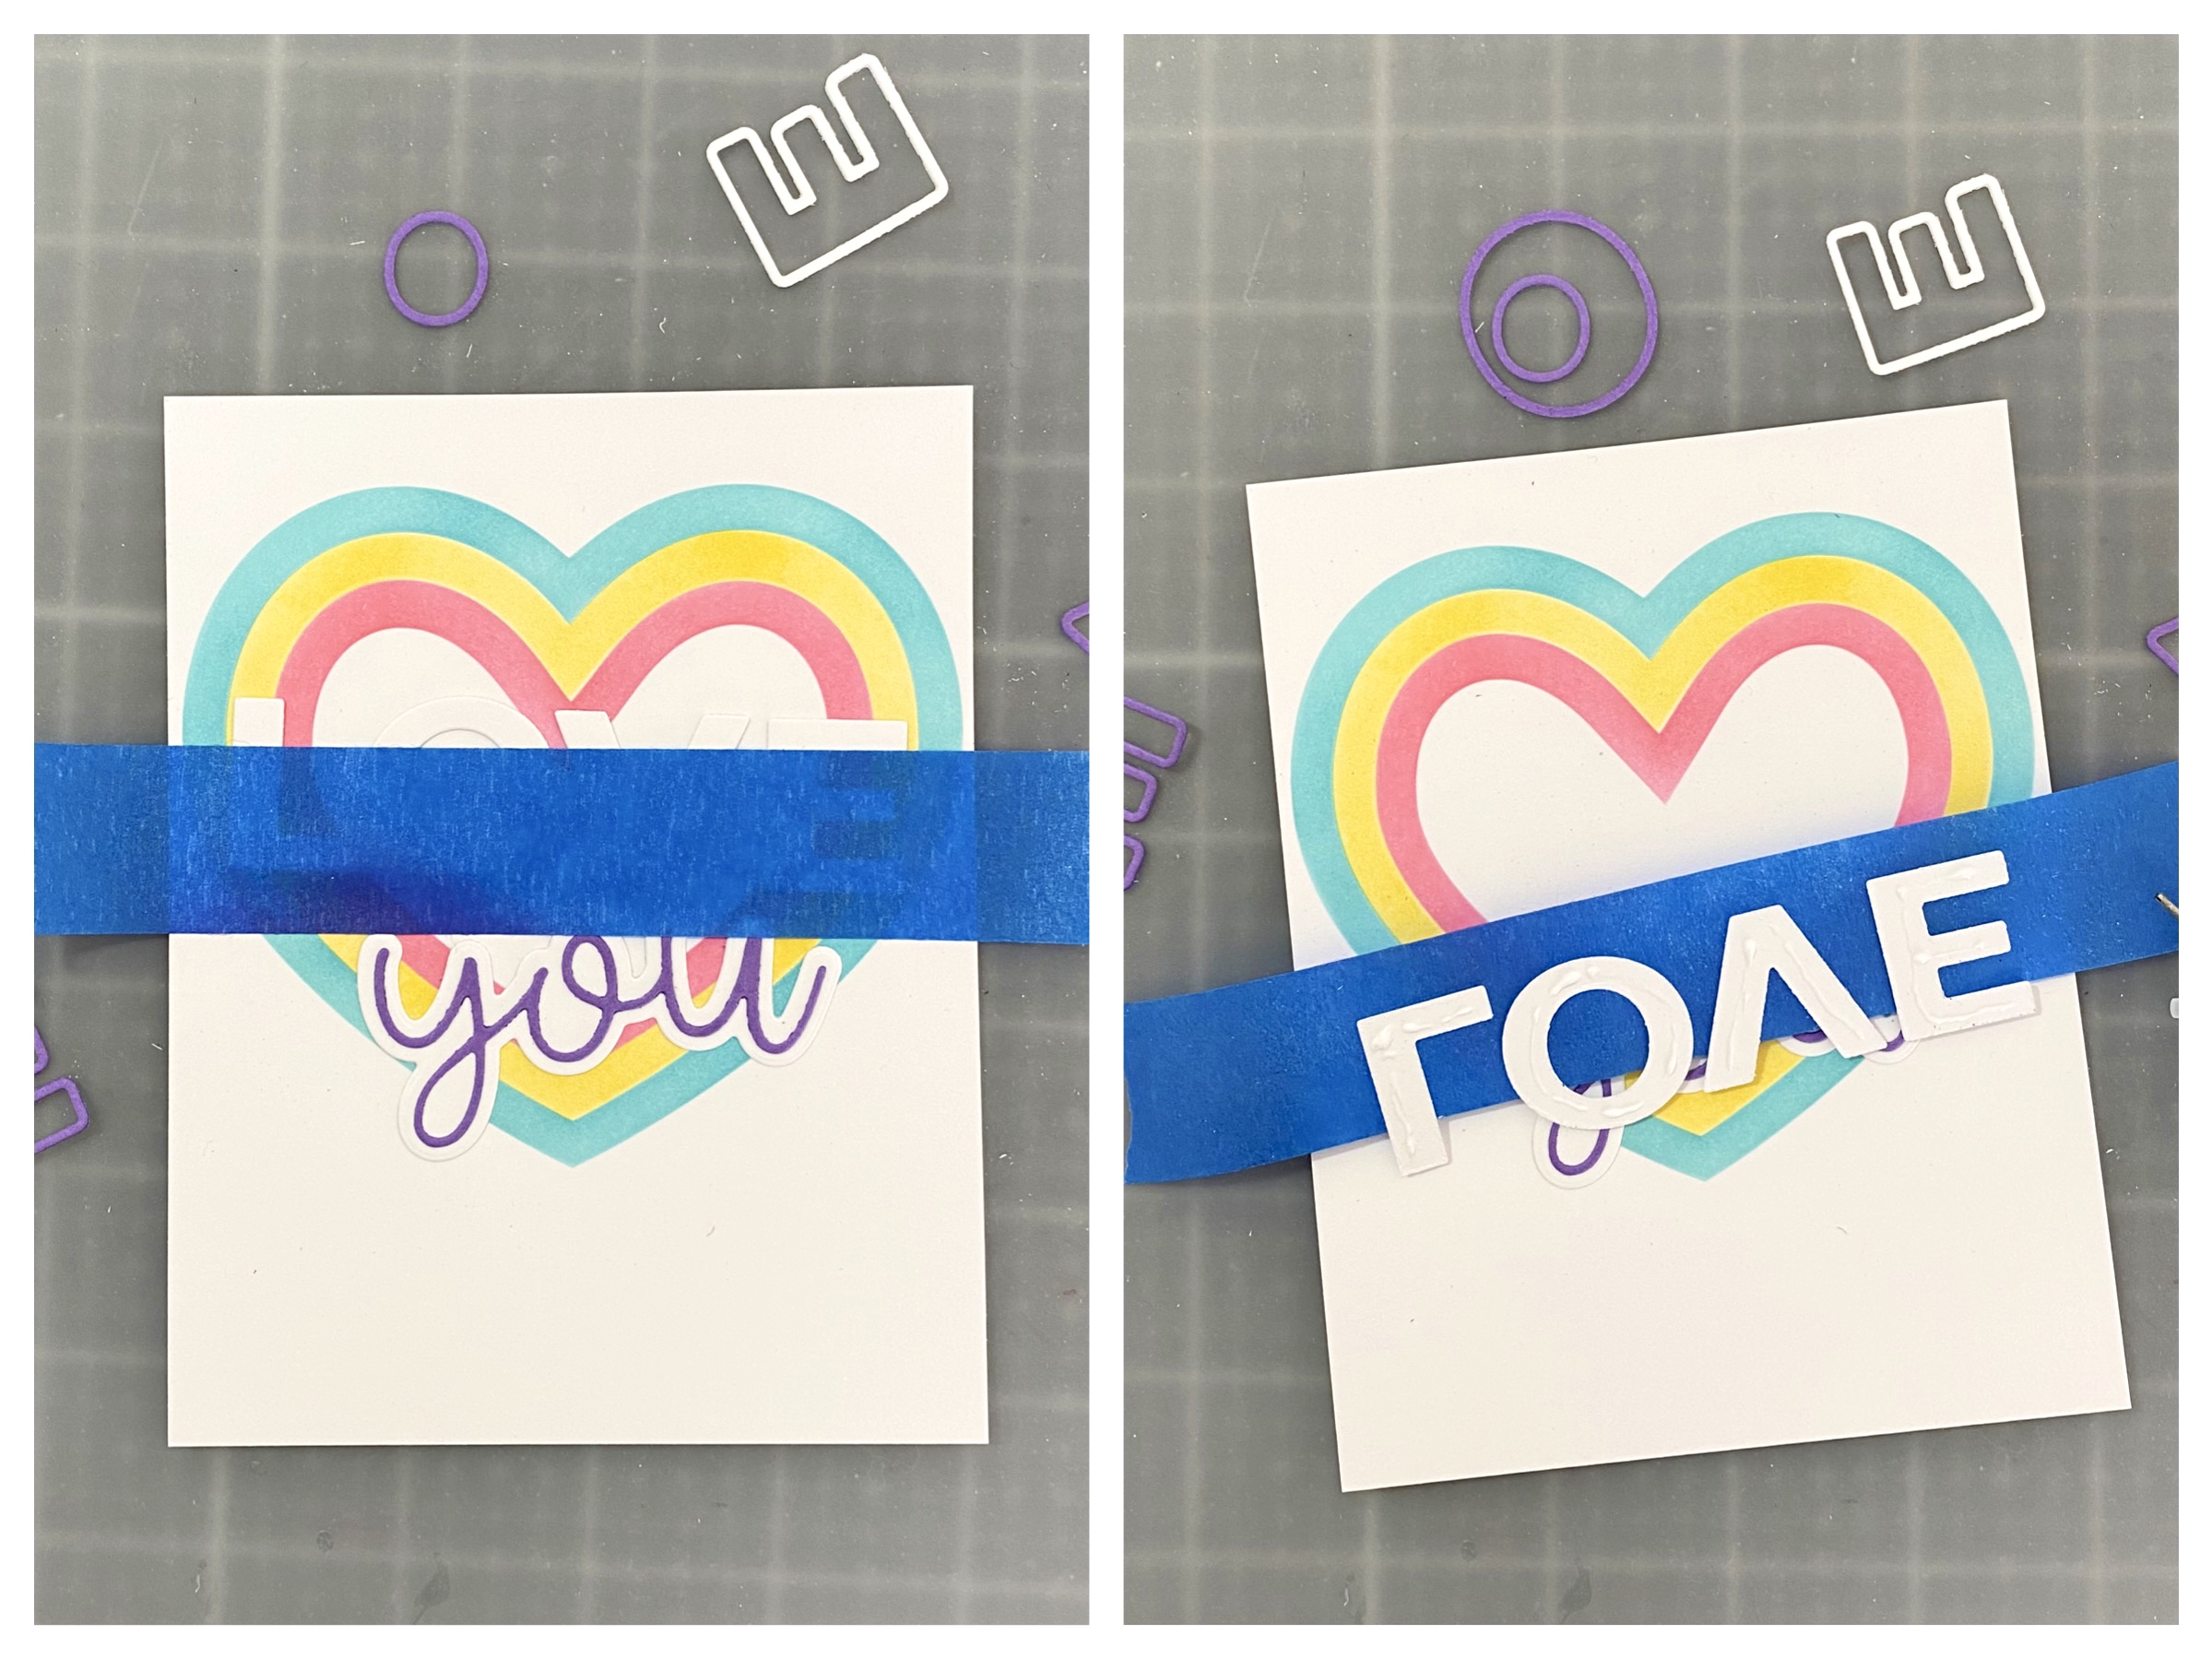
Creating the Sentiment
The Bold Love die provides both an outline and shadow layer all in one. I ran the LOVE die through my die cutting machine with both purple and white card stock. I also did the same from the puffy script YOU from the Frame and Fold Die Set. I adhered all of the letters and words to the stenciled heart using liquid adhesive.
Tips/Tricks
- To line-up the individual words for a sentiment, I line-up the letters exactly how I want them on my card front and then collect the letters with washi or painter’s tape. I turn the tape over with the letters, add my glue and then use then hold the tape ends to position and glue the letters in place.
Finishing the Card
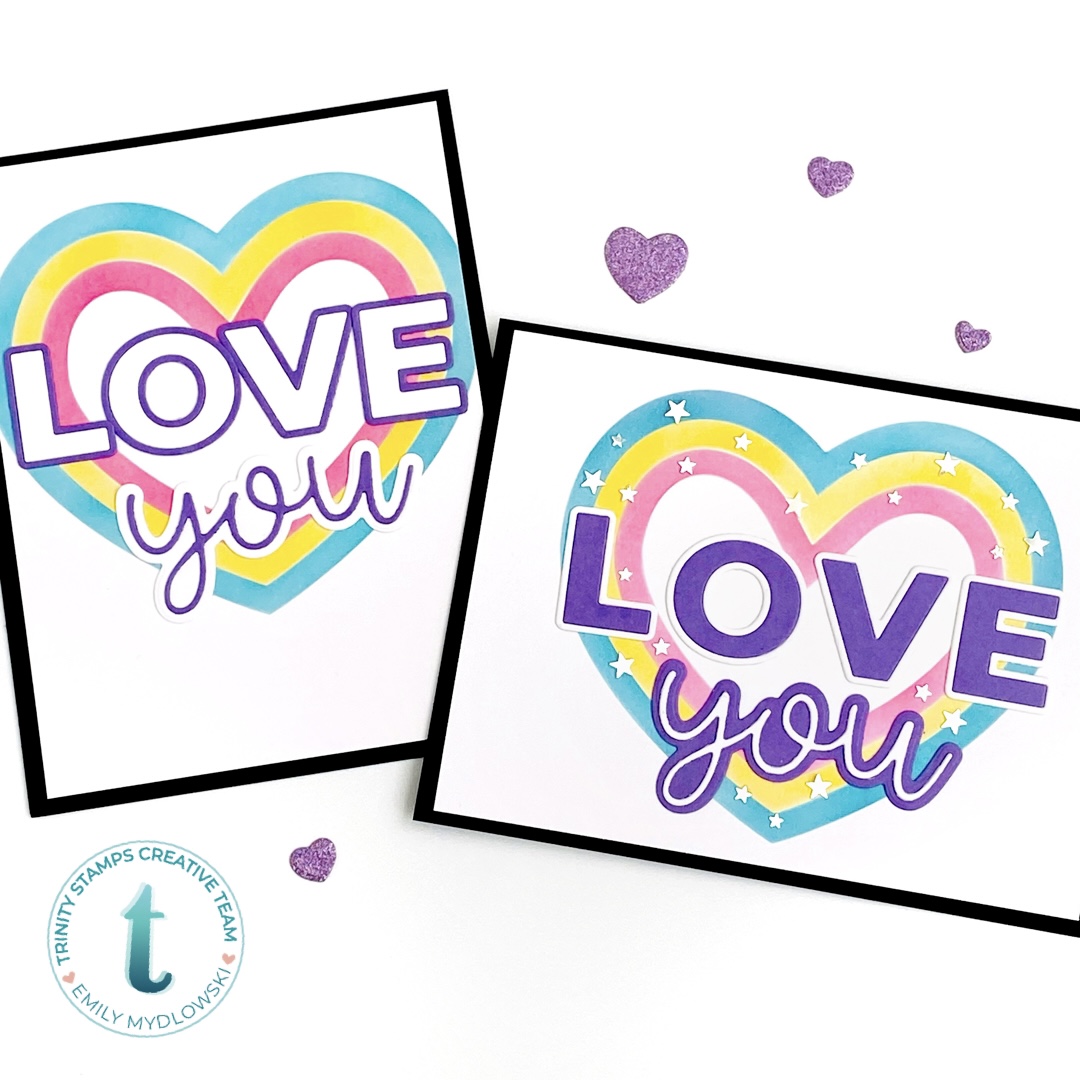
For a little extra sparkle, I added star embellishments to the heart on the landscape card panel. Then I adhered both cards to a black card base.
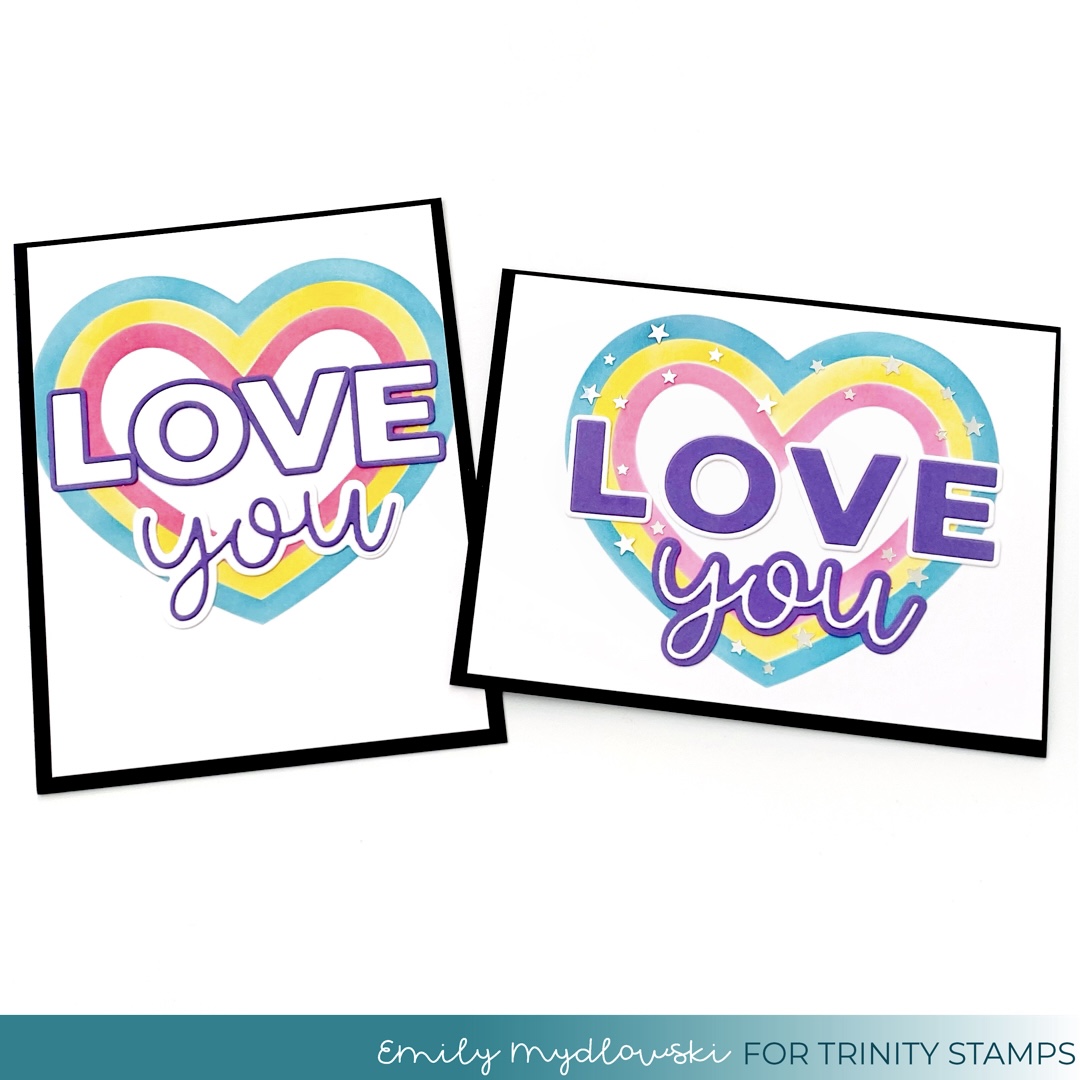 So there we are friends, a set of two “different-but similar” cards using a mix and match of supplies. I hope you enjoyed my post today and it inspires you to mix and match and use your supplies in fun new ways.
Big Paper Hugs!
Emily
@popsofpaper


