

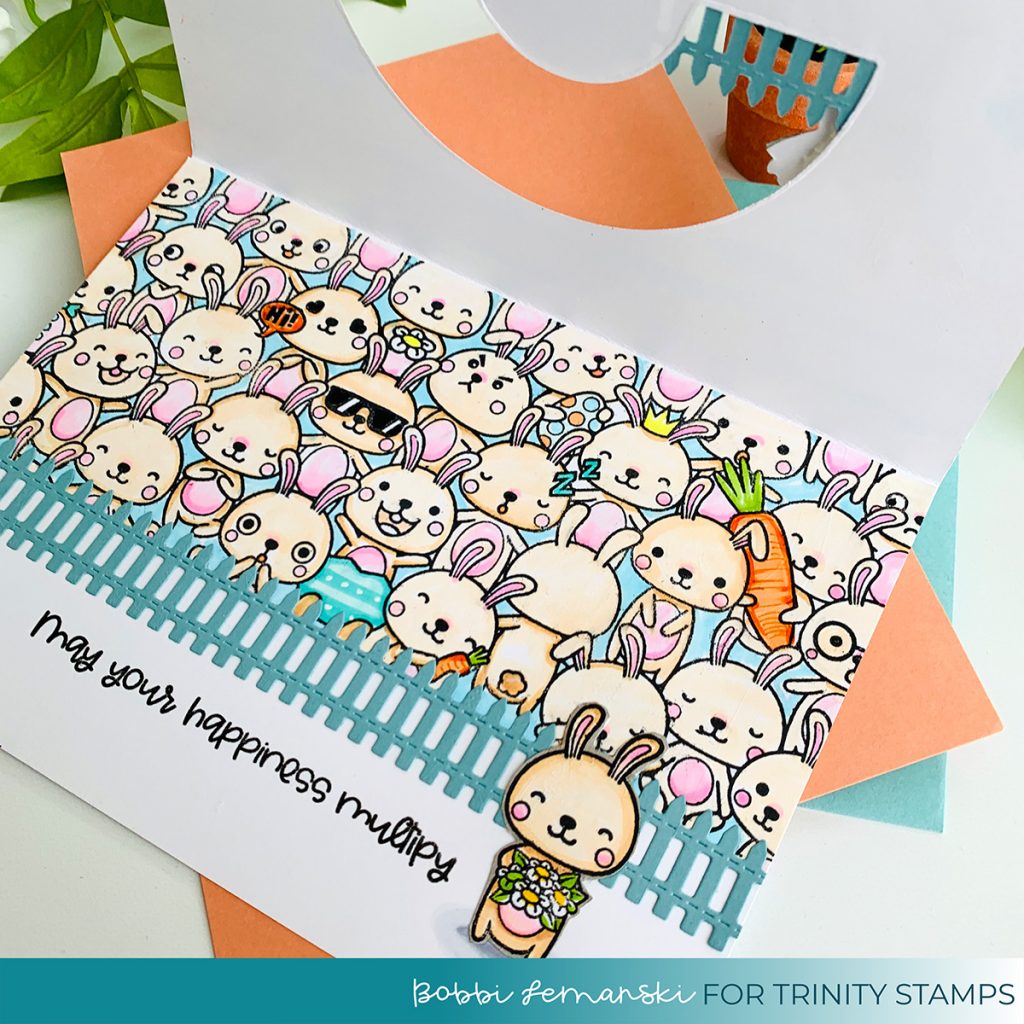
Happiness Window Card
Hello Trinity friends! It’s Bobbi Lemanski here with a sweet Easter card featuring new sets from the latest mini release, Sunnyside Up. This card features a peek-through window card designed to offer a little sneak peek inside. 🙂 I love these types of cards because you get two scenes in one greeting.
I’m using the following Trinity Stamps products:
Slimline Bunny stamp and die set
Slimline Series The Great Outdoors Borders and Builders die set
Funshine Rainbow die set for the opening (coming soon) or Rainbow die set
Cutting Dimensions
For this 5″ X 7″ card, you will need to cut three 5″ X 7″ panels – two for the front panel and one for the inside sentiment) and one 7″ wide X 10″ tall piece for the card base. I use 80lb Neenah Solar White cardstock for these pieces to eliminate bulk.
Front Panel
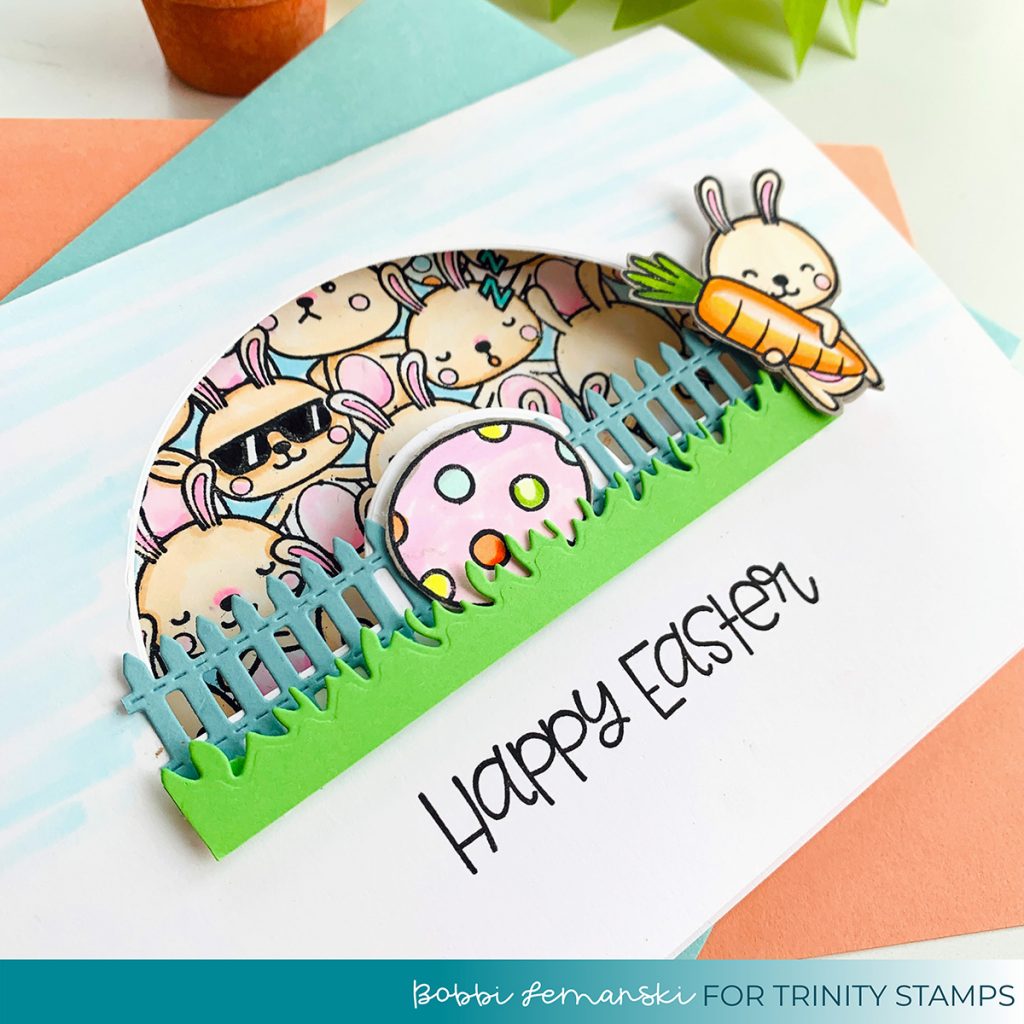
To make this 5″ X 7″ card, I stamped, colored, and cut the carrot-holding bunny, colored egg, fence, and grassy border for the front and set them aside to complete the next step.
To make the front and interior front panels, I die cut an opening using the Funshine rainbow die (coming soon) or Rainbow die set. Any half circle shape die will work. You want to cut the shape from the middle of two 5″ X 7″ panels using this die. See figure 1.
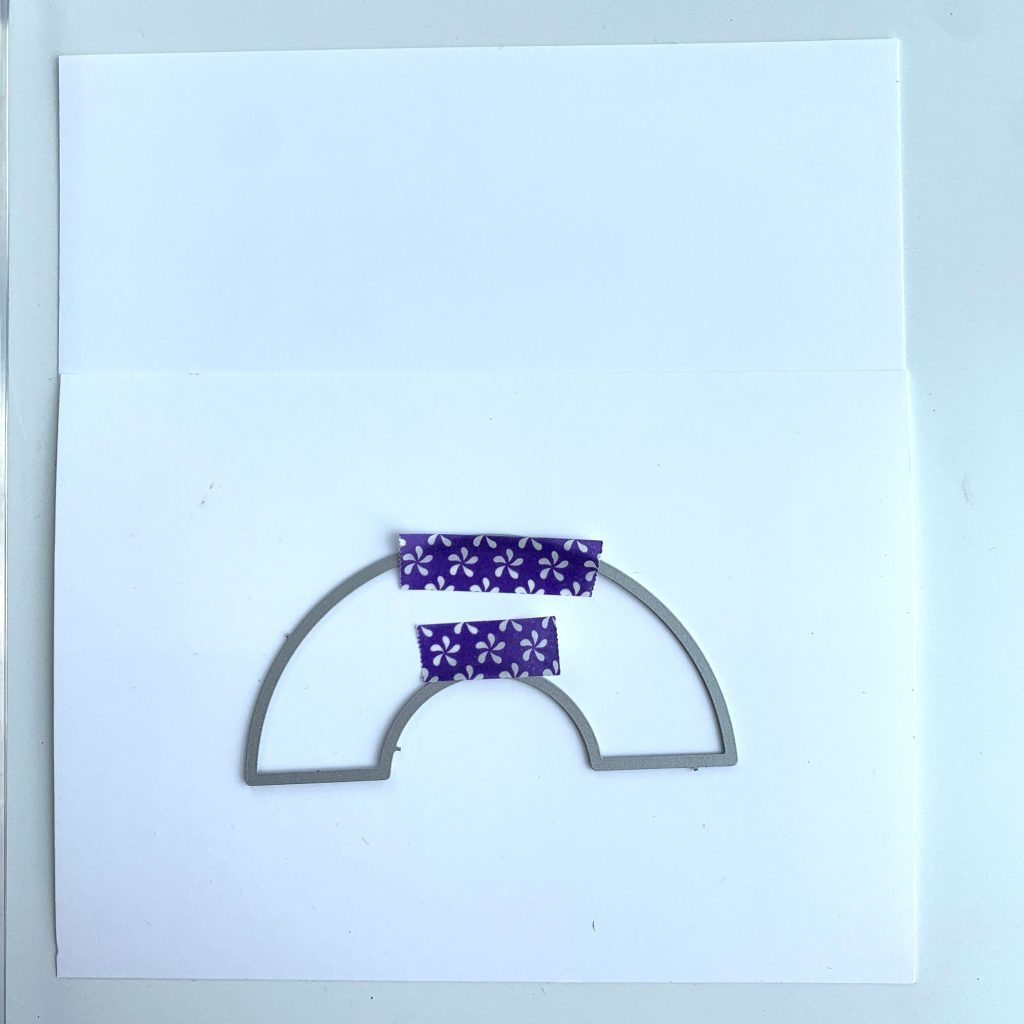
TIP: When die cutting, stack the two 5″ X 7″ panels and run it through the die cutter so that the placements will match perfectly during assembly.
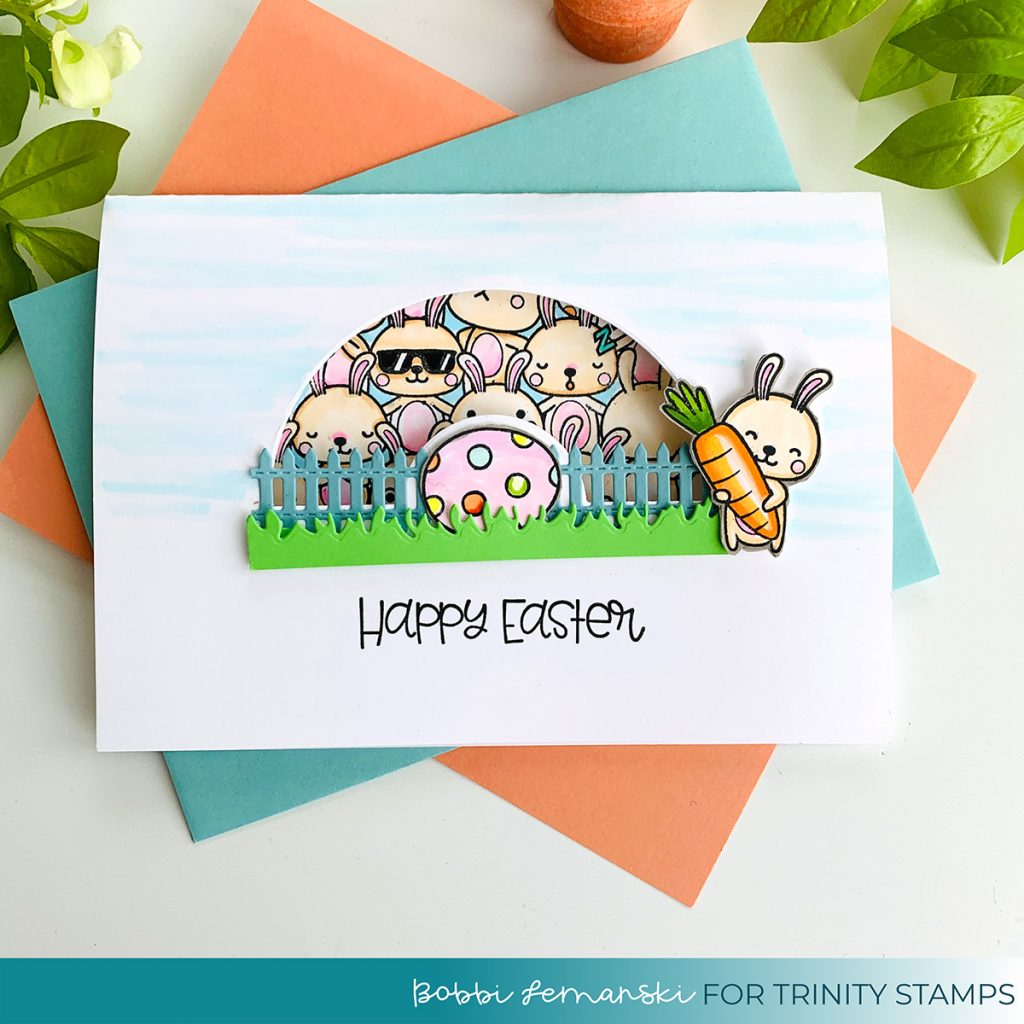
I stamped the “Happy Easter” and added some clouds using BG0000, BG000 Copic Sketch Markers to the front panel to begin the scene. Next, the fencing and grass die, bunny and egg were added to the front.
Inside Card Panel
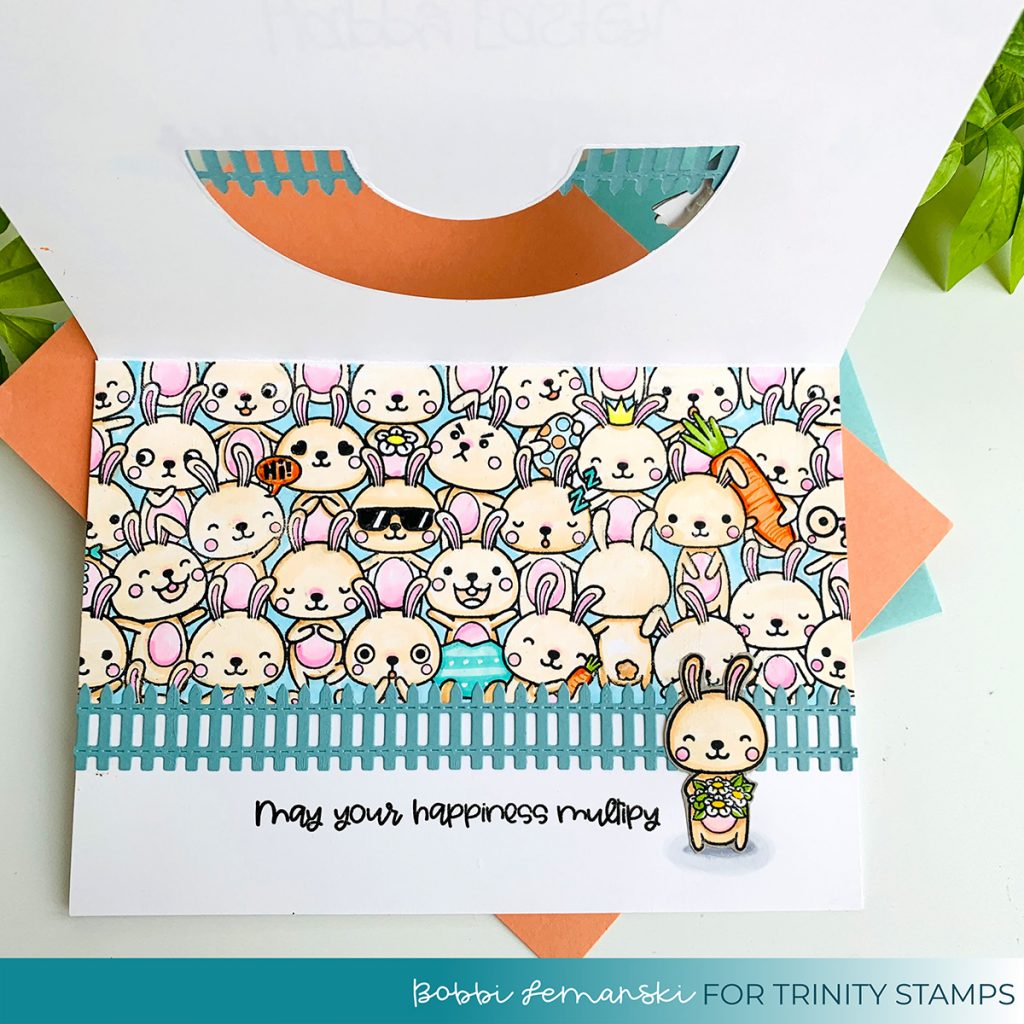
For the inside panel, I stamped the large slimline bunny image at the top of the interior panel, and colored it in using the following Copic colors: E53, E50, B00, RV55, RV02, RV00 and various accent colors. I die cut and added the fencing in front of the bunnies image as if it is holding the bunnies back. I stamped and die cut the singular bunny holding the flowers. I added a little shading below the bunny to ground the image and placed the bunny in front of the fence. Lastly, I stamped the phrase to the left of the bunny. Once the inside panel was complete, I adhered it inside the card base.
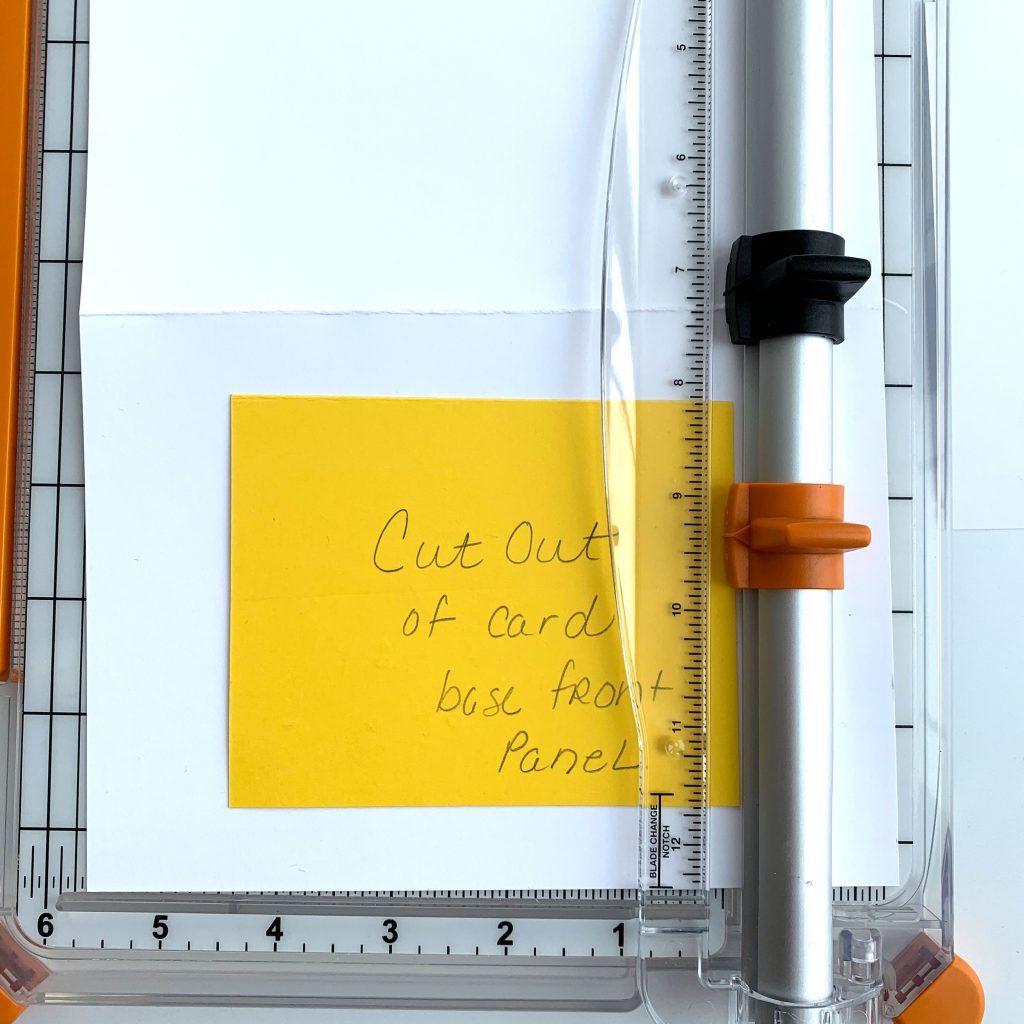
For the card base, score down the center to create a 5″ X 7″ base and cut out a rectangular shape – sized larger than the die cut – from one half of the base panel. (See figure 2 above.) This rectangle will allow the peek through window to show through. A die or a paper cutter works to cut out the middle. TIP: If you have a large size die cutter (e.g. Gemini) that can accommodate a 10″ tall X 7″ wide sheet, you can skip this step. Next, I attached the rainbow die cut panels, sandwiching the rectangular cut.
You can find these items in the Trinity Stamps store today! If you decide to place an order, please use my links in this post so that Trinity Stamps knows how you found these products.
Thanks for stopping by today. If you want to see more ideas and inspiration from me, subscribe to my blog, BobbiHartDesign.com. I’ll send you updates on new posts! You can also find me on Instagram as @BobbiHartDesign and on Facebook as BobbiHartDesign.
Bobbi Hartmann Lemanski, Bobbi Hart♥ Design, Adding h♥art into every design


