
Mix it Up Monday: Lady Liberty, Fireworks and the Narrow Card/Envelope Die Set!
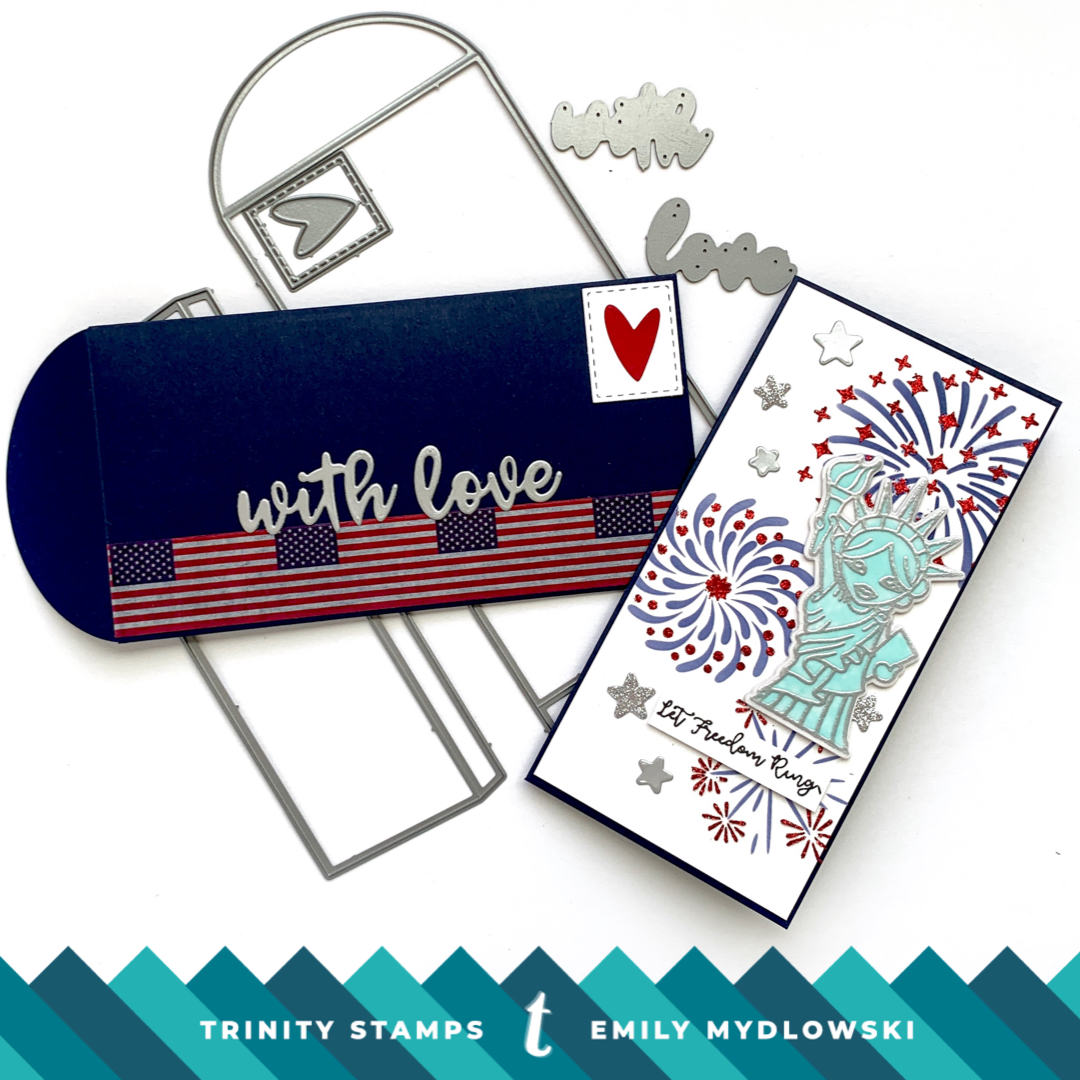
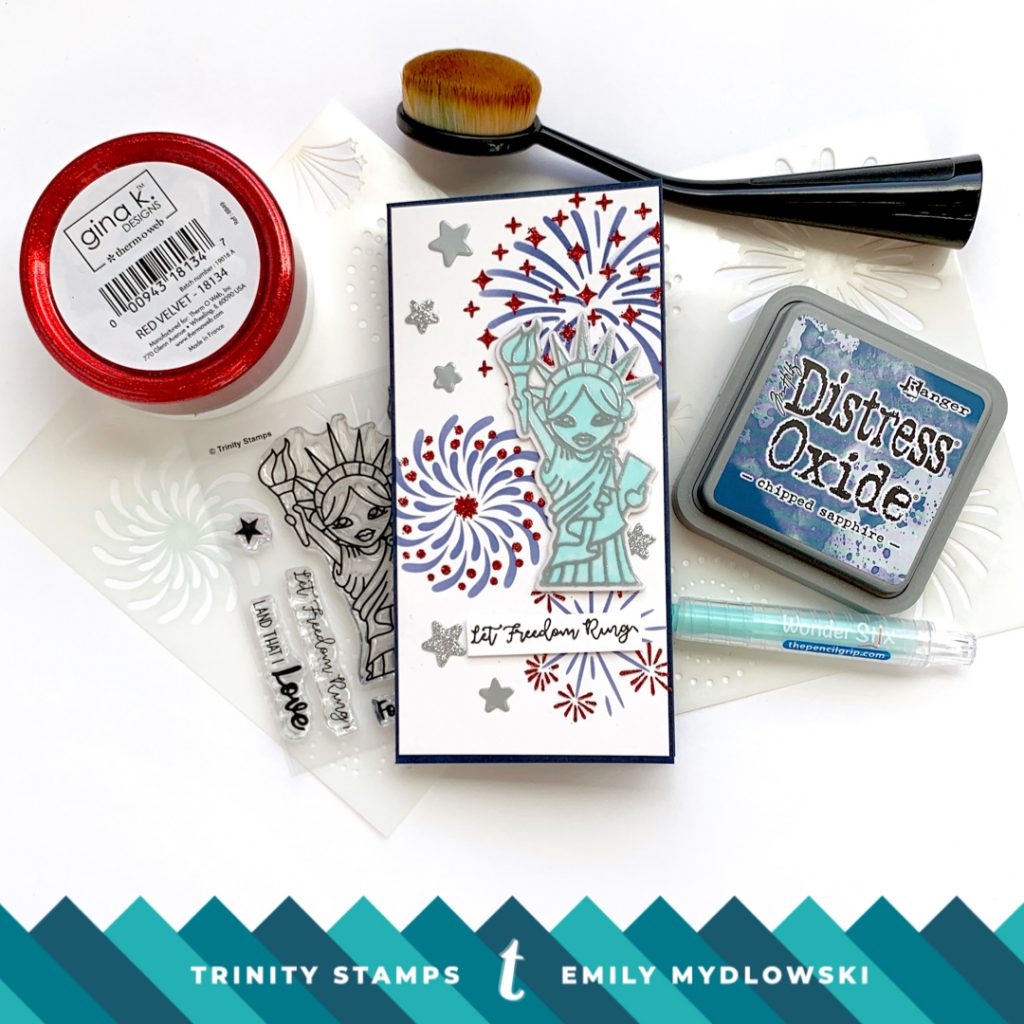
Hi Everyone and Happy Monday! Hope you all had a wonderful weekend! I can’t believe it’s already July and Independence Day is right around the corner. To celebrate, I thought it would fun to highlight the Lady Liberty 3×4 Stamp Set with the newly released Narrow Card and bookmark die WITH Envelope and bonus dies and the Layered Fireworks Stencils.
The Envelope Die
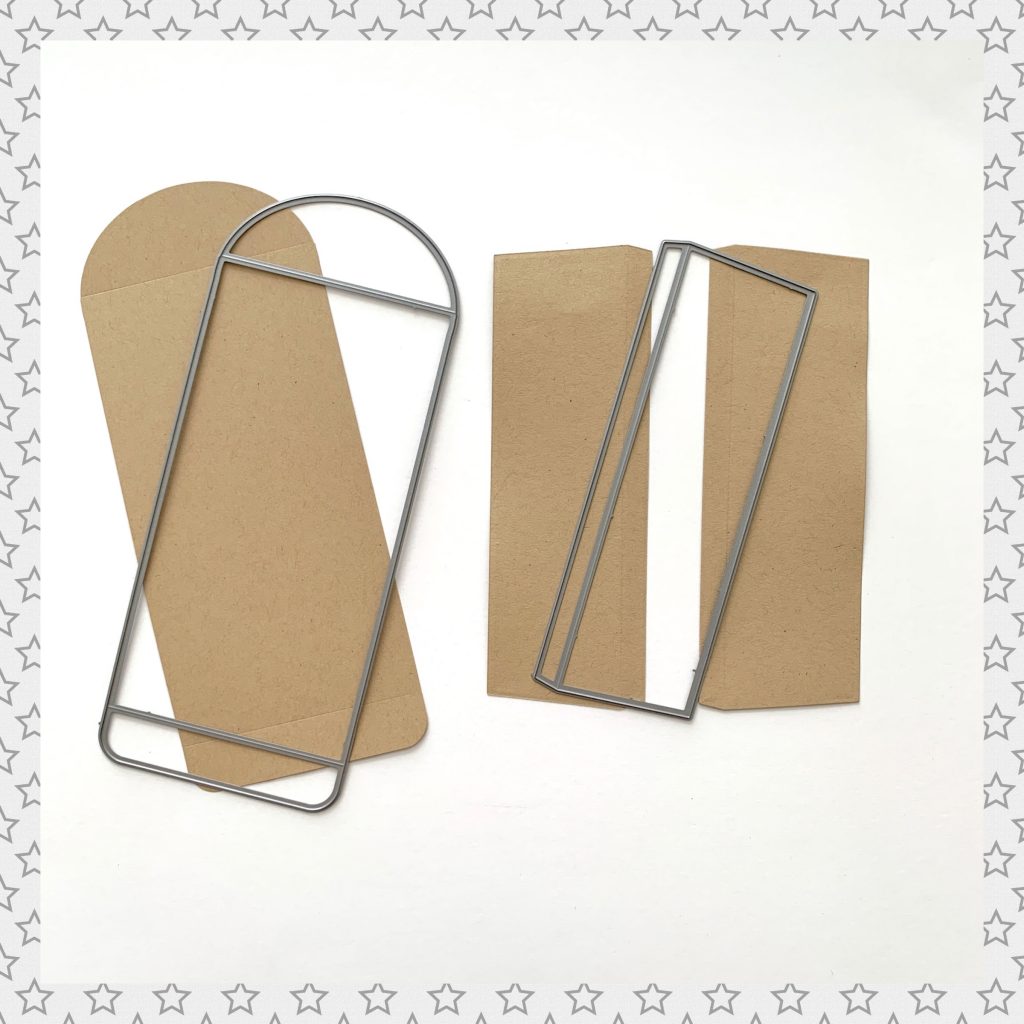
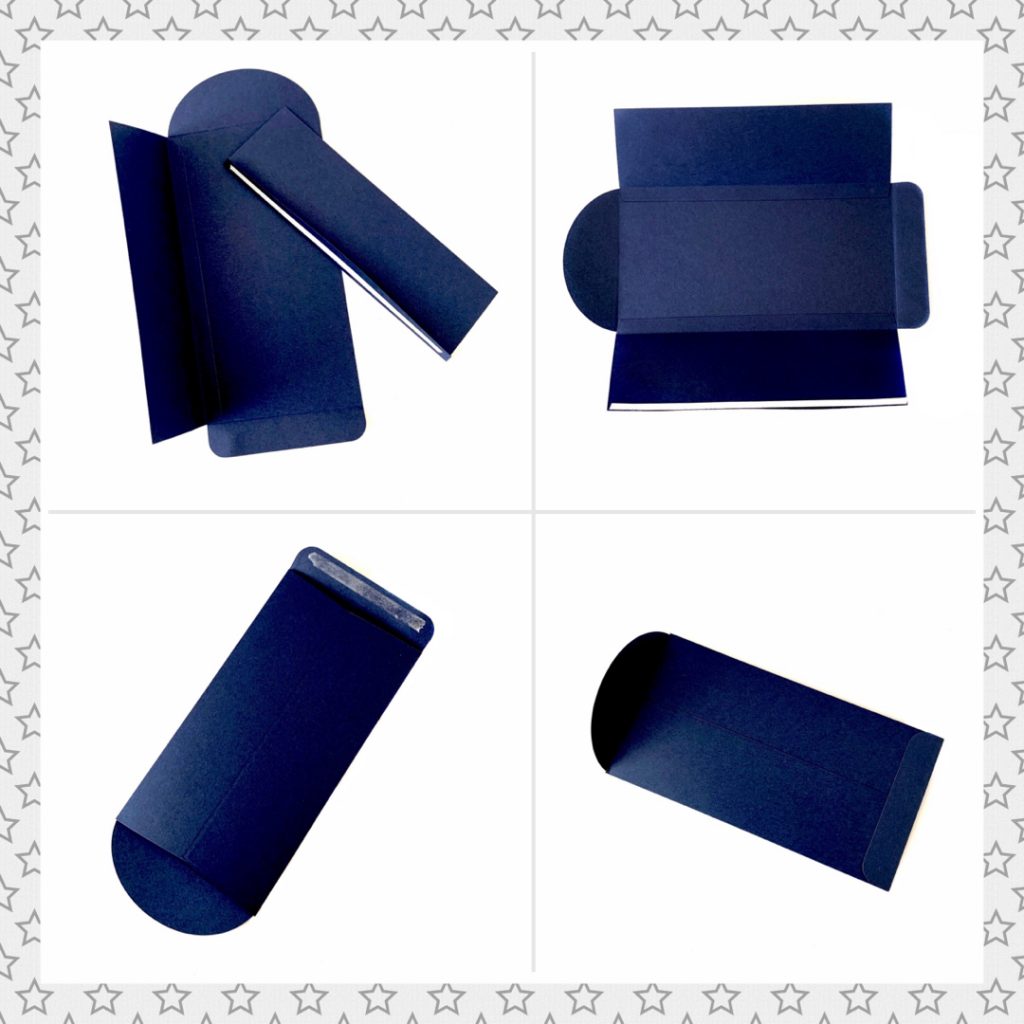
The Envelope Die that comes with the Narrow Card and Bookmark die set is amazing! A 3×6 narrow card perfectly fits in this envelope which is fantastic because all you need to create the card base is to score a 6×6 piece of card stock/pattern paper in half and you have an instant narrow card. What!!! Super Cool!
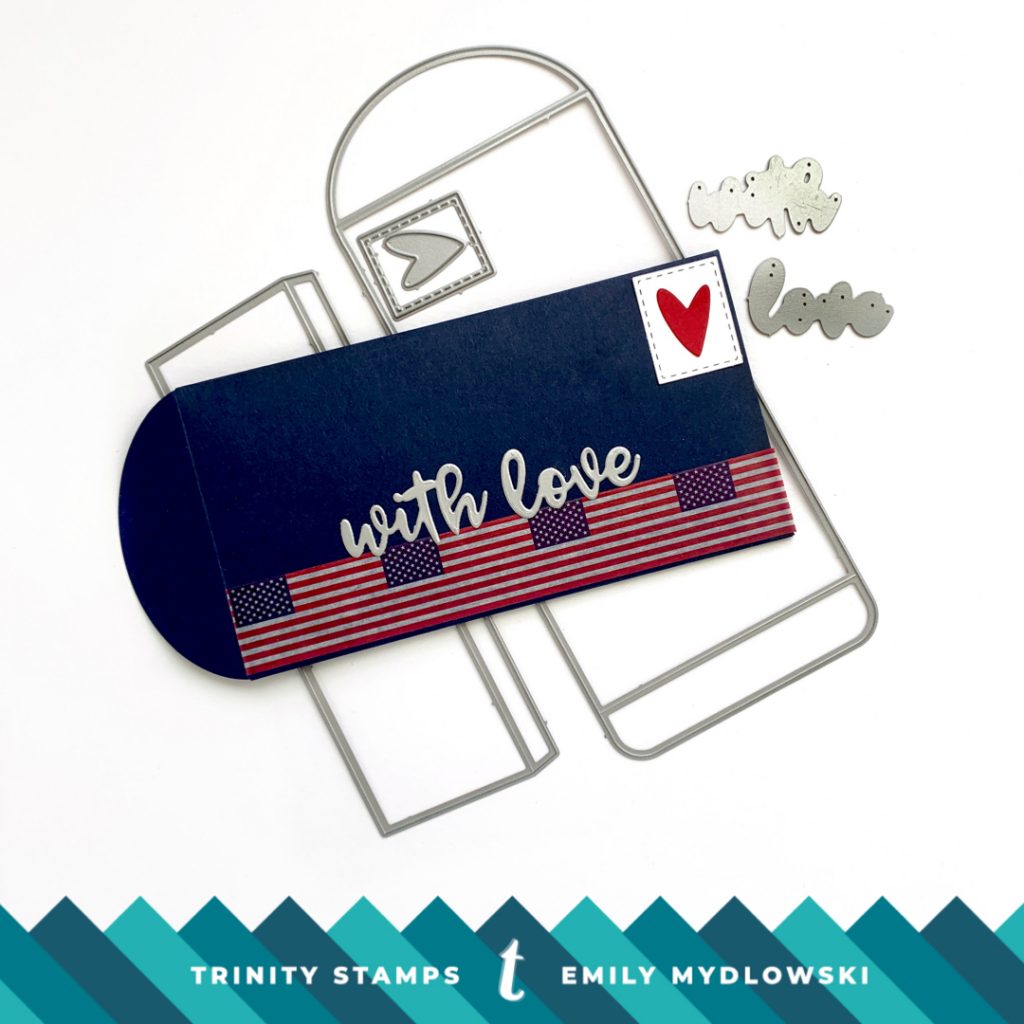
The Bonus dies that come with the set are perfect for decorating the outside of your envelope. There are so many options with this die set, but but for today I wanted to create a decorated envelope that perfectly fits my Lady Liberty Narrow Card.
To create the envelope, you need two dies from the set (the envelope front and the side flap) which you’ll die cut for a total of three total pieces: two side flaps an the envelope front. Quick Tip: To create two side flaps in one pass of the die cut machine, I folded a piece of paper in half and then ran through my die cutting machine.
Then with adhesive tape you can adhere/piece together the envelope. Easy-peesy! To decorate the envelope, I used the bonus dies to add the “with love” sentiment and a little heart postage stamp. For extra pop, I added some red, white and blue washi tape to the bottom of the envelope.
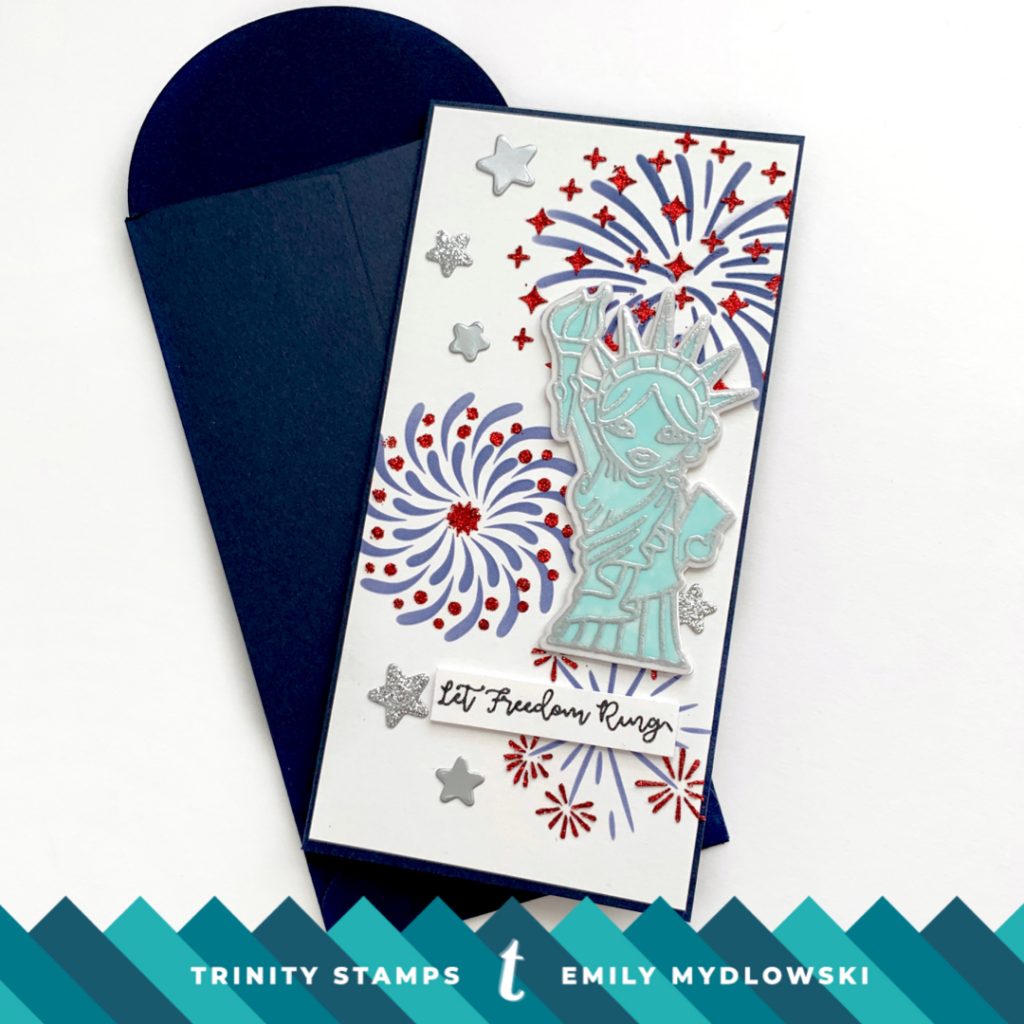
The Lady Liberty Narrow Card
I had so much fun creating this card! The entire design is way outside my CAS comfort zone with all the different elements but I loved every minute of the creative process. I have to admit, I now have a mad crush on layered stencils and more narrow cards are sure to be in my future posts!
The Stenciling
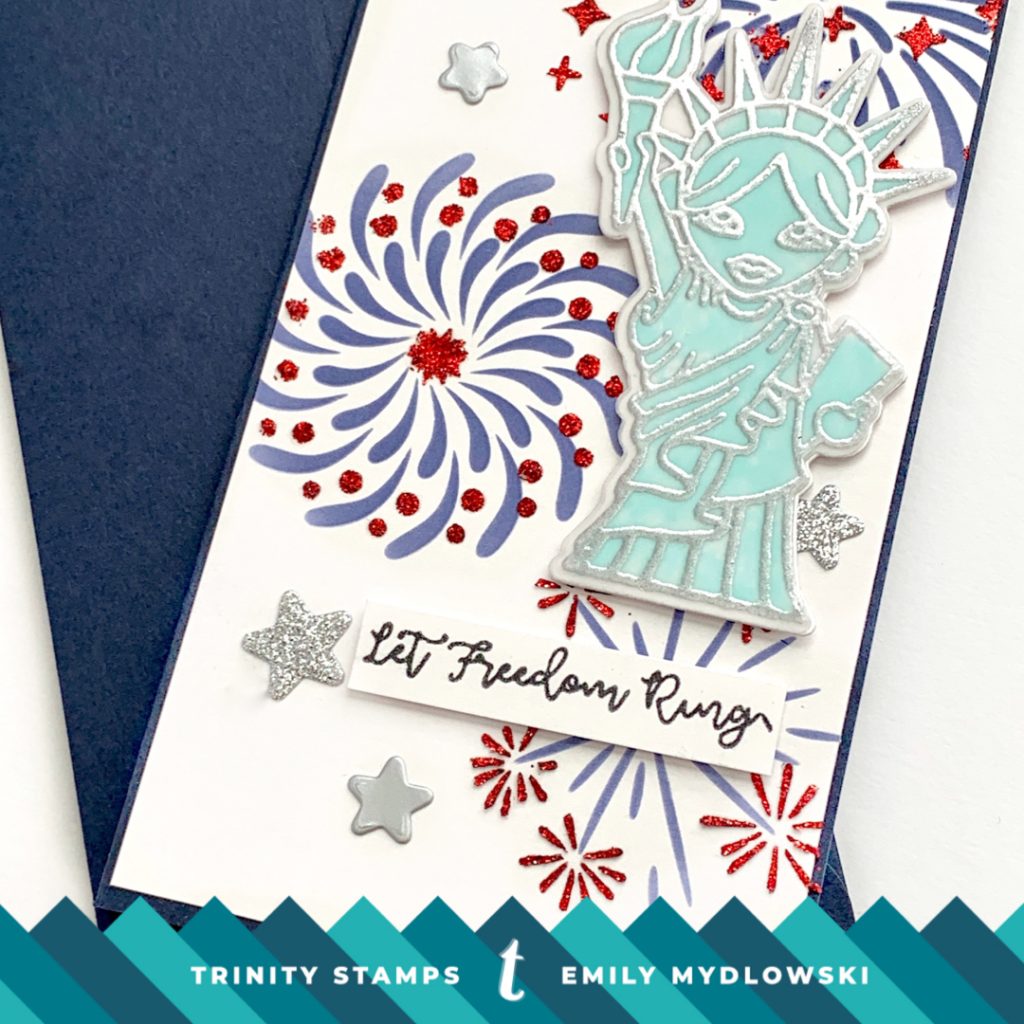
Like I mentioned above, the navy blue card base is 3×6 (to fit in the envelope) so I cut the white card panel to approximately 2.75×5.75. Then I used my blending brush to stencil the fireworks with Chipped Sapphire Distress Oxide Ink. Ok, here is where the layered stencil magic happens. You then take the other stencil and you line-up the laser-etched images that match the images you just stenciled to the card. This will perfectly position your stencil for the layering!! For my second layer, I applied Gina K Glitter Gel in Red Velvet with a spatula for added sparkle!
The Stamping
First I stamped Lady Liberty with VersaMark on Vellum and heat embossed with silver embossing powder. Then I flipped the embossed vellum over and used a pastel green Wonder Stix to color Lady Liberty. Then I adhered the image to a white card stock die cut and adhered the vellum ensemble with thin foam squares to the fireworks panel. I stamped Let Freedom Ring on a sentiment strip and adhered it to the card with foam tape. And if that was not enough already, I die cut some of the stars from the Lady Liberty Coordinating Die set from silver shiny and glittery paper and adhered them to my card panel.
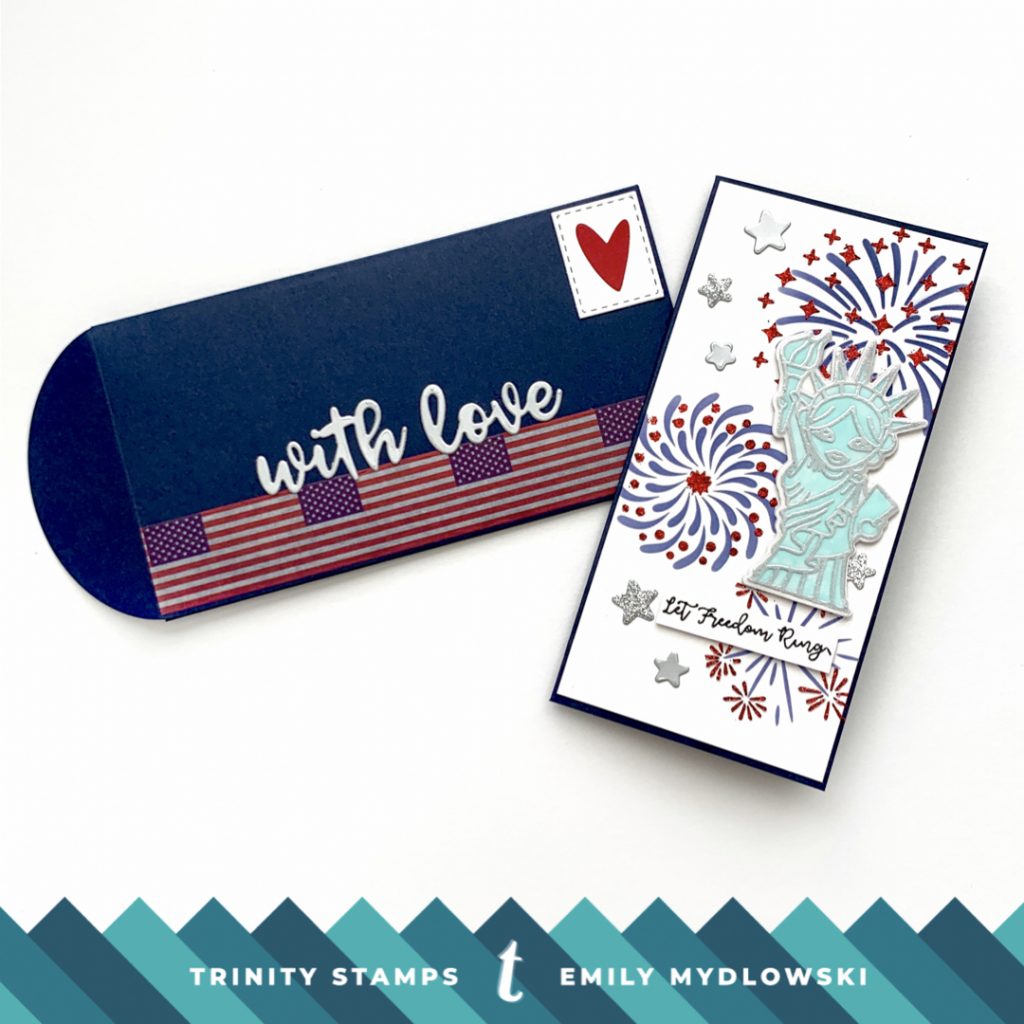
And there we have it friends! A decorated envelope and narrow card to Celebrate the 4th of July! I hope you enjoyed this project and I look forward to seeing you all next week! Until then, you can always catch on Instagram @popsofpaper or on my blog!
Remember to check out/subscribe/follow the Trinity Stamps Blog, You Tube Channel and Instagram feed for more design team inspiration all week long.
Big Paper Hugs! 🤗
Emily


Great job!