
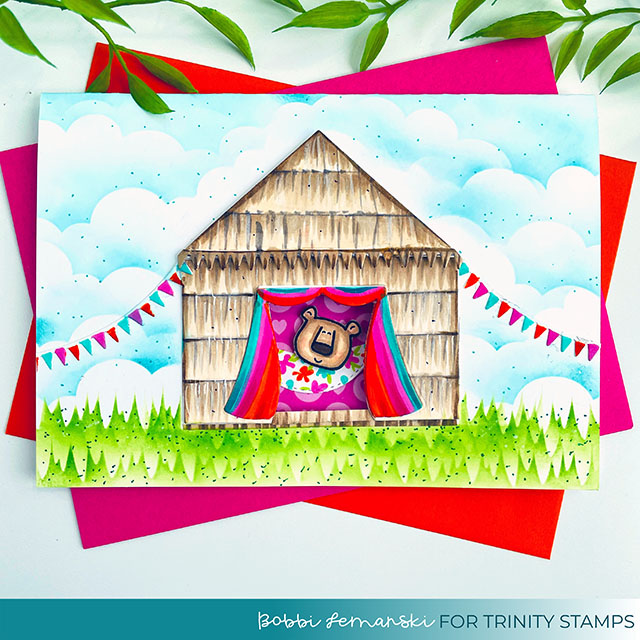
Tiki Hut Birthday Greeting
Hello Trinity friends! It’s Bobbi Lemanski here with another birthday card to celebrate birthdays in the month of June. Today’s project turns the Build A Big Top die set into a tiki hut for summer. I love when you can find more ways to use a die or stamp set than its intended use. This transformation is really quick and easy to do. I’m using the following Trinity Stamps products:
Spring Day Scene Builder Stencil Set
Beary Special Slimline stamp set
Slimline Paper Pad – All Heart
On the outside, this 5″ X 7″ card features a tiki hut with a little opening for a curious peek inside the grassy abode. I used the Build A Big Top die set to create the hut and the Puffy Cloud Layers Stencil with Mermaid Lagoon Distressed Oxide Ink for the sky and the Spring Day Scene Builder Stencil Set with Mowed Lawn Distressed Oxide Ink for the grassy ground. I used the Blending Buddy to apply the inks. I also used fine-tip markers and dotted the background areas in a slightly darker green and teal for more interest.
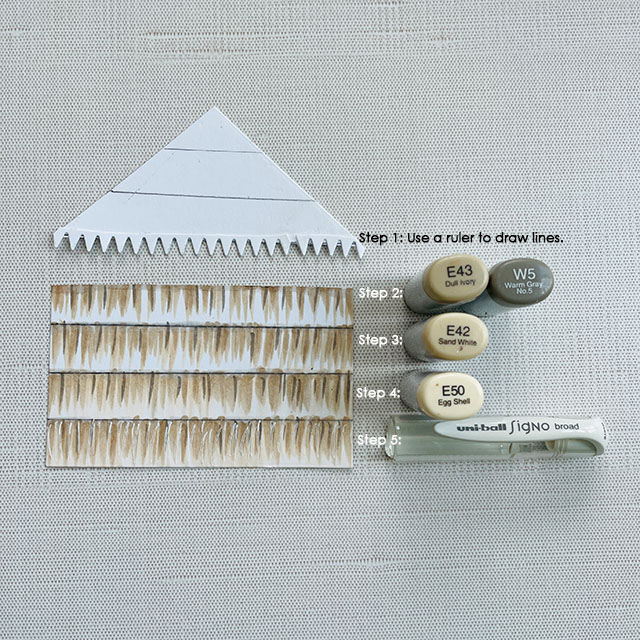
To make the hut, I first die cut the big top base. I used a ruler to draw horizontal lines across the entire design. I used a paper cutter to cut off the roof section. Next, I created the thatched roof and walls by coloring the horizontal rows as shown above, following steps 1-5. These leaves should be created with quick wisps of the brush marker tip, starting at the horizontal line. I added two pennant die cuts to create the imperfect roof edging. I like how it makes it jagged.
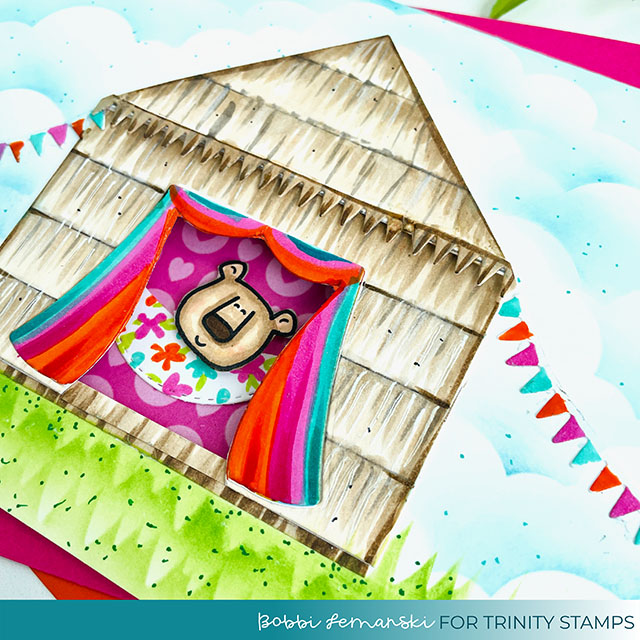
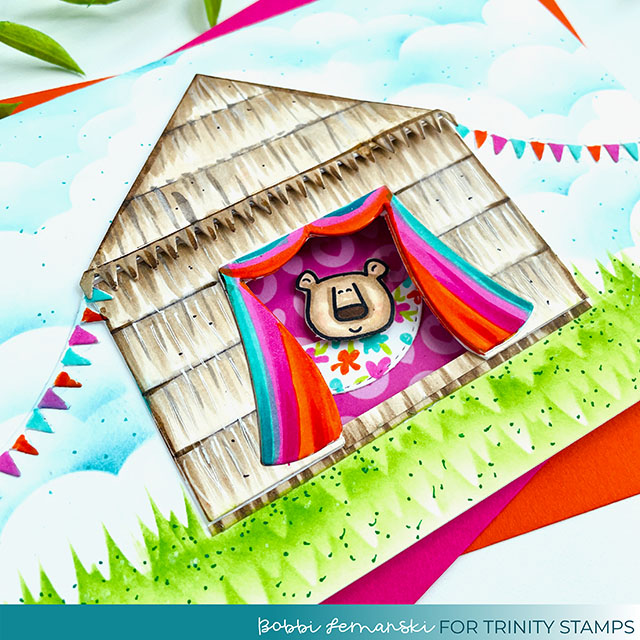
The door opening was die cut from the front of the hut and the curtain die cut accessory added and colored using aquas, fuchsia/pinks and oranges (Copic colors: B49, B23, RV09, RV55, R05, and YR68).
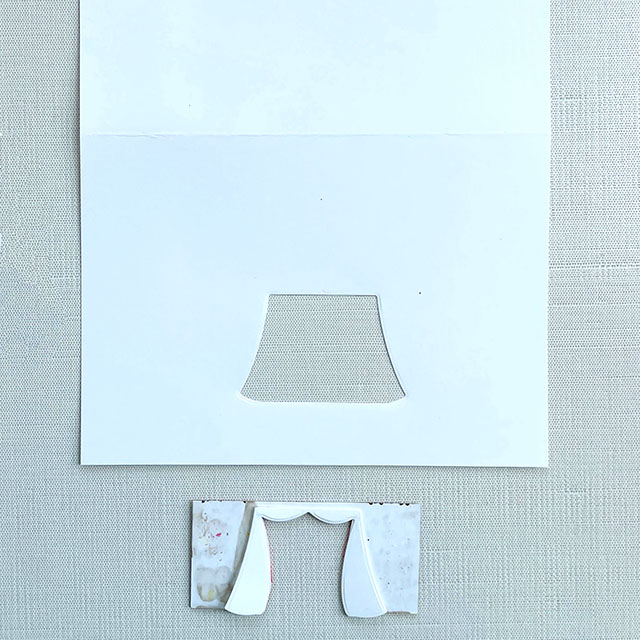
The same die was used to create a matching opening on the card front base. Because my card is 7″ wide, I used my Gemini machine (v. the Gemini Jr) for this cut. The curtain cut from the card base opening was used to create a clean white back-side to the curtain that shows from the inside. (You can see it in the next photo.)
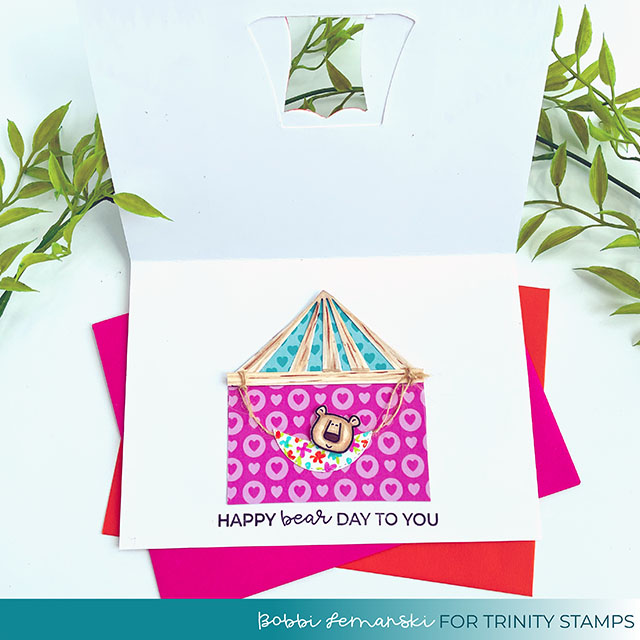
Inside the hut, the small bear from the set, Cottage Kitchen stamp set is enjoying a relaxing time in a hammock, suspended from the hut’s interior beams. I used Trinity Stamps Slimline Paper Pad – All Heart in pink and aqua to create the simplistic inside walls and ceiling. I used the striped roof layer die from the big top set to create the roof beams and added a horizontal beam, too. I colored them using E55, E43, E42, and W2 to look like bamboo wood.
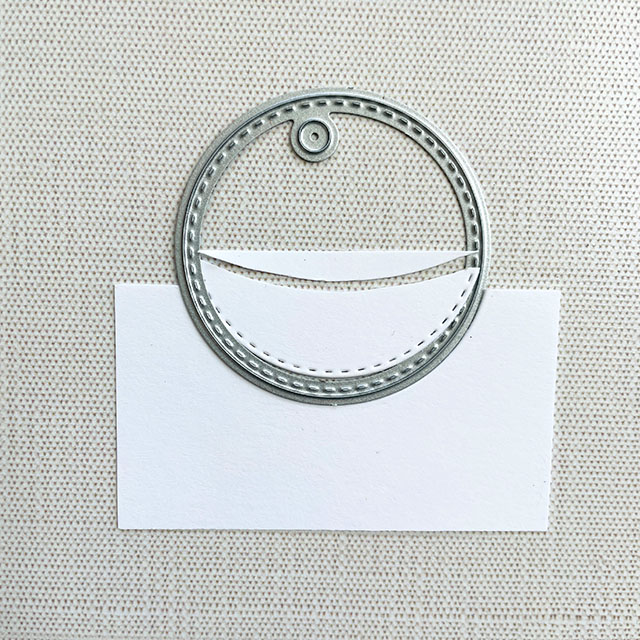
To create the hammock, I used a stitched, circular tag die (a previous free- with-purchase die from Trinity Stamps) and die cut a half circle and then hand cut the top to be slightly scooped. I hand drew some flowers and leaves on the hammock to finish it.
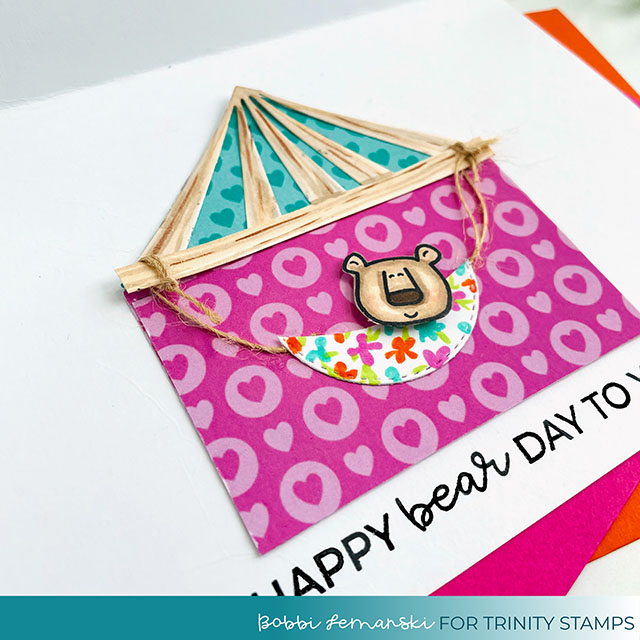
The hammock was suspended from the interior beams with hemp twine. The bear head was attached to the side of the hammock using a Scrapbook Adhesive foam tab to finish the hut interior. It’s important that the bear head fits within the opening since it stands out a bit with the foam tab. Lastly, I stamped the phrase, “Happy bear day to you” from the set, Beary Special Slimline stamp set, right below the hut using black ink.
You can shop these Trinity Stamps products here. If you decide to place an order, please use the links in this post so that Trinity Stamps knows how you found these products.
Thanks for stopping by today. If you want to see more ideas and inspiration from me, subscribe to my blog, BobbiHartDesign.com. I’ll send you updates on new posts! You can also find me on Instagram as @BobbiHartDesign and on Facebook as BobbiHartDesign.
Bobbi Hartmann Lemanski, Bobbi Hart♥ Design, Adding h♥art into every design


