
Winter Botanicals: One Stamp, Three Ways with Designer Emily
Hello Friends! I’m Emily @popsofpaper and I’m so excited that you are here for this week’s One Stamp Three Ways blog post. This week I’m working with new stamps and dies from the awesome New Winter Release. The Winter Botanicals Stamp Set & Dies are amazing and while it may say Winter in its title, these images translate beautifully into Fall Botanicals.
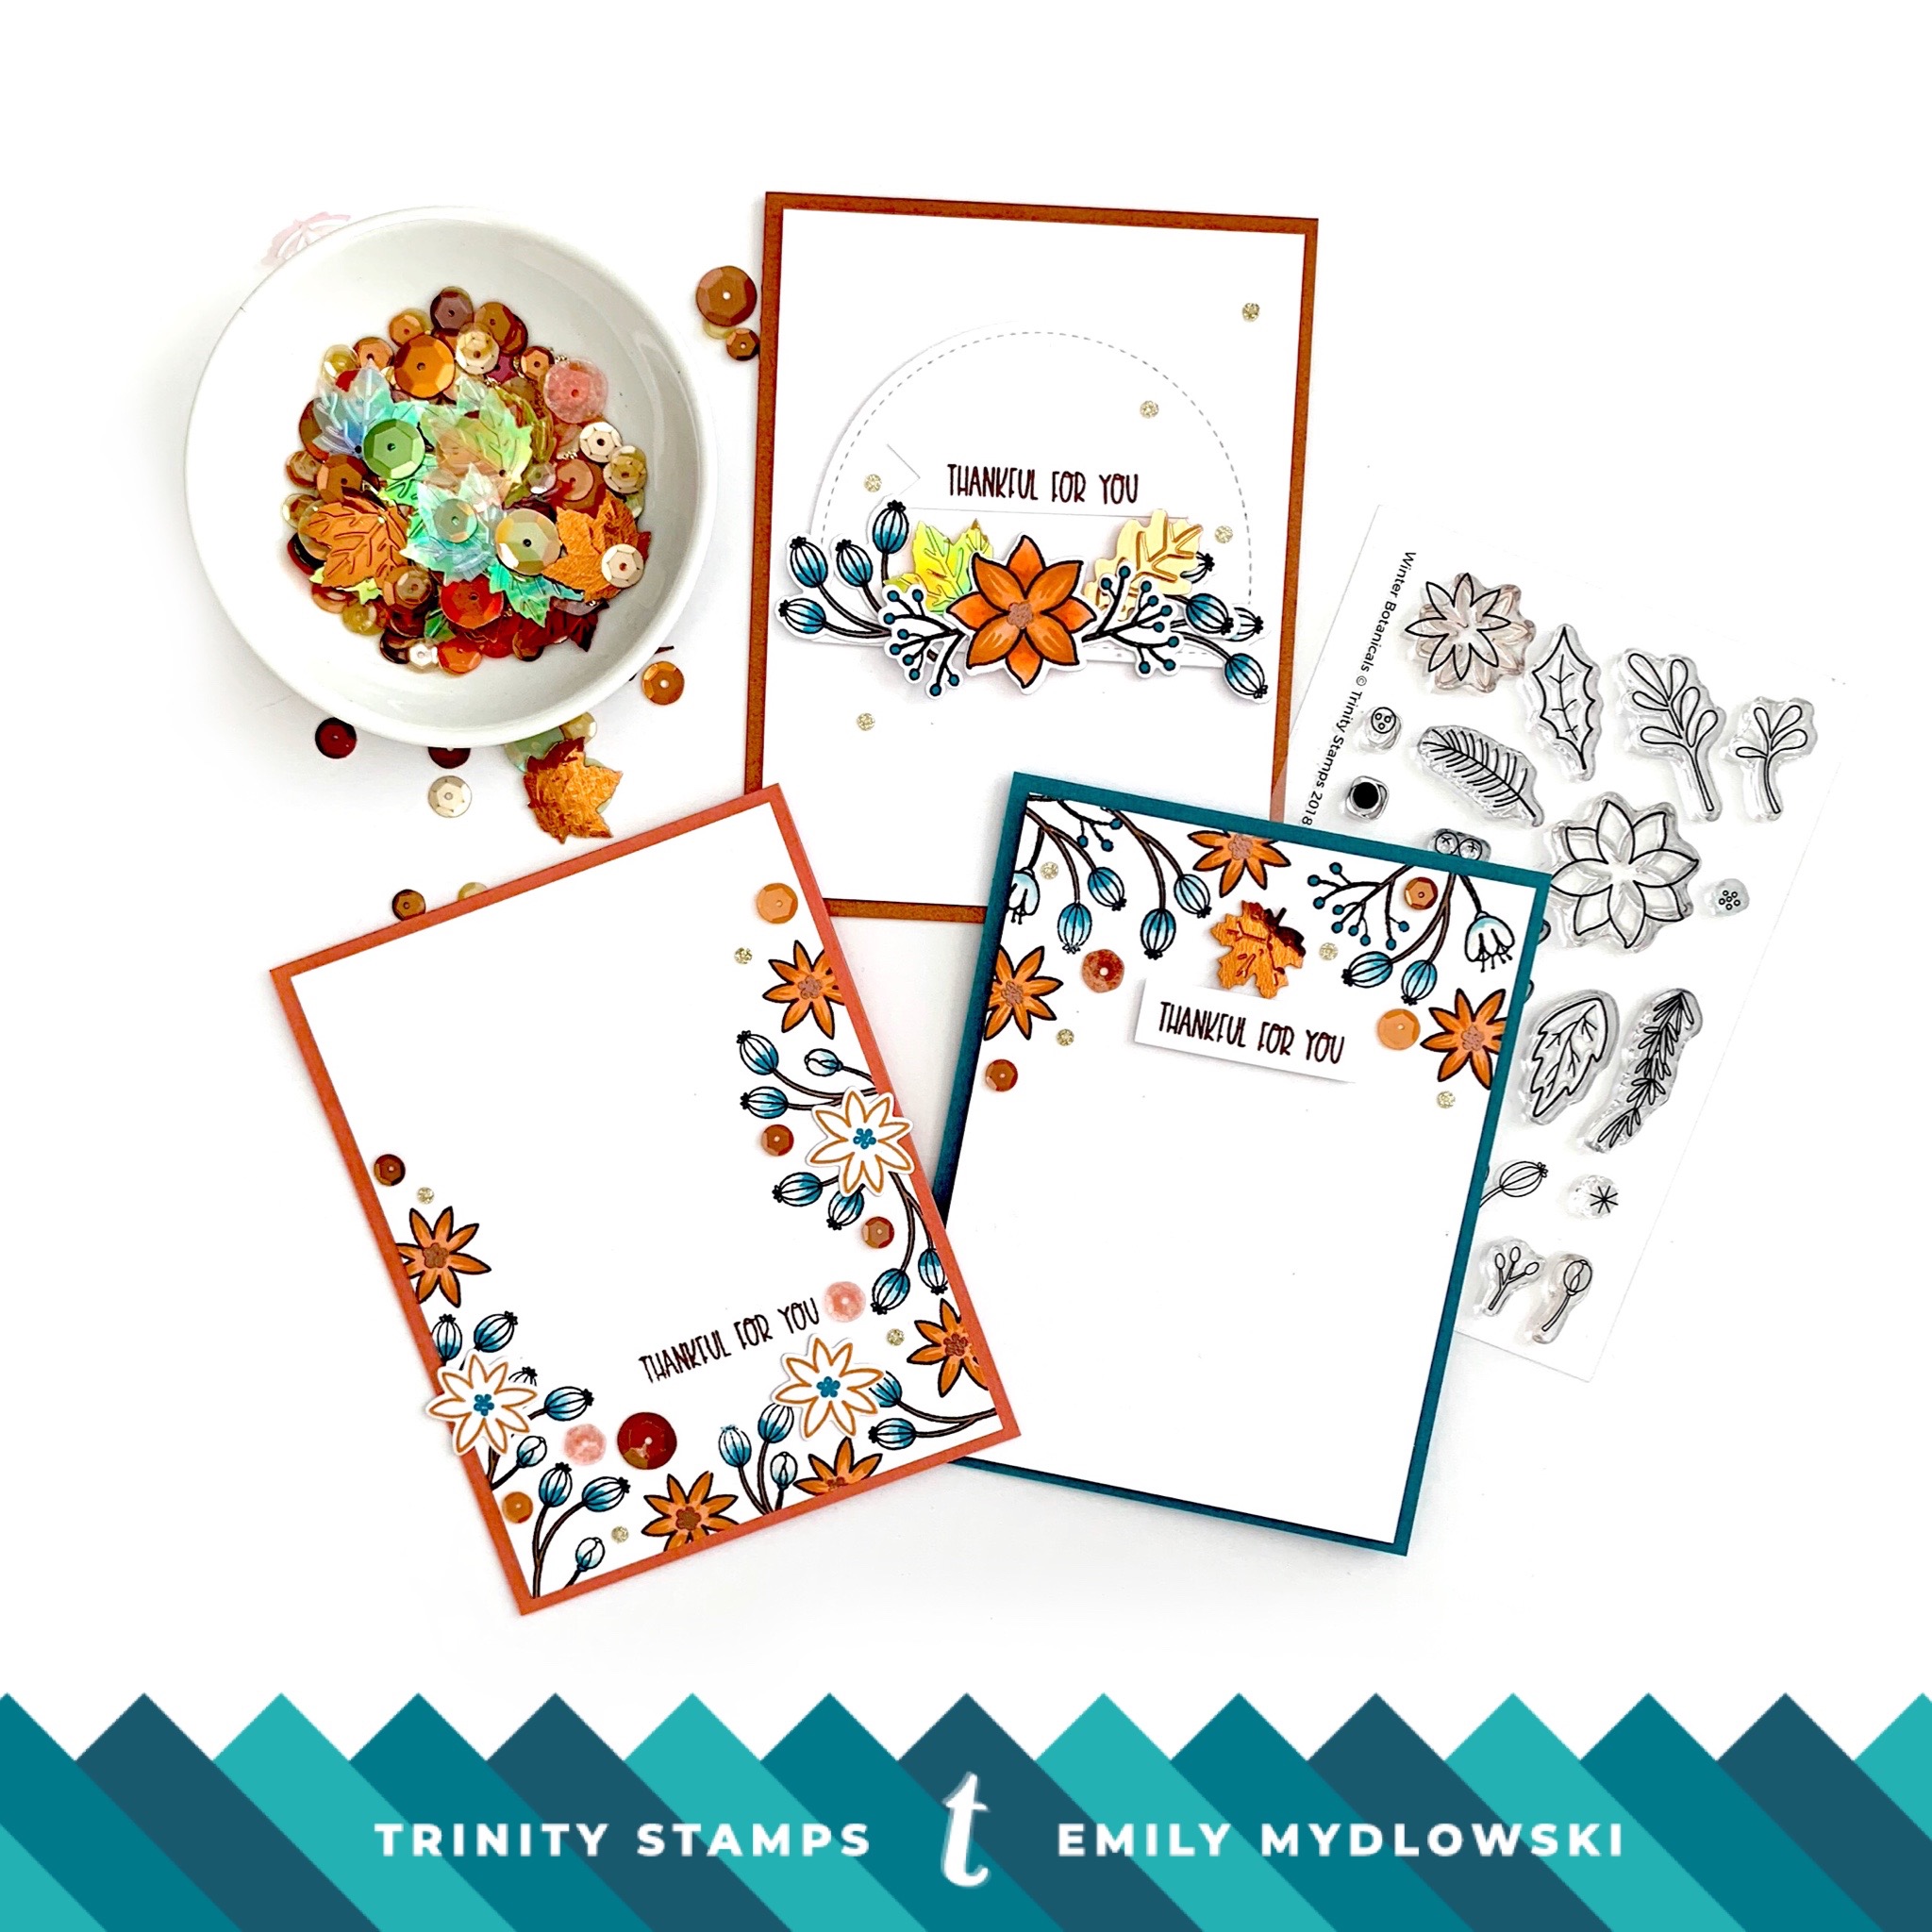
Supplies & Color Recipe
This week, I thought it would be fun to not only share the cards and supplies with you but also the color recipe that I used. I just love how stunning the teal, orange and copper tones worked together to create a trio of bold autumnal cards.
Copic Colors Used: B0000, BG01, BG07, E57, E74, R02, R05, YRo1, YR02, YR27
Inks Used: VersaFine Clair Acorn [Sentiment], VersaFine Clair Summertime, VersaFine Clair Warm Breeze, VersaFine Memento Tuxedo Black [Botanical Images], VersaMark [Embossing]
The Stamps and Dies: Winter Botanicals, Winter Botanical Coordinating Dies, Seasonal Sweetheart (Sentiment)
Sequins & Sparkles: Autumn Leaves Shaker Embellishment Mix (Limited Edition)
The Color Recipe:
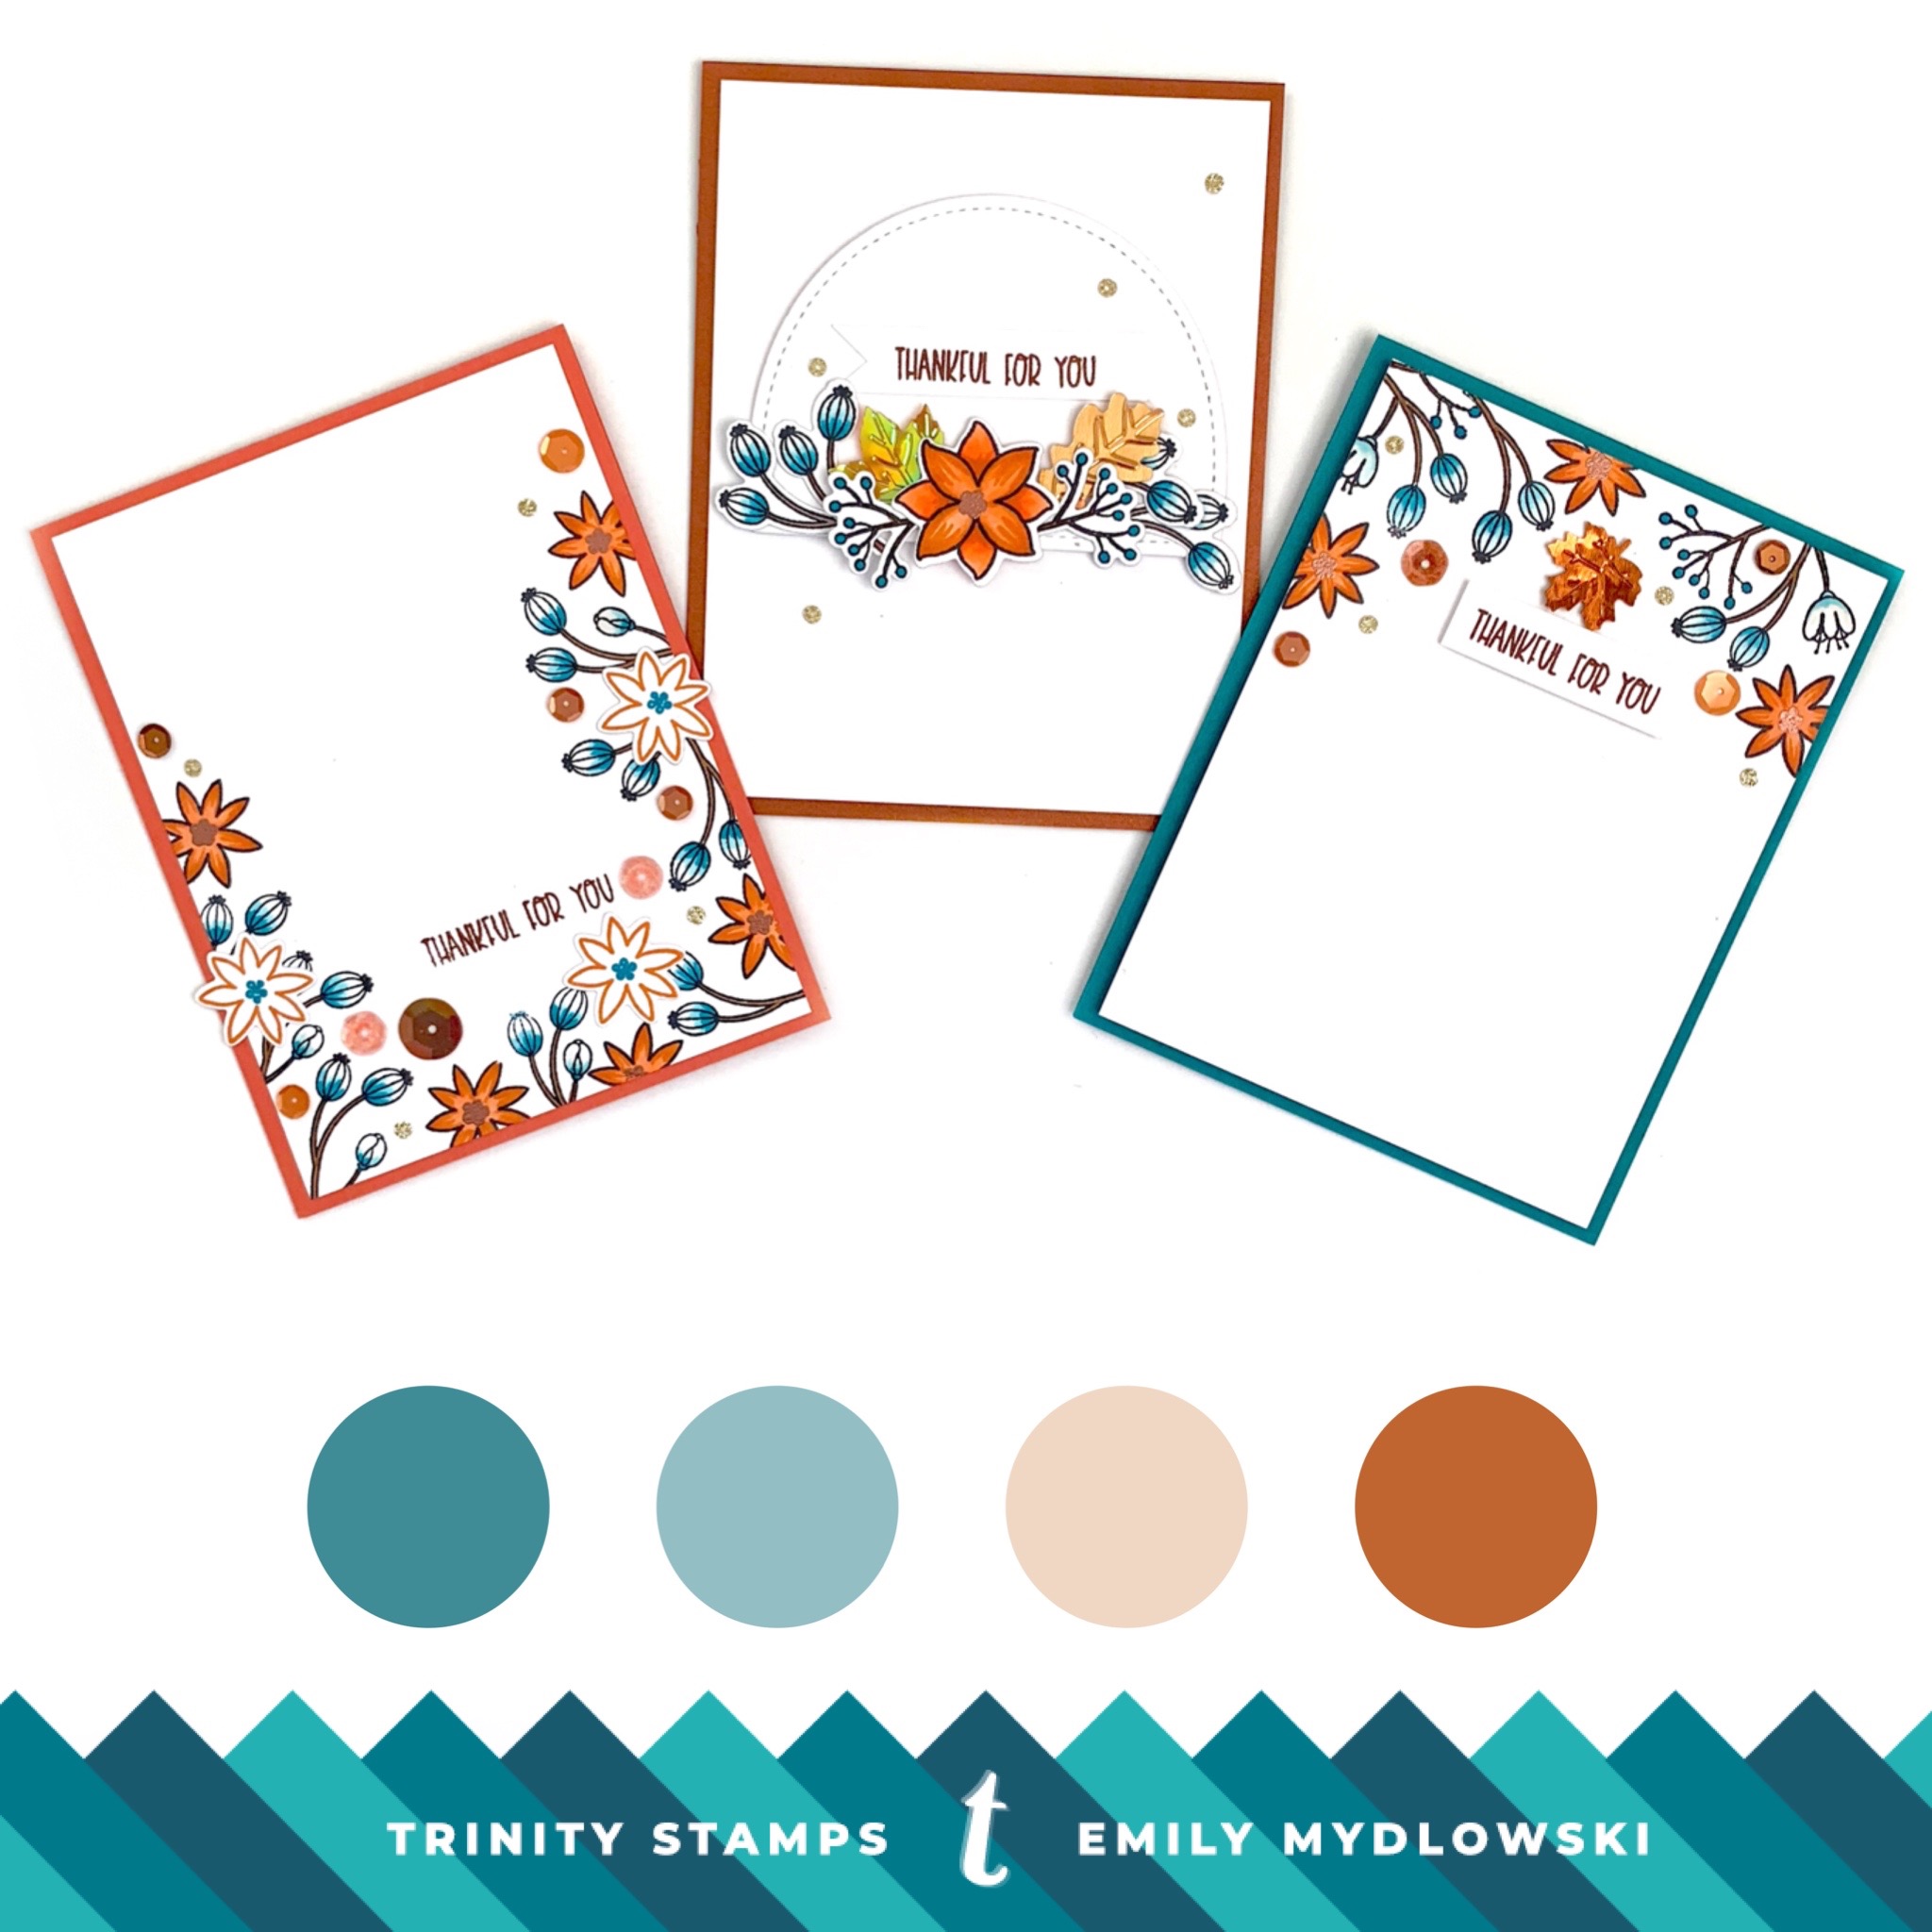
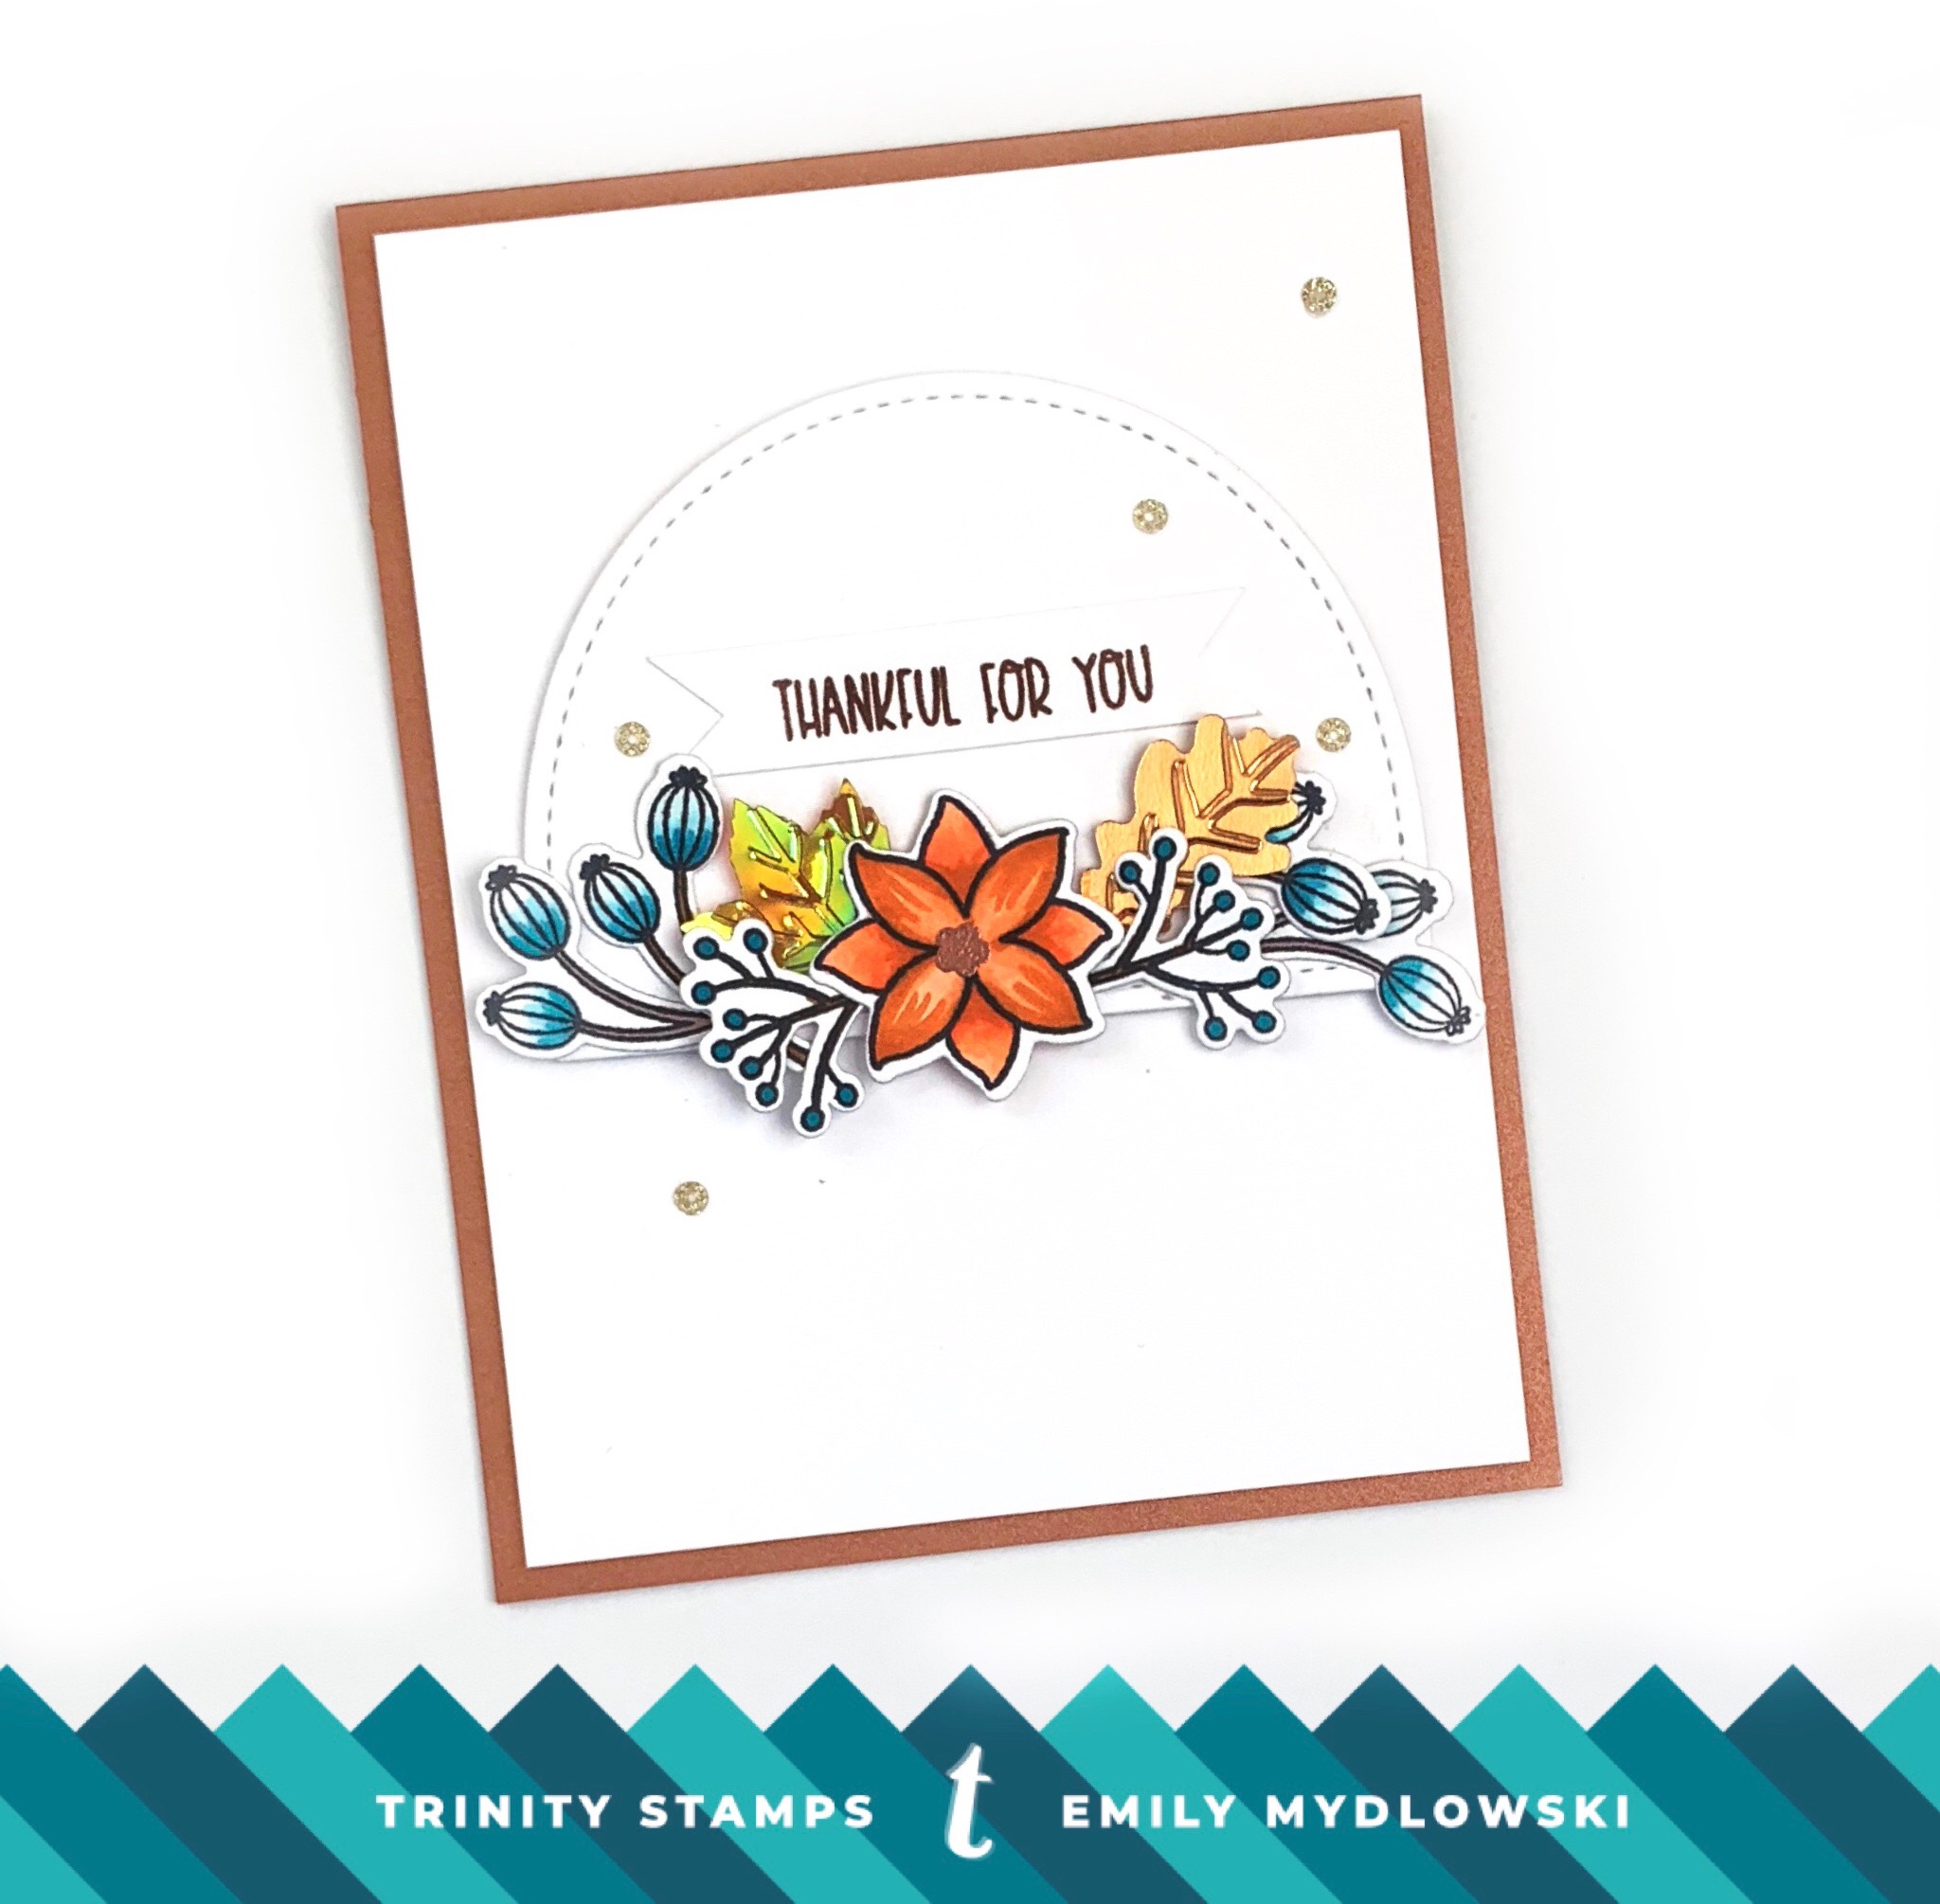
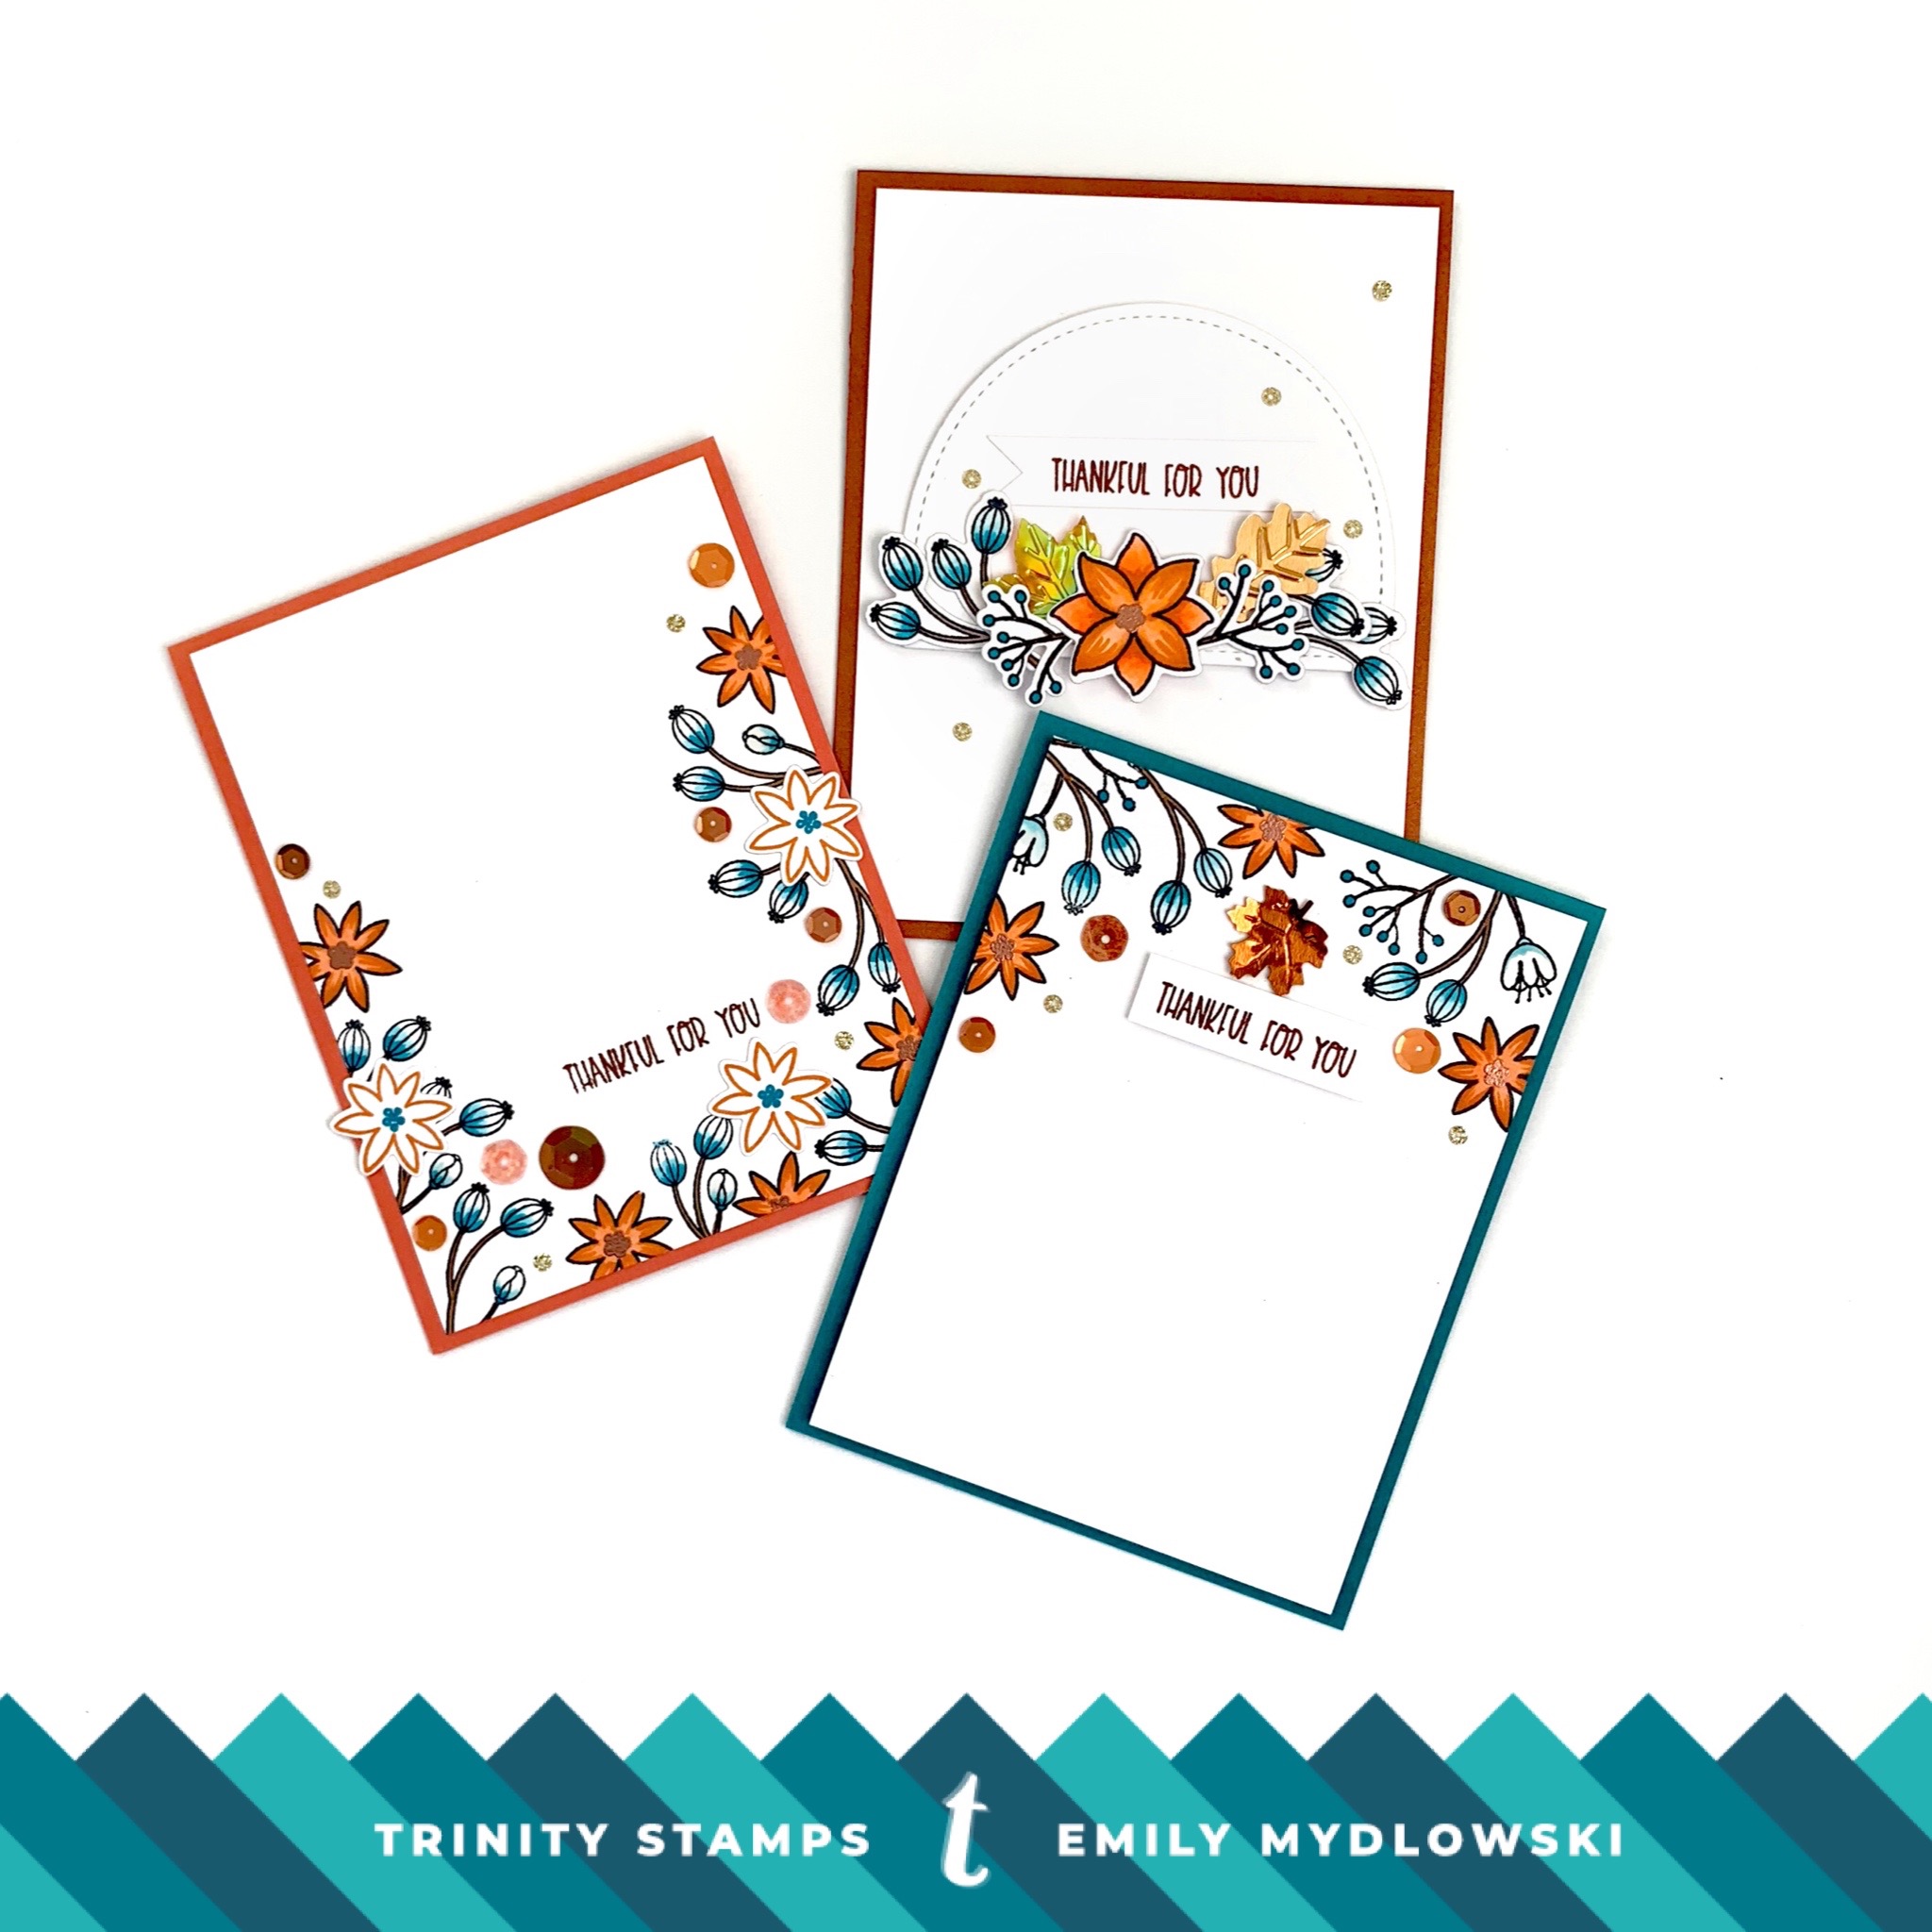
Top Cascade Botanical Card
For this card, I wanted to create a cascade of fall foliage just at the top of the card. When I’m creating pattern clusters like this, I like to select two or three primary images that I stamp at least three times at different angles on the card. When those images are in place, I add smaller stamped images into the little extra spaces. After Copic coloring the images, I stamped a small cluster image into the flower center with VersaMark Ink and heat embossed with Copper Embossing powder. Then I added that amazing copper leaf from the Autumn Leaves Limited Edition Shaker Embellishment Mix to the top-center of the cascade pattern. For extra pop and dimension, I added a few sequins and sparkles into the extra spaces. Then I stamped the sentiment on a white sentiment strip and tucked it into the branches with foam tape.


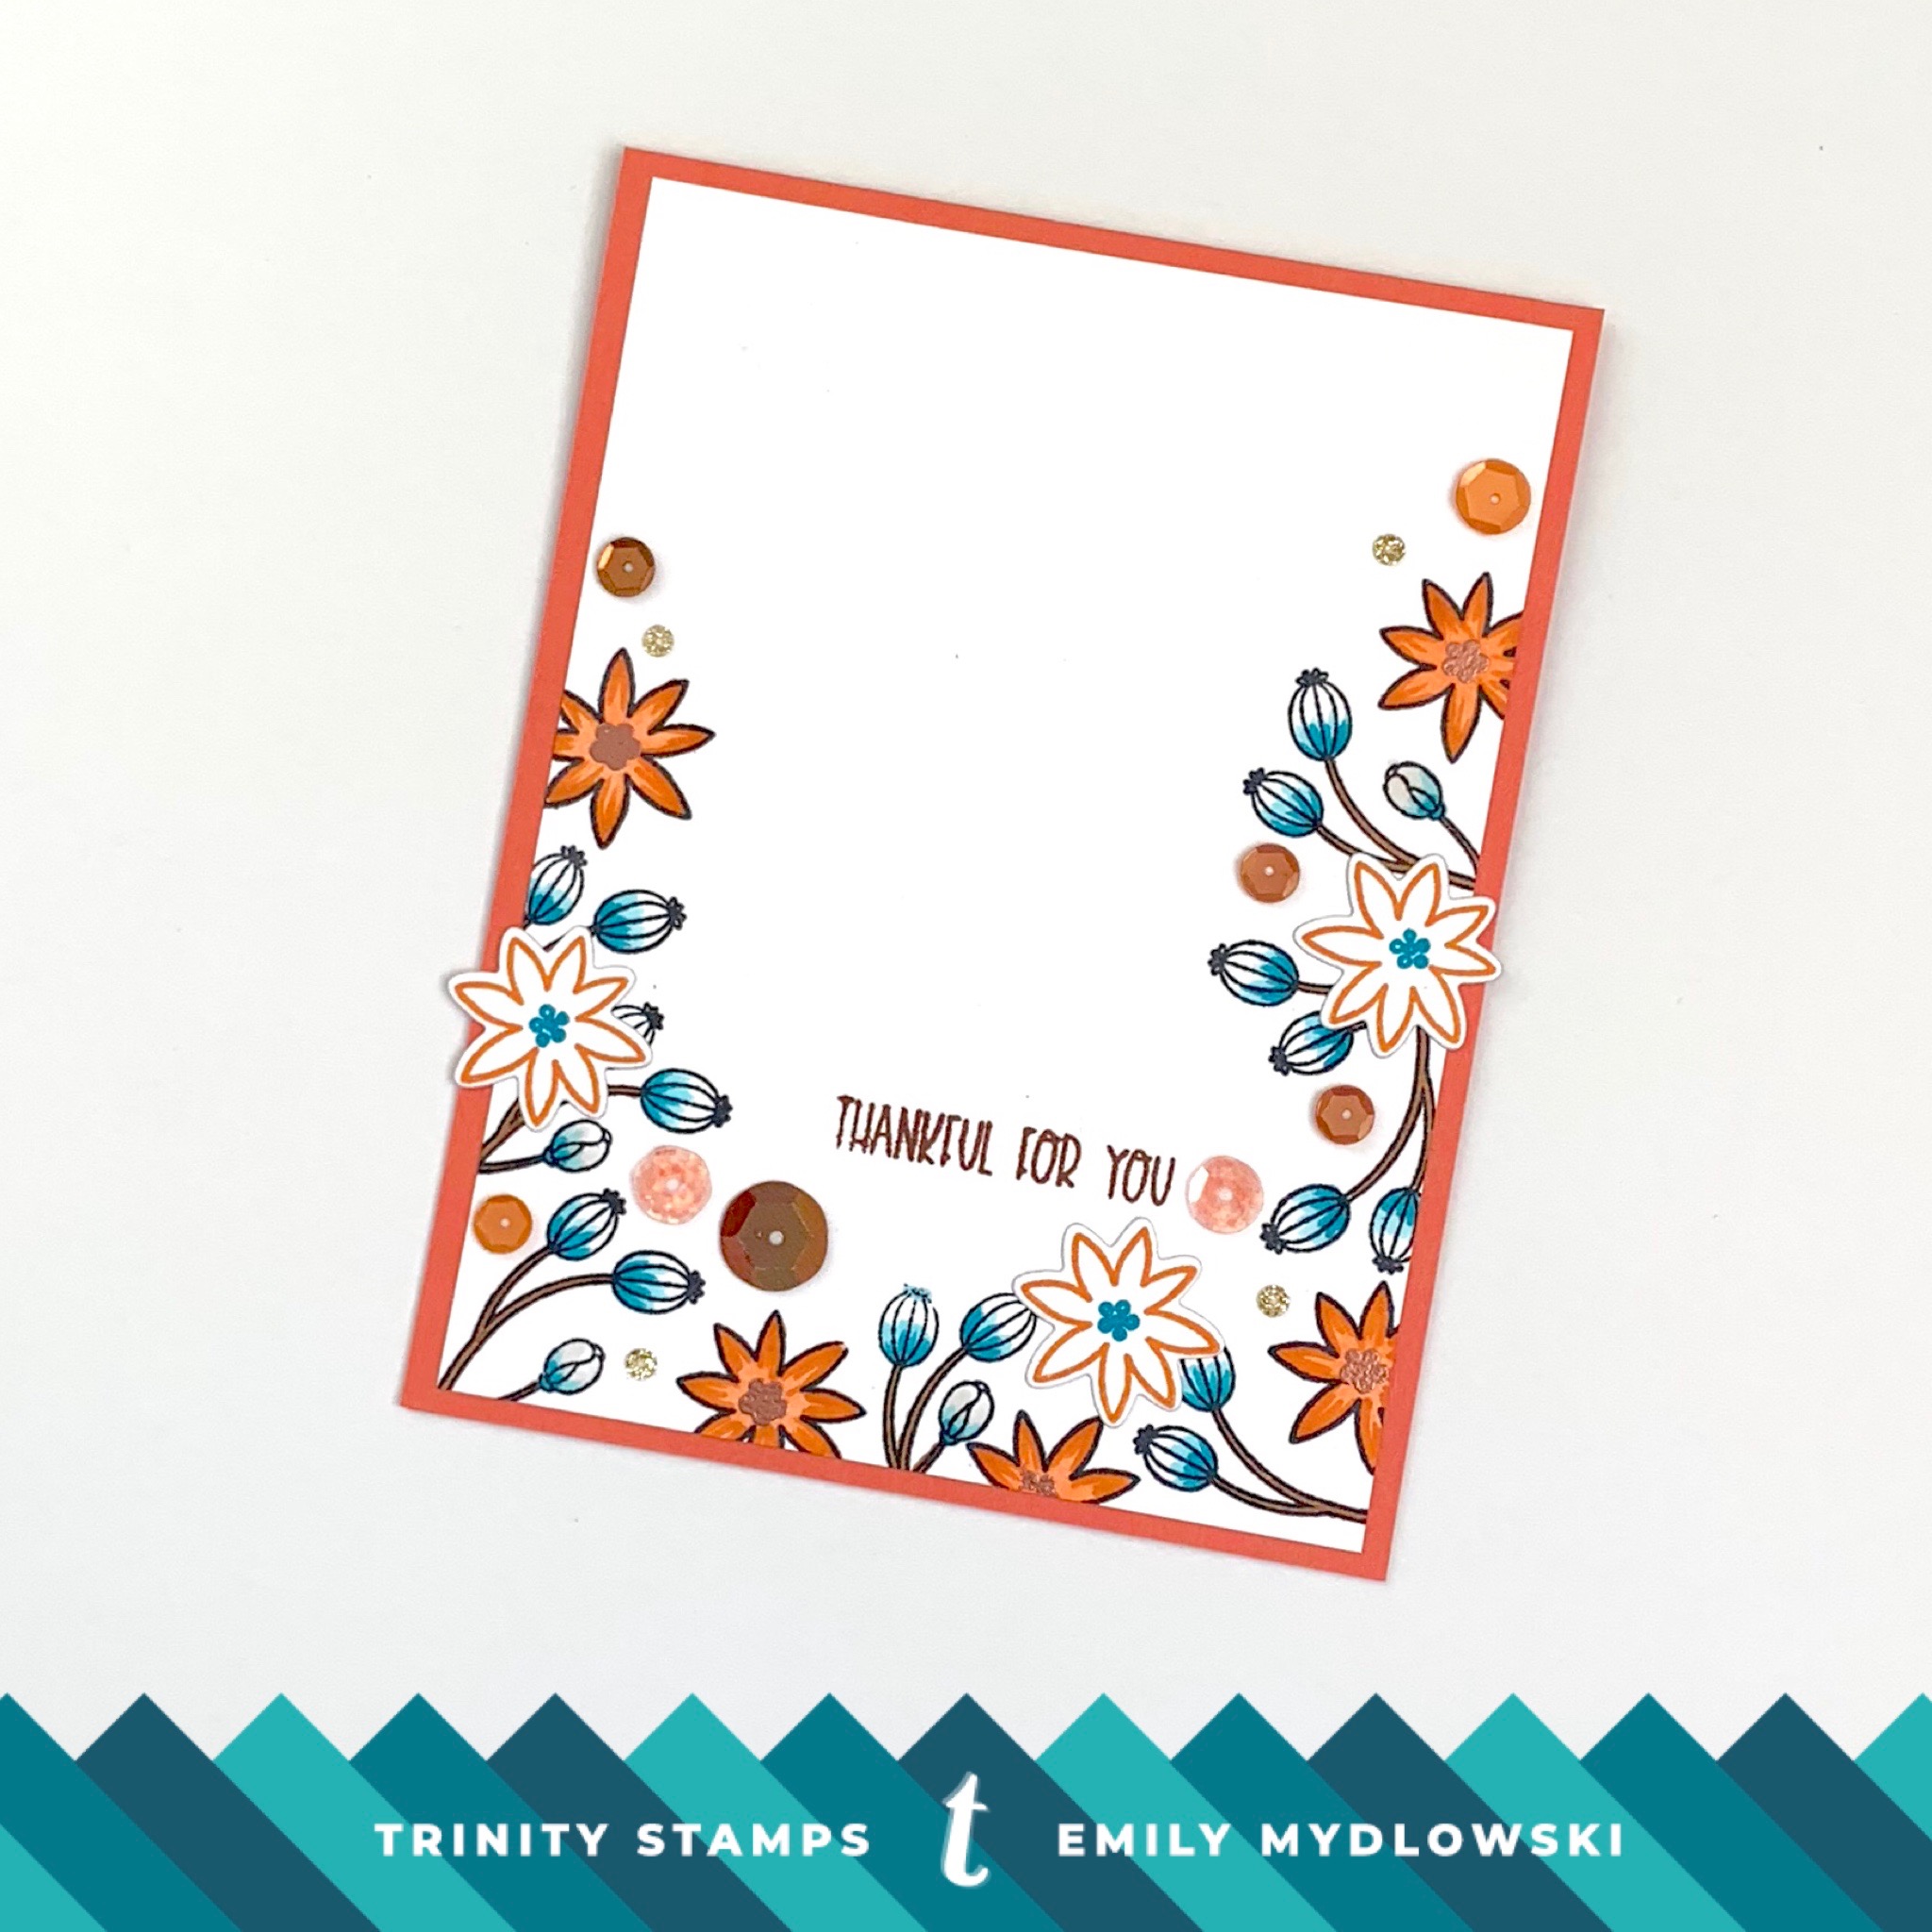
Bottom Border Cascade Botanical Card
For this card, I used similar steps as above, except this time I started stamping at the top right side of the card working my way to the bottom and then back up the left side of the card. After I created the pattern, colored, and embossed the center of the flowers I also stamped and die cut three flower images and adhered them with foam tape to the pattern. Then I added the sentiment to the bottom of the card and filled in the extra space with sequins and sparkles.
Botanical Half-Moon Cluster
For this card, I wanted to create a cluster of images using the stamped and die-cut images. I had this half-circle die in my stash and it was the perfect size to ground all the botanical pieces together. I arranged and rearrange the branches and floral images several times and then adhere them with a combination of Nuvo Adhesive Glue and Glue Dots. Then I tucked in a few leaf sequins behind the stamped images. I stamped the Thankful for you sentiment on a sentiment strip and freehand cut the banner triangles at each end. For a little extra pop, I added a few small sparkle circle sequins to the card (those little gold glitter circle sequins add just the right amount of sparkle and are my new favorite sequin style! Totally unique). This entire card was adhered to a Copper Sparkle card base.
So there you have it friends, three different ways to use the Winter (or Fall) Botanical Stamp Set and Dies! Thank you for stopping by and I hope you enjoyed this post.
Until next Monday, Big Paper Hugs! Don’t forget to check out the Trinity Stamps Blog, You Tube and Instagram for more design team inspiration all week long!


These are gorgeous and I absolutely ADORE your color palette!
Thank you, Amy!