
Simple ideas for adding colour to your designs without colouring per se
Blooming Bunch appears to be one of those stamp sets that – once on my desk – is hard to put away! The options with this gorgeous image are literally endless, and I haven’t even started using the butterflies yet (which is an absolute shock to me, as I thought that butterflies would always go before flowers in my craft-room!).
Today, we’re going to focus on adding colour to your card designs without the need to actually colour as such. So, if you feel that your colouring skills are not exactly there yet, or you simply don’t have the time & energy to precisely colour an entire image/scene – I hope you’ll find my tips useful.
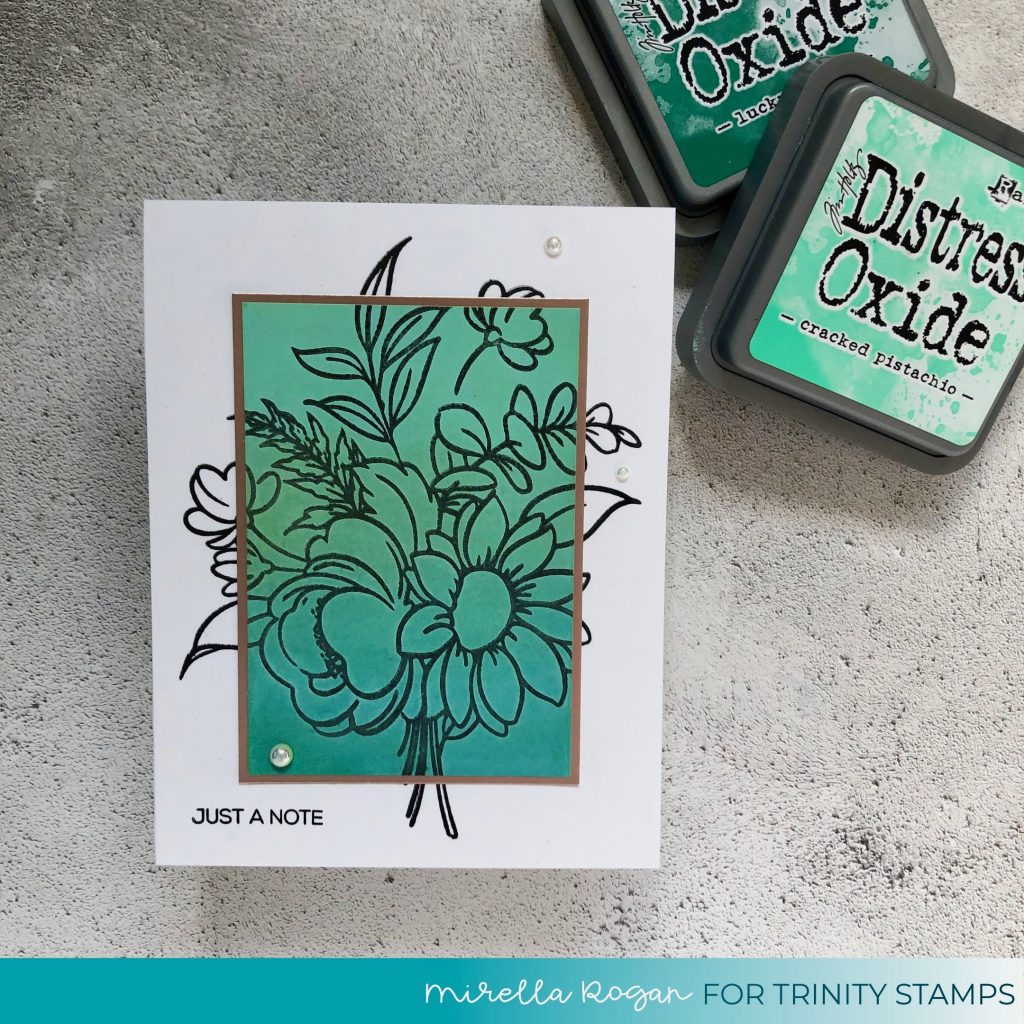
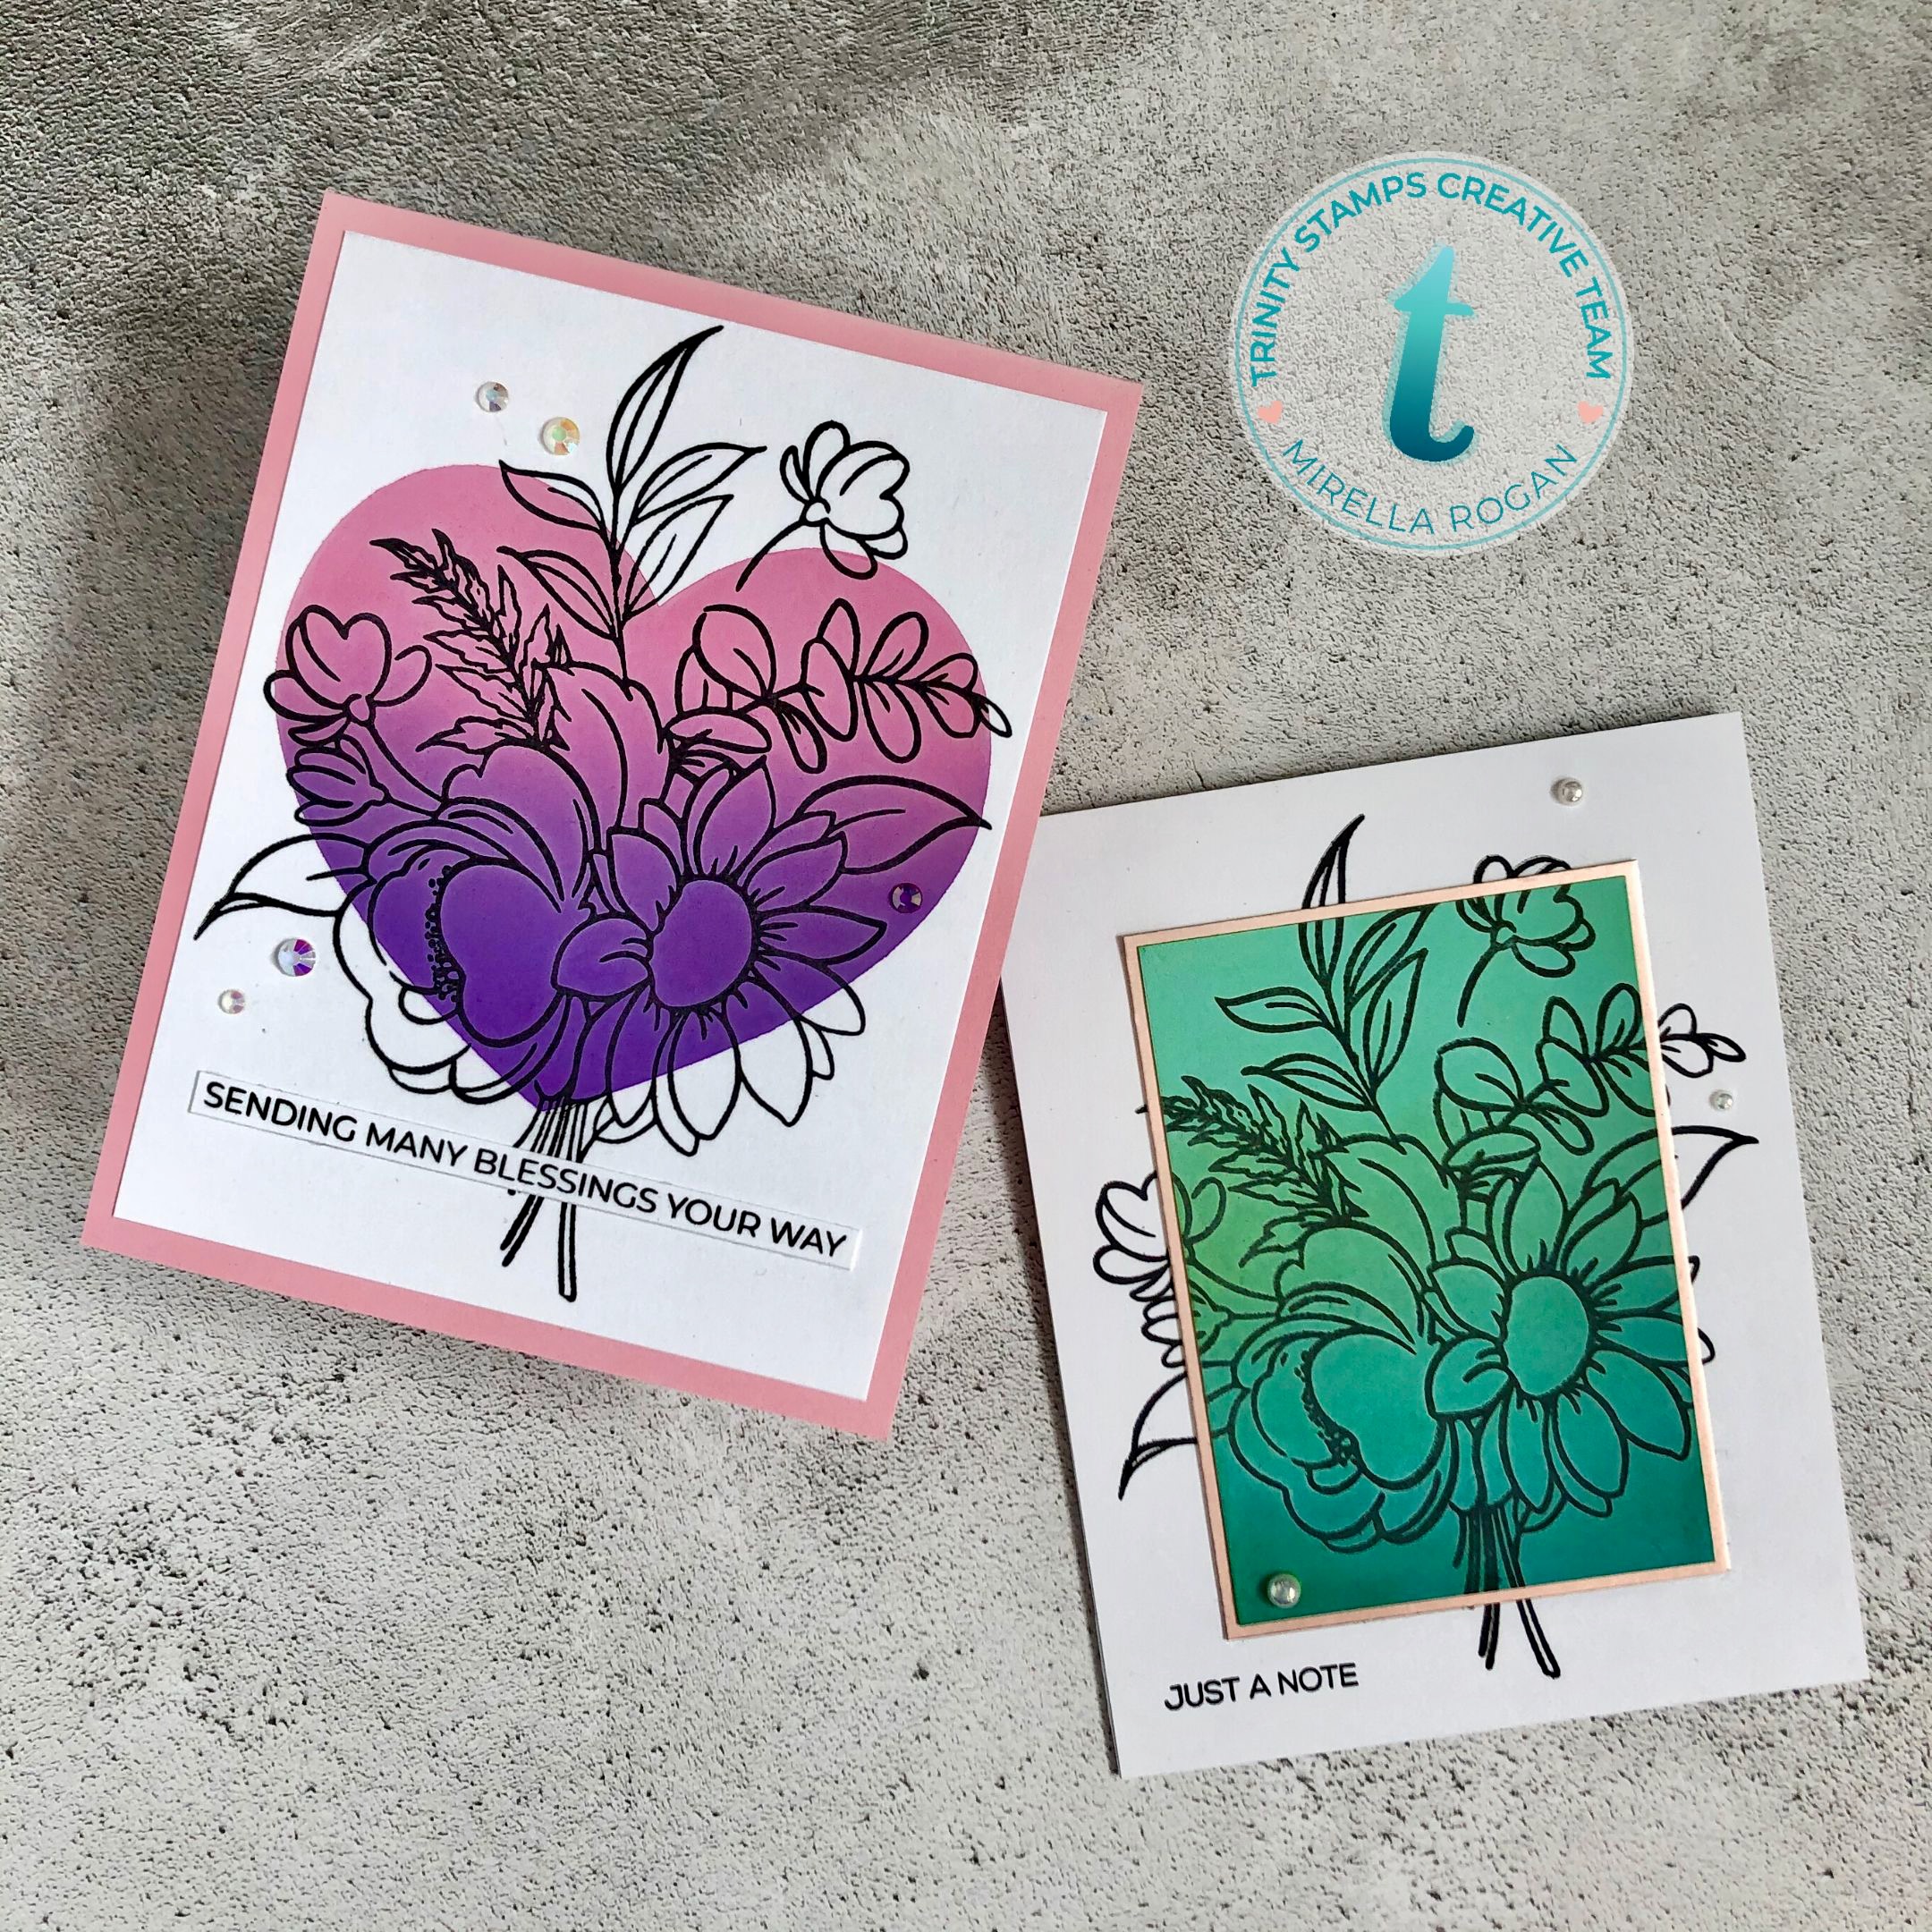
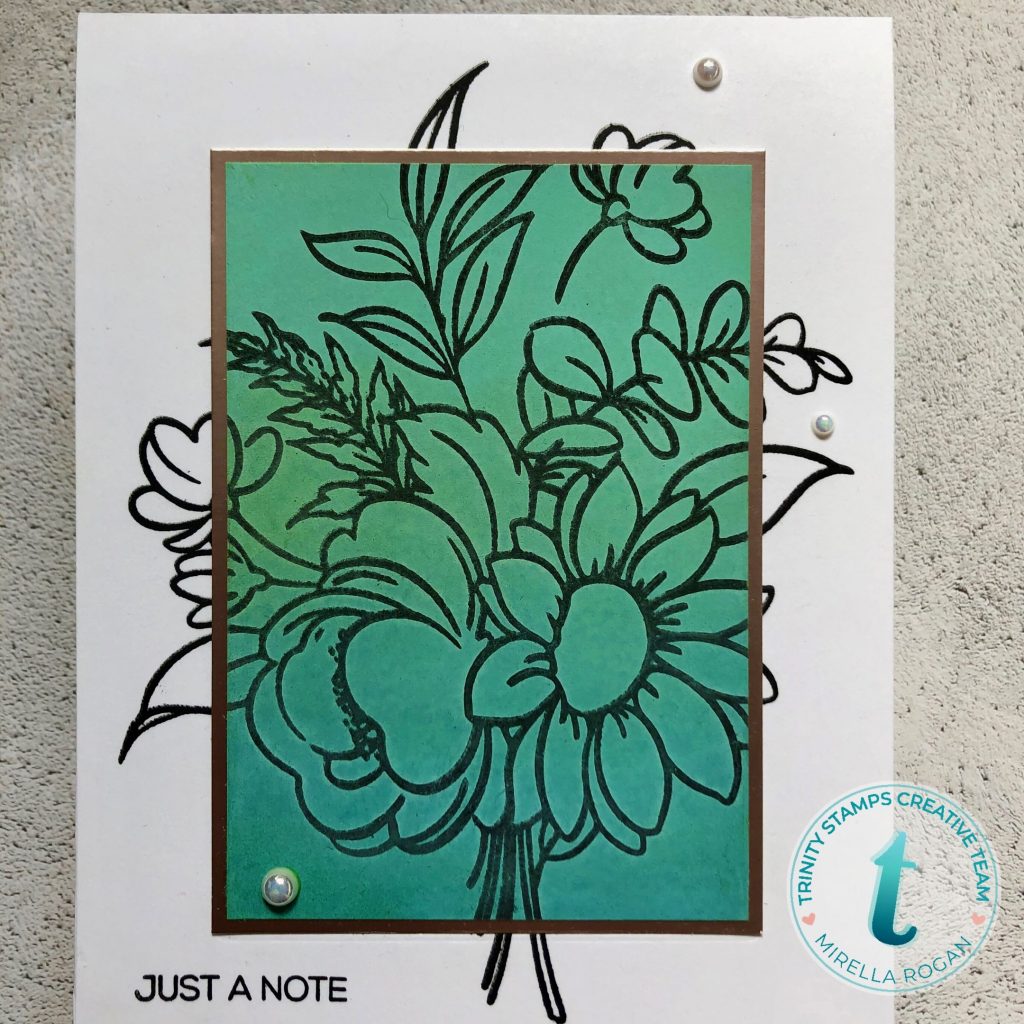
Let’s focus on the first card. To be absolutely honest with you, this was meant to be a one layer card, but I had to change my plan, as my masking tape didn’t do a great job, and I had ink seeping underneath it – using the Foundations Rectangle stencil set here could have made my life easier, but I don’t own that one yet!
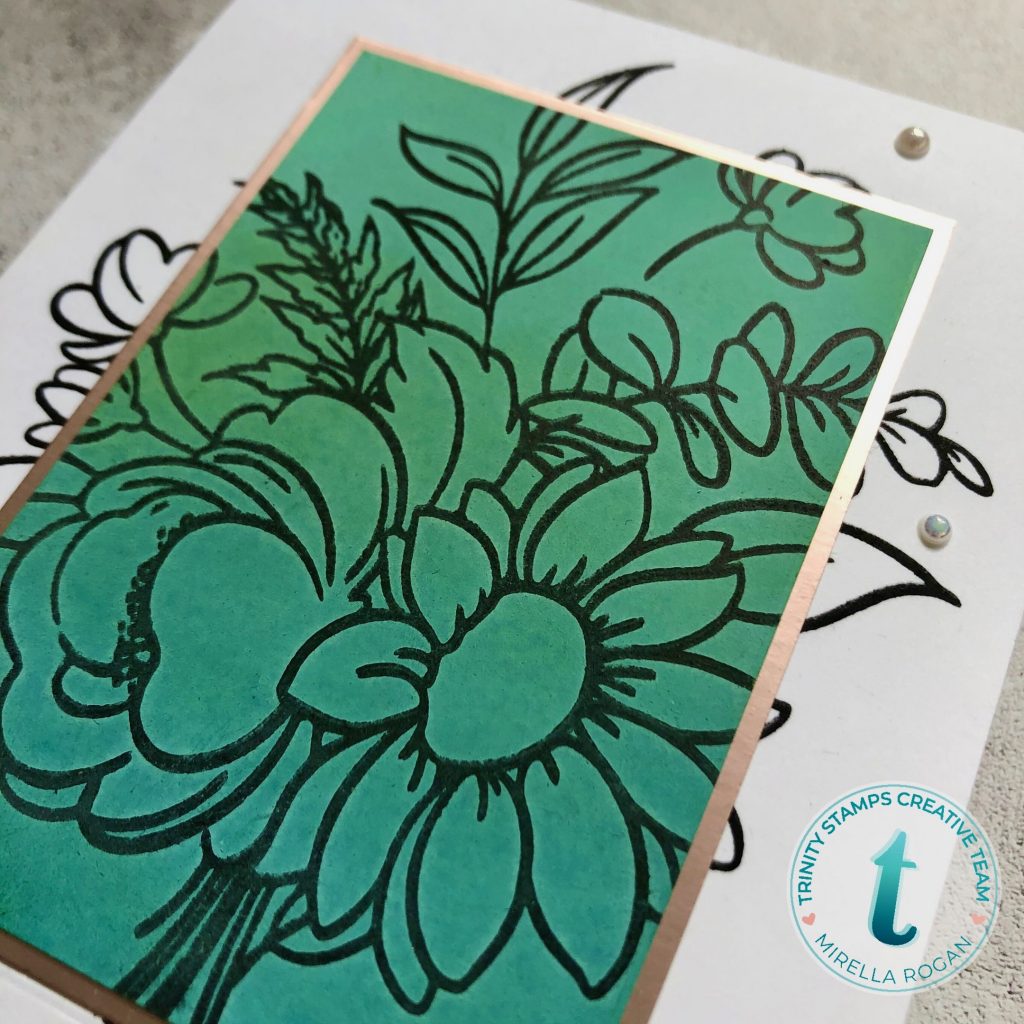
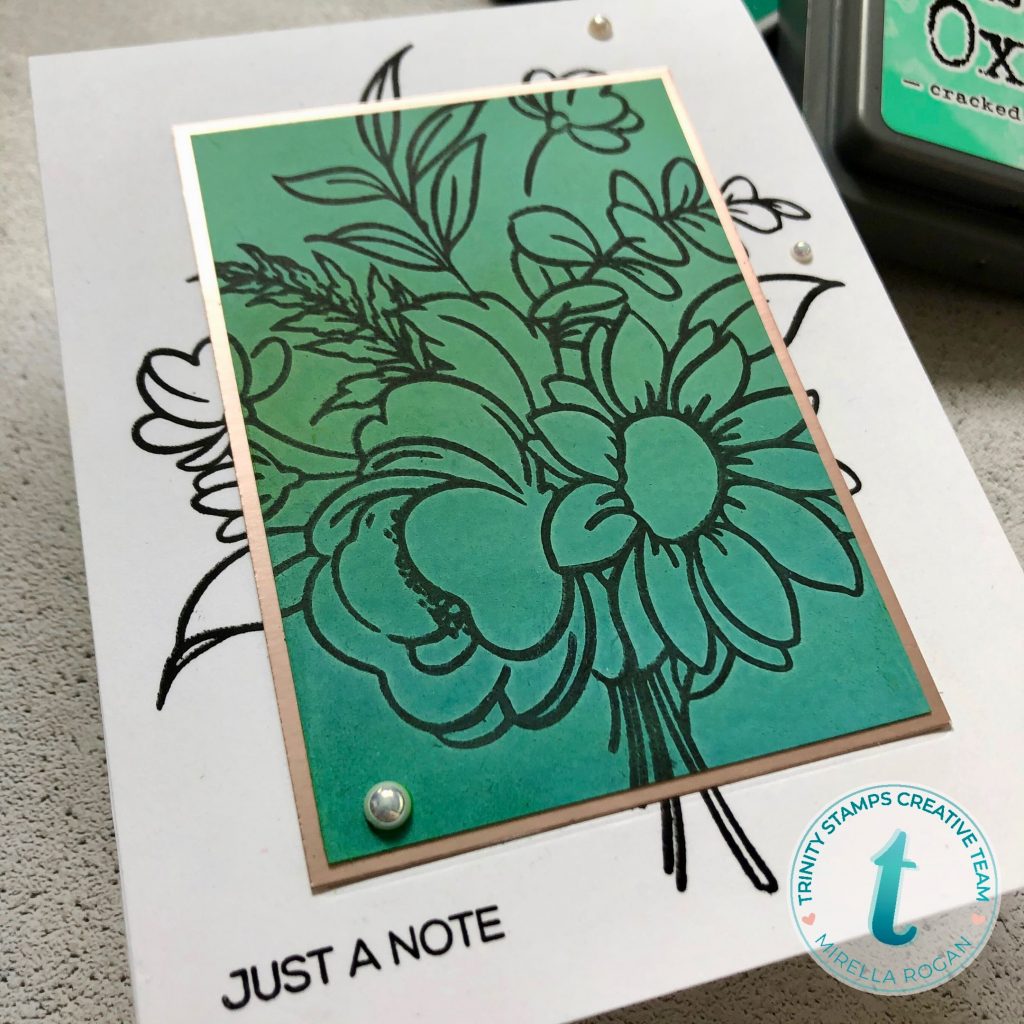
I was planning to literally just have the edges masked off, the inside part ink blended & then the image stamped in black. Due to my boo-boo, the design took a slightly different direction, though – I ended up trimming the ink blended panel, to ensure that I had nice crisp edges, matting it on a complimenting satin mirror cardstock, and adhering it to a white card base, with the same image stamped in black, ensuring outlines continuity.
In a way, my mistake made the design a bit more interesting, as we have the addition of a slight dimension, and I love the frame element, too!
I popped a few elegant pearls here and there, added a simple & classy looking sentiment, and voila – the card was ready. If you’re into mass producing, you could repeat this in all the colours of the rainbow (or you could even do a rainbow background, too!), use different sentiments for different occasions, change the embellishments on each card… all of these could help you create a lovely card set!
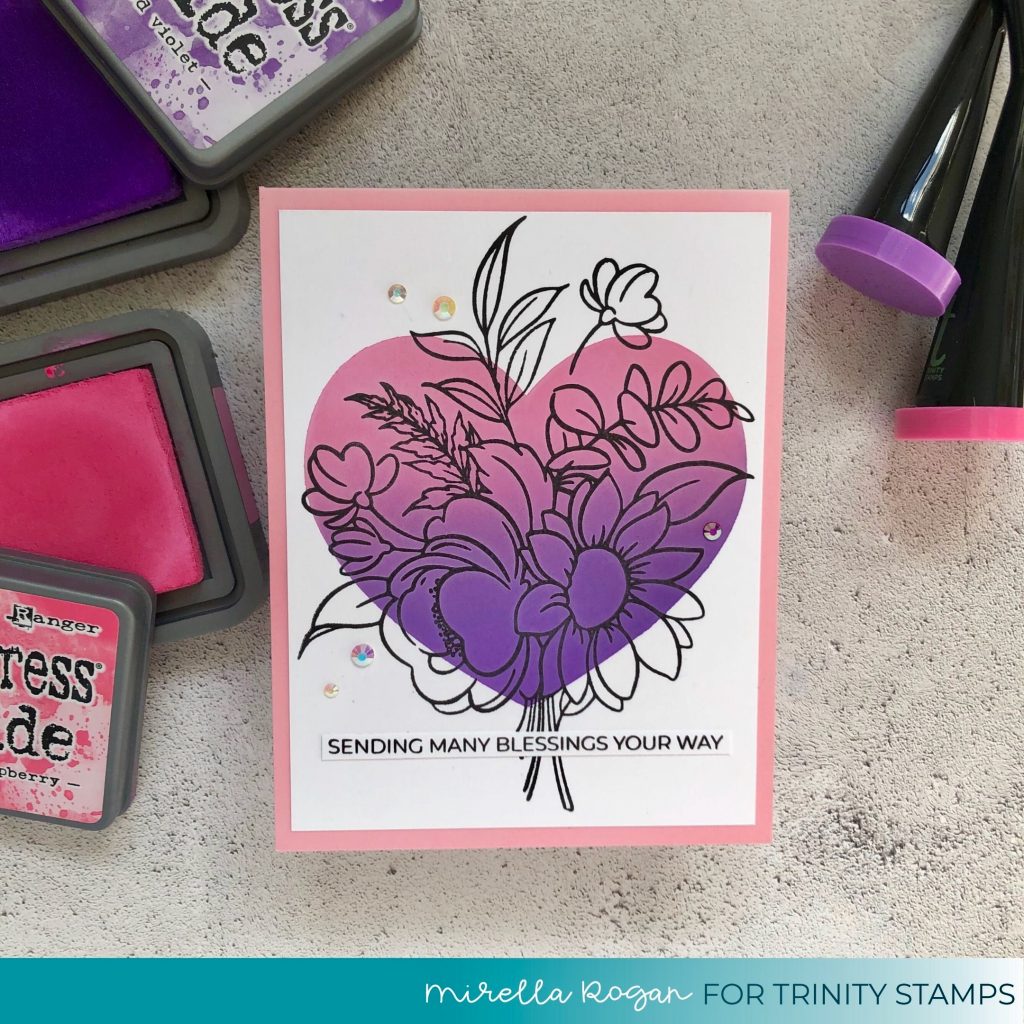
For my second card, I had more luck with my initial idea, as I used the Heart Layering Stencil set – the stencil did a much better job during the ink blending/masking process (by the way, I honestly cannot recommend the Blending Buddies enough!).
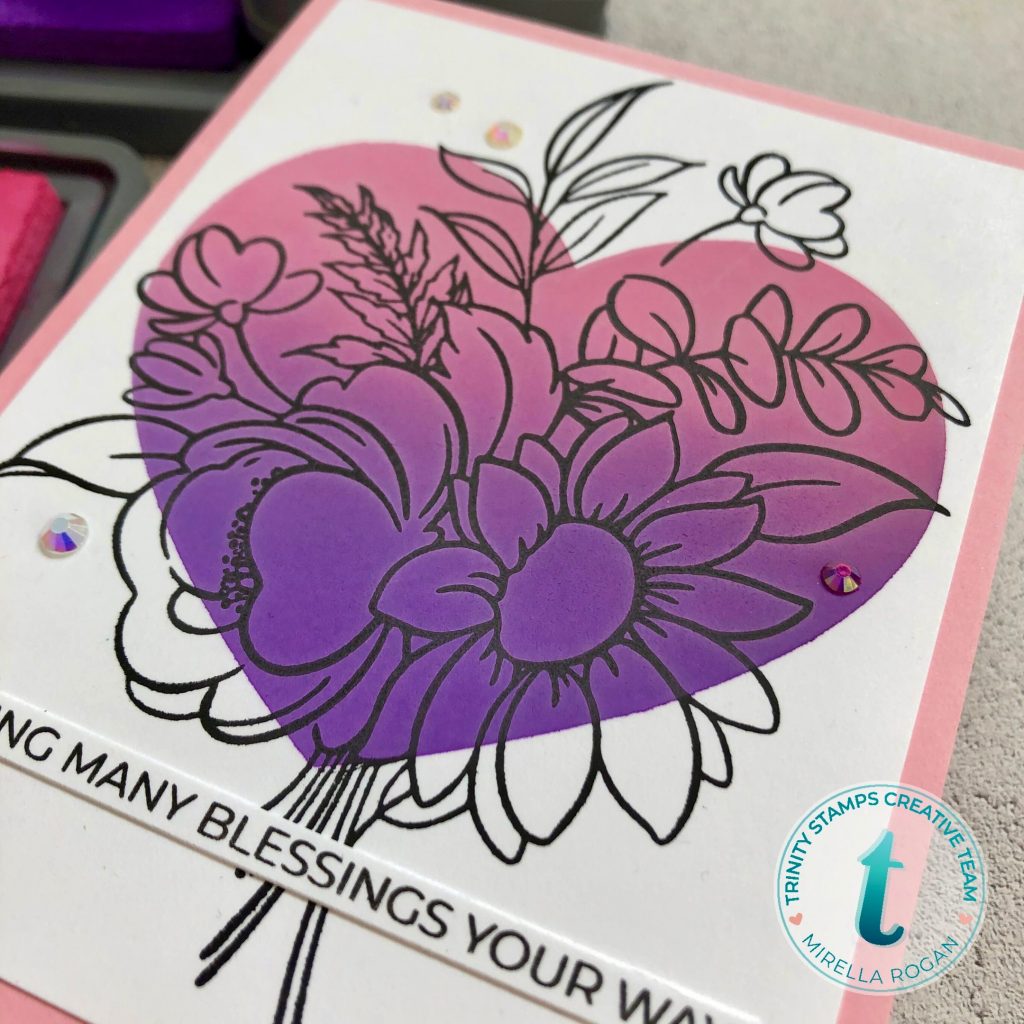
I thought that using a heart shape, instead of the traditional rectangle or circle, would make the design a little bit more interesting. This time, I opted for more feminine colours, too.
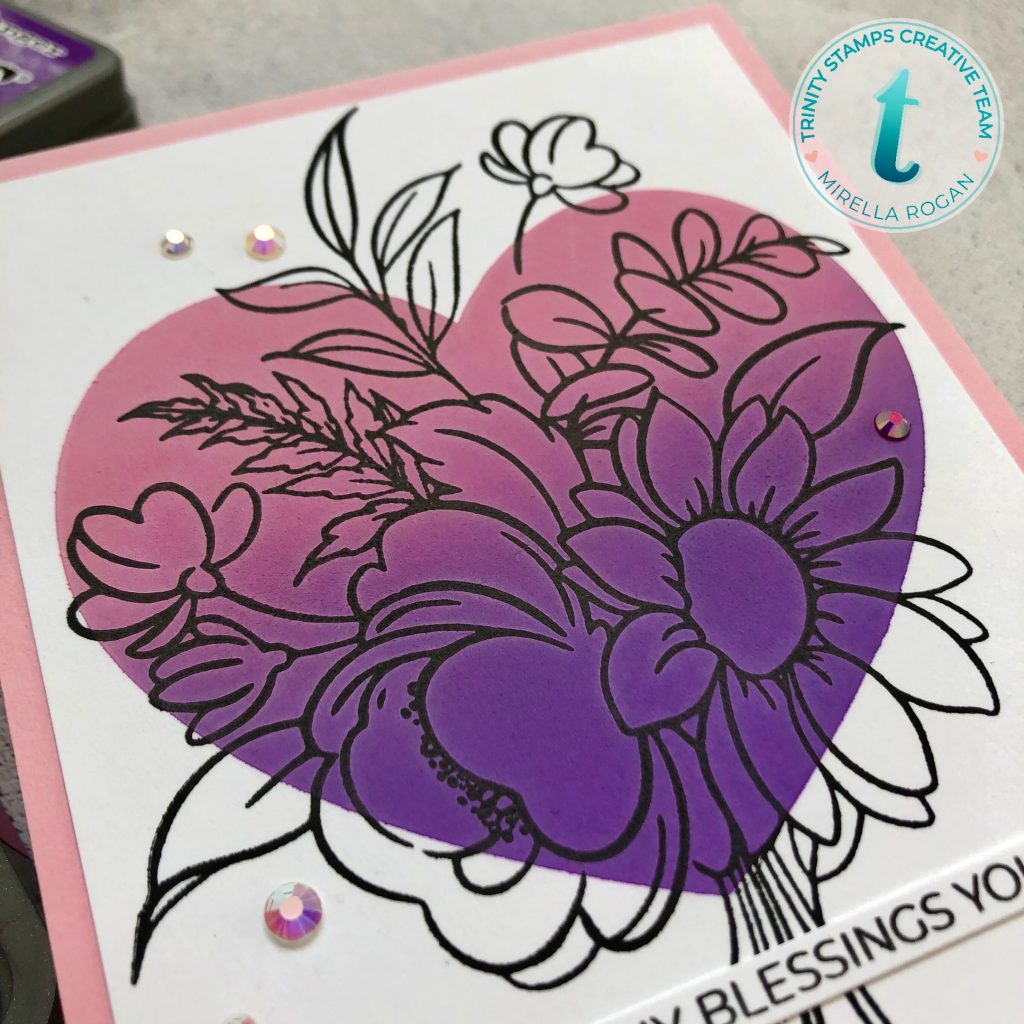
The Crystalized Unicorn Tears rhinestones went perfectly with my colour palette, and the sentiment is from the A Sentiment For (Almost) Everything stamp set. To add a little bit more colour to my card, I decided to trim the white panel slightly, and adhere it to a pink card base.
Two quick and simple cards that are perfect for mailing, since they’re rather flat and light. They’re colourful, yet they don’t require any colouring skills – how great is that?
What is your favourite way to add colour to your images, apart from typical colouring? I’d love to hear your ideas!
As always, you can find the full list of supplies used over at my blog.
Until next time,
Mirella


Beautiful cards!
Thank you Nicole!
Mirella, I like to add color to my cards with Distress inks. I have the oxides too, but I prefer blending the inks for their brighter colors.
I like your cards and sometimes a mistake is really not one! The top one has kind of an optical illusion going! Both are stupendous in hue color!
Thank you so much for your awesome comment, Liz! I like normal Distress Inks, too, but recently keep reaching for Oxides… not sure why.. maybe because my blending buddies are already loaded with the Oxide ink 😉
Thank you so much for your awesome comment, Liz! I like Distress Inks, too, but recently keep reaching for Oxides… not sure why.. maybe because my blending buddies are already loaded with the Oxide ink 😉