
Hopeful Flowers: One Stamp, Three Ways with Designer Emily
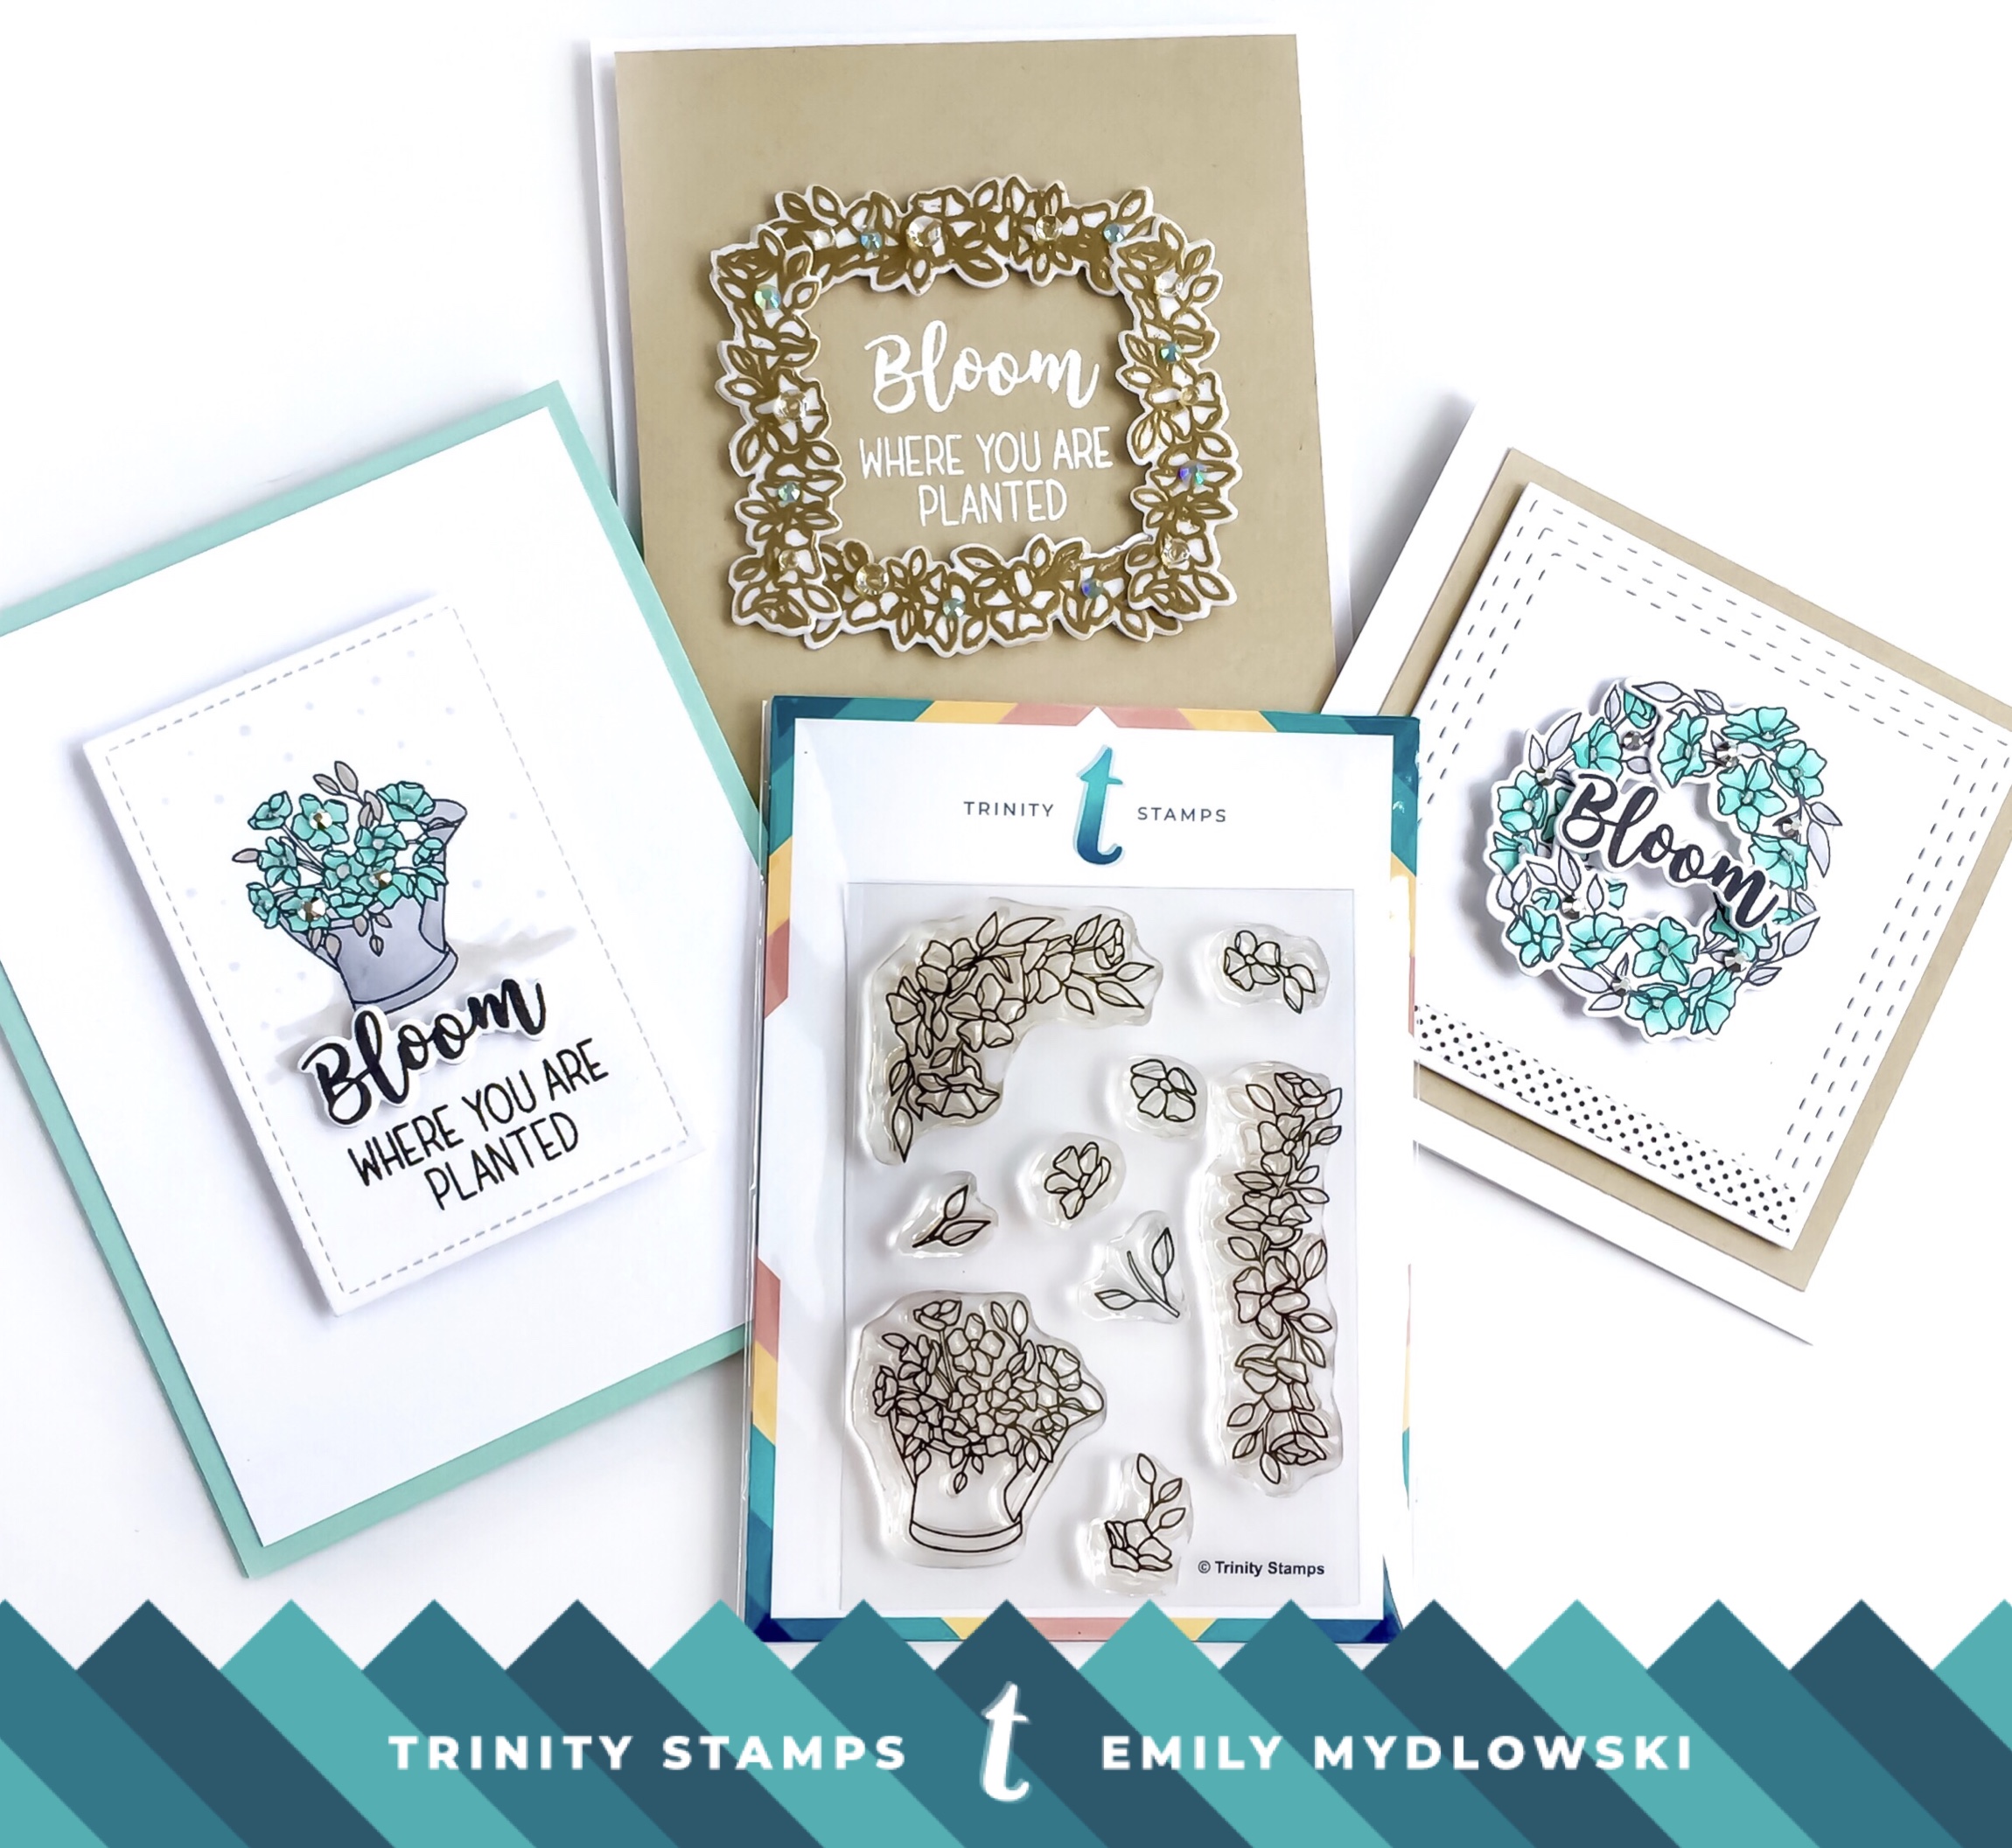
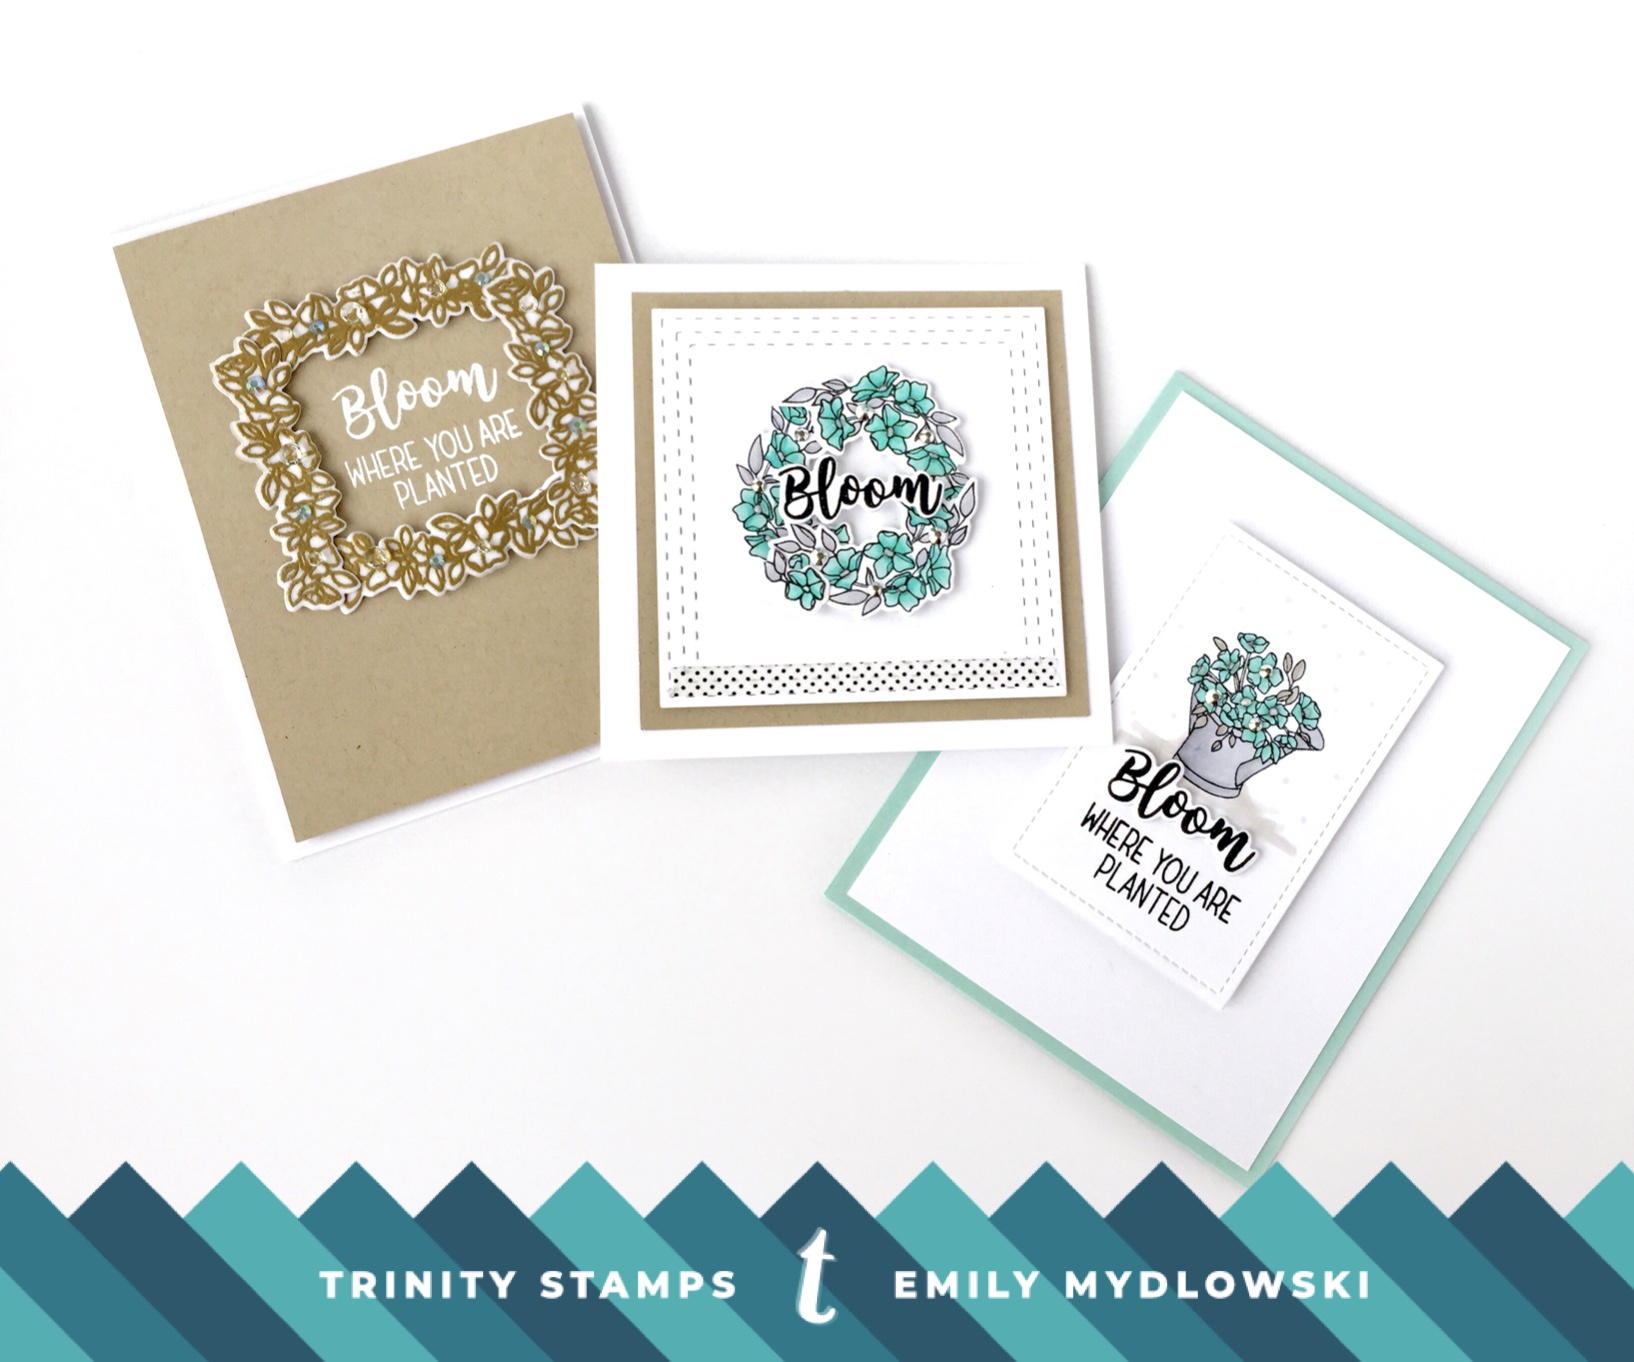
Hello, Friends! So happy to be here this week sharing three ways to use the Hopeful Flowers set. I love 3×4 sets that deliver big results and the Hopeful Flowers set does just that.
For the three designs, I kept with a similar Copic color scheme, integrated Kraft and had fun with embossing and vellum. I also paired this set with the “Bloom; Where you are Planted” sentiment from Let Love Grow.
For the first two projects, I created two wreaths using the flower corner and bough images.
Here’s how the first wreath card came together:
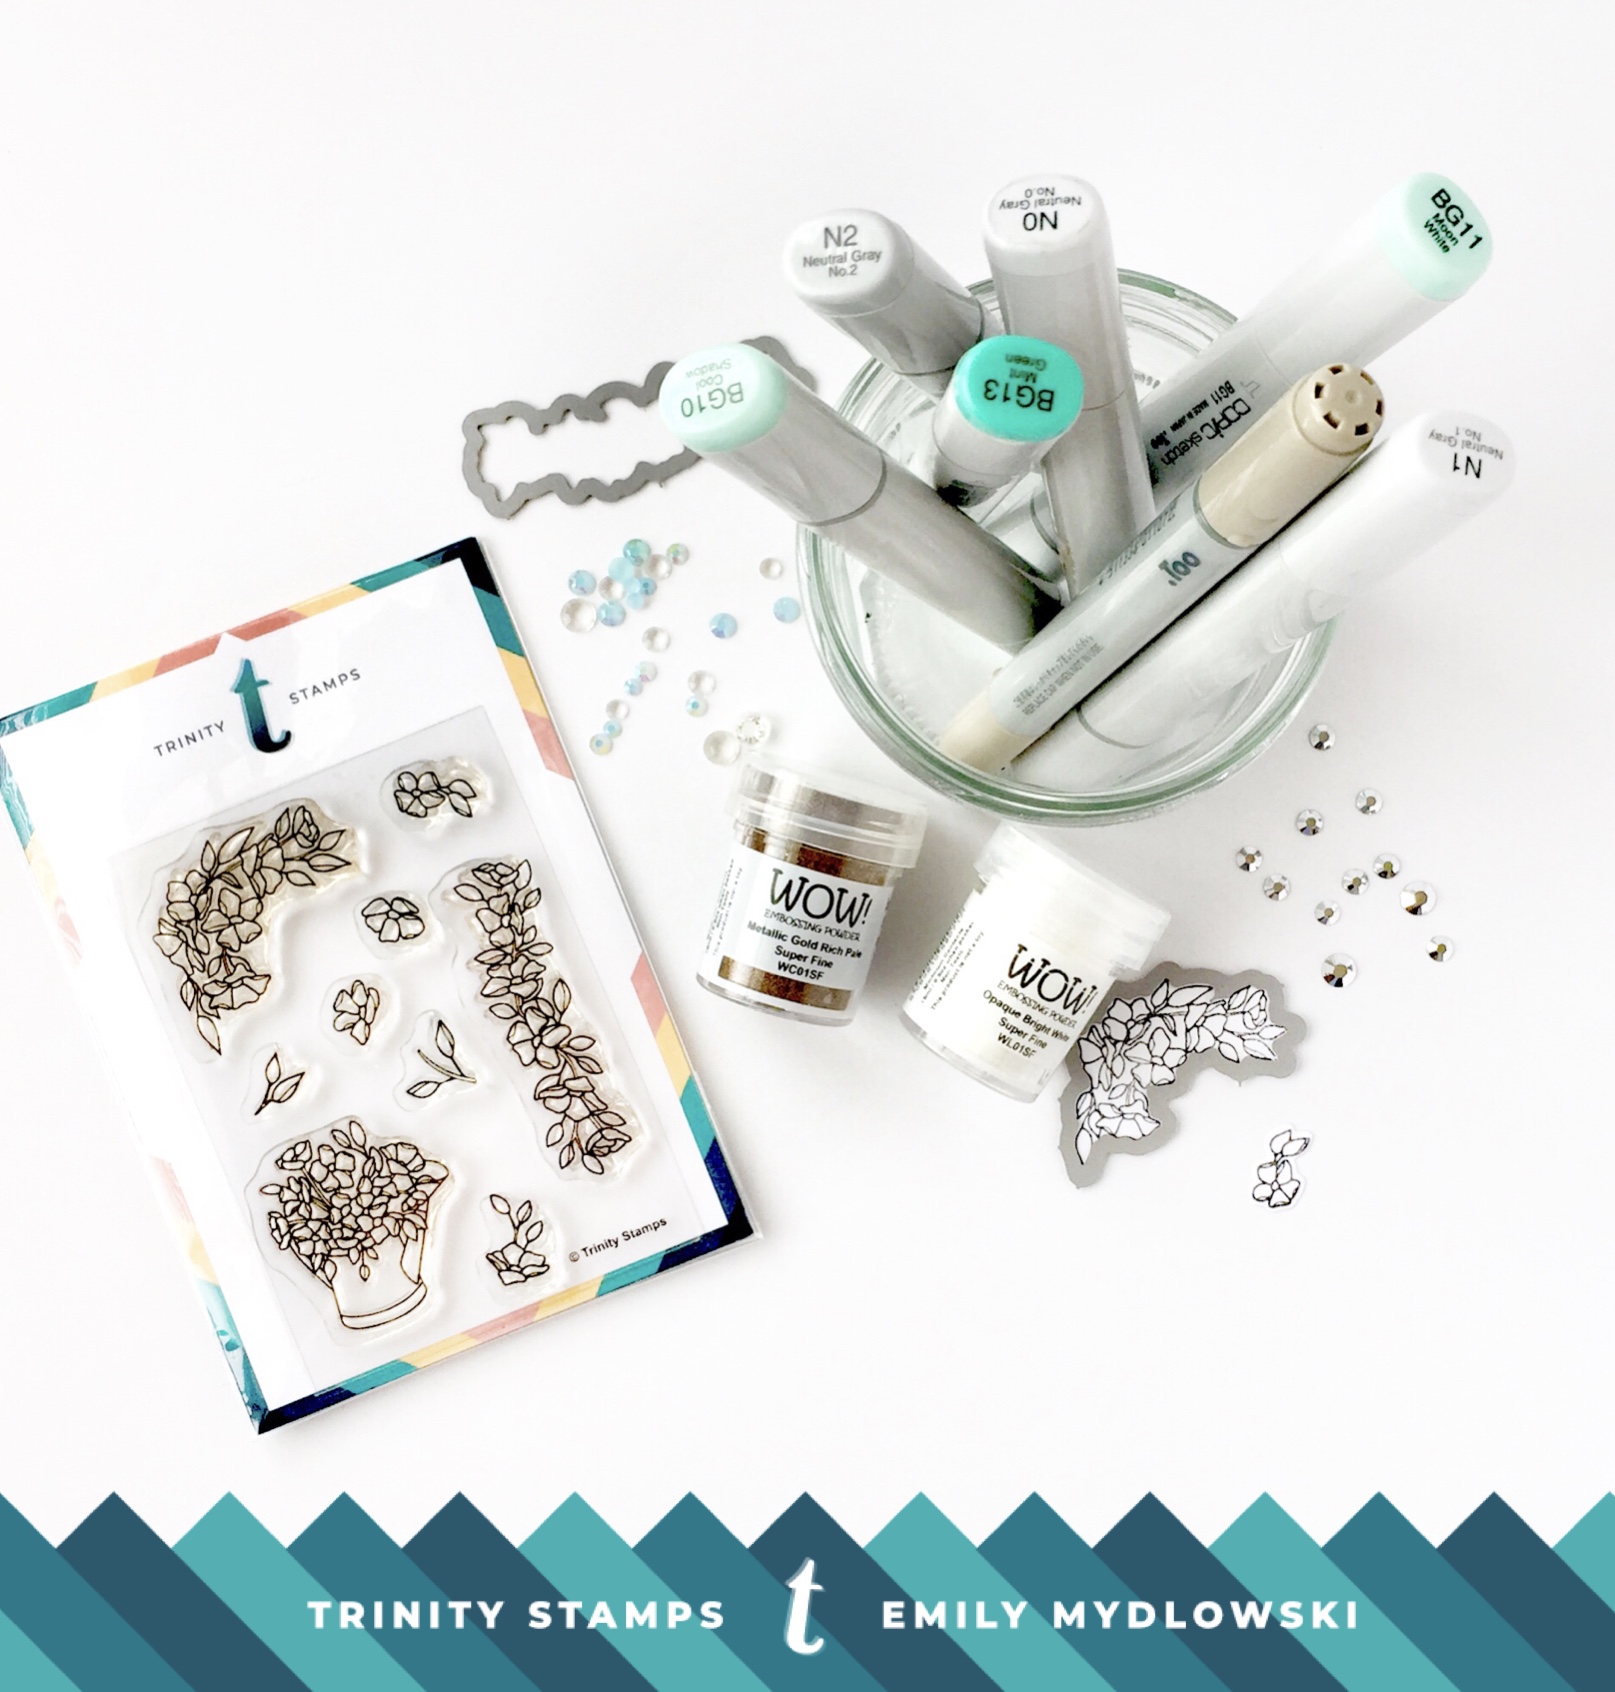
- I die cut and then stamped three corner images. Then Copic colored with aquas and neutral grays.
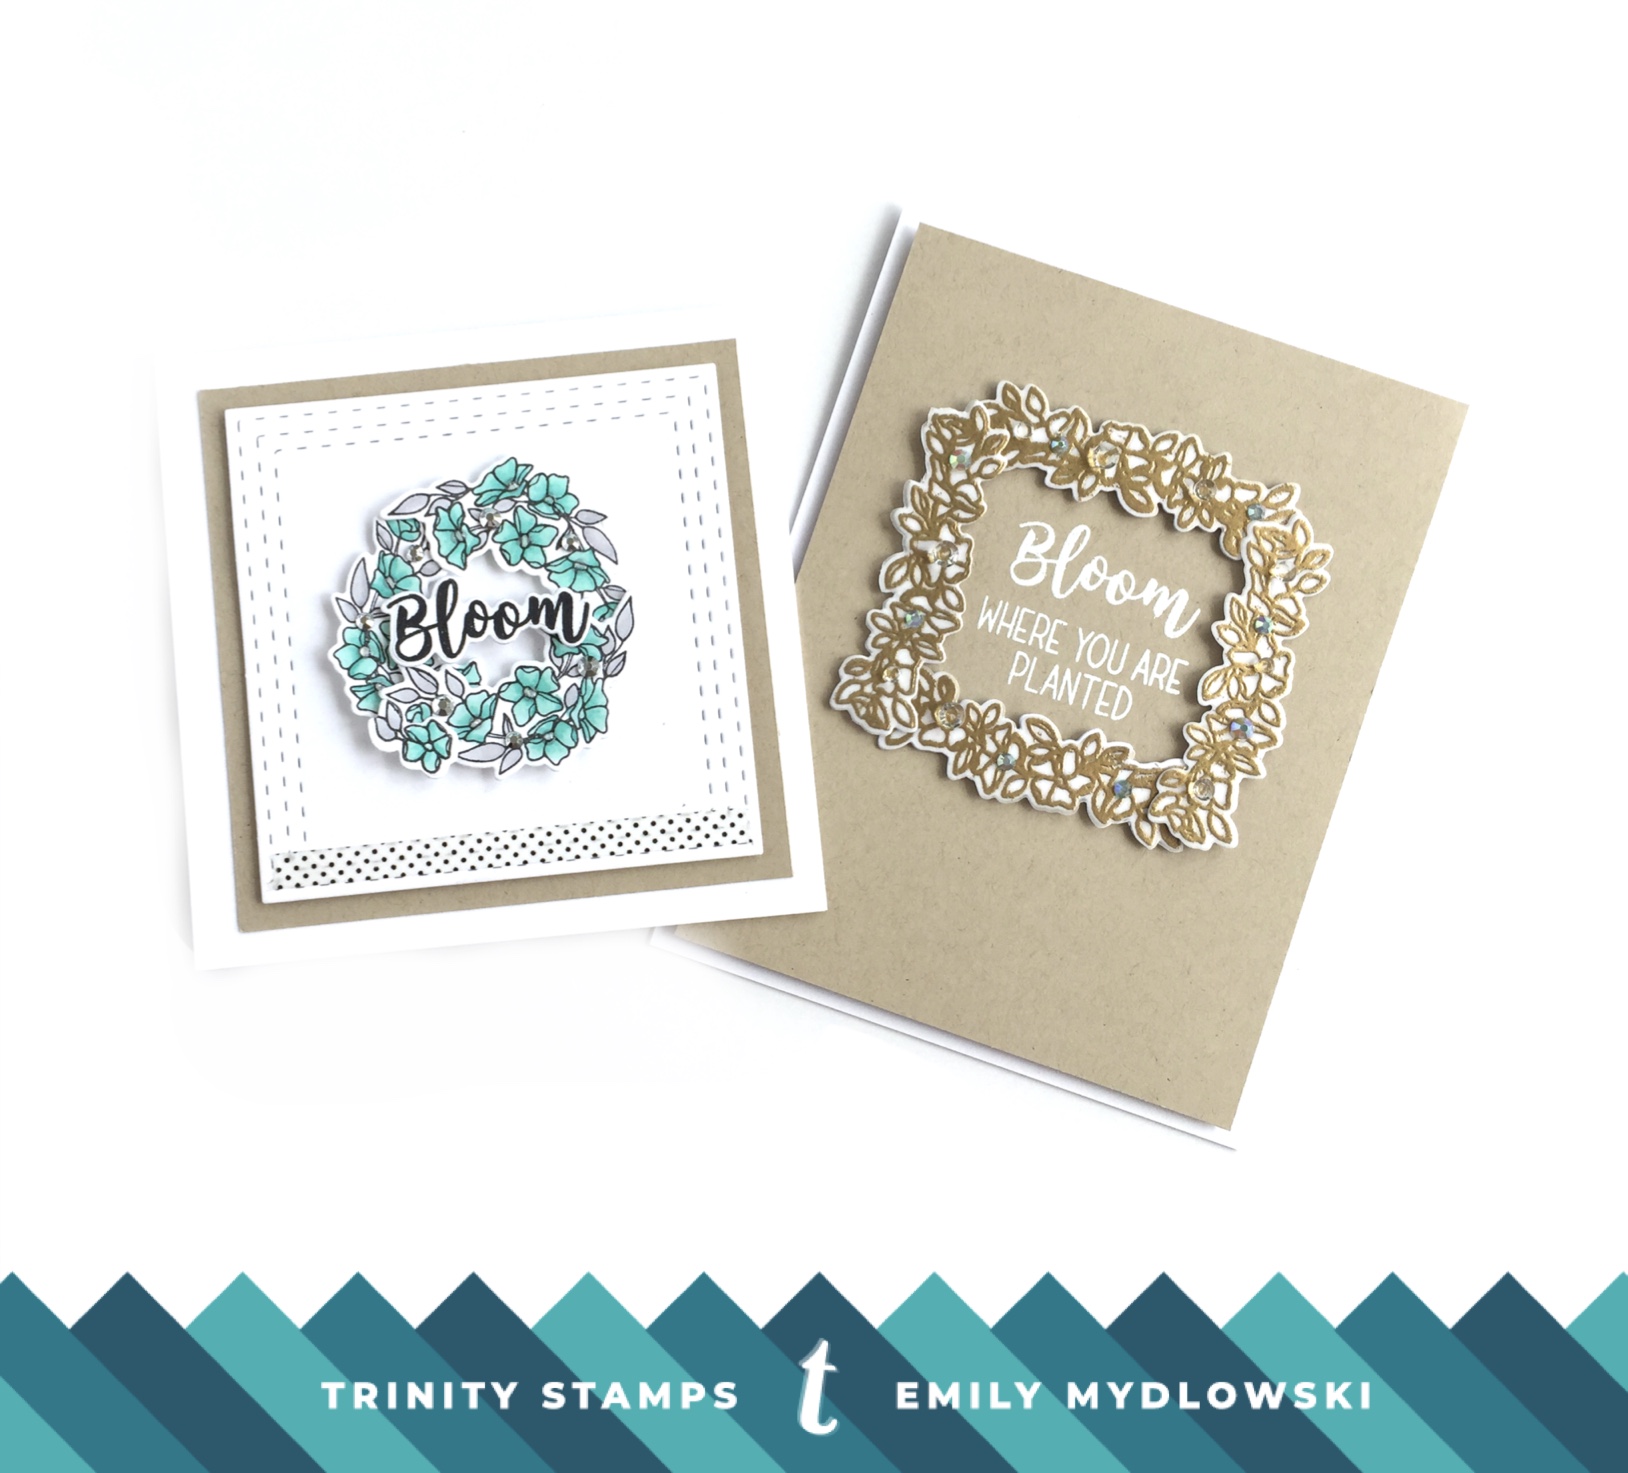
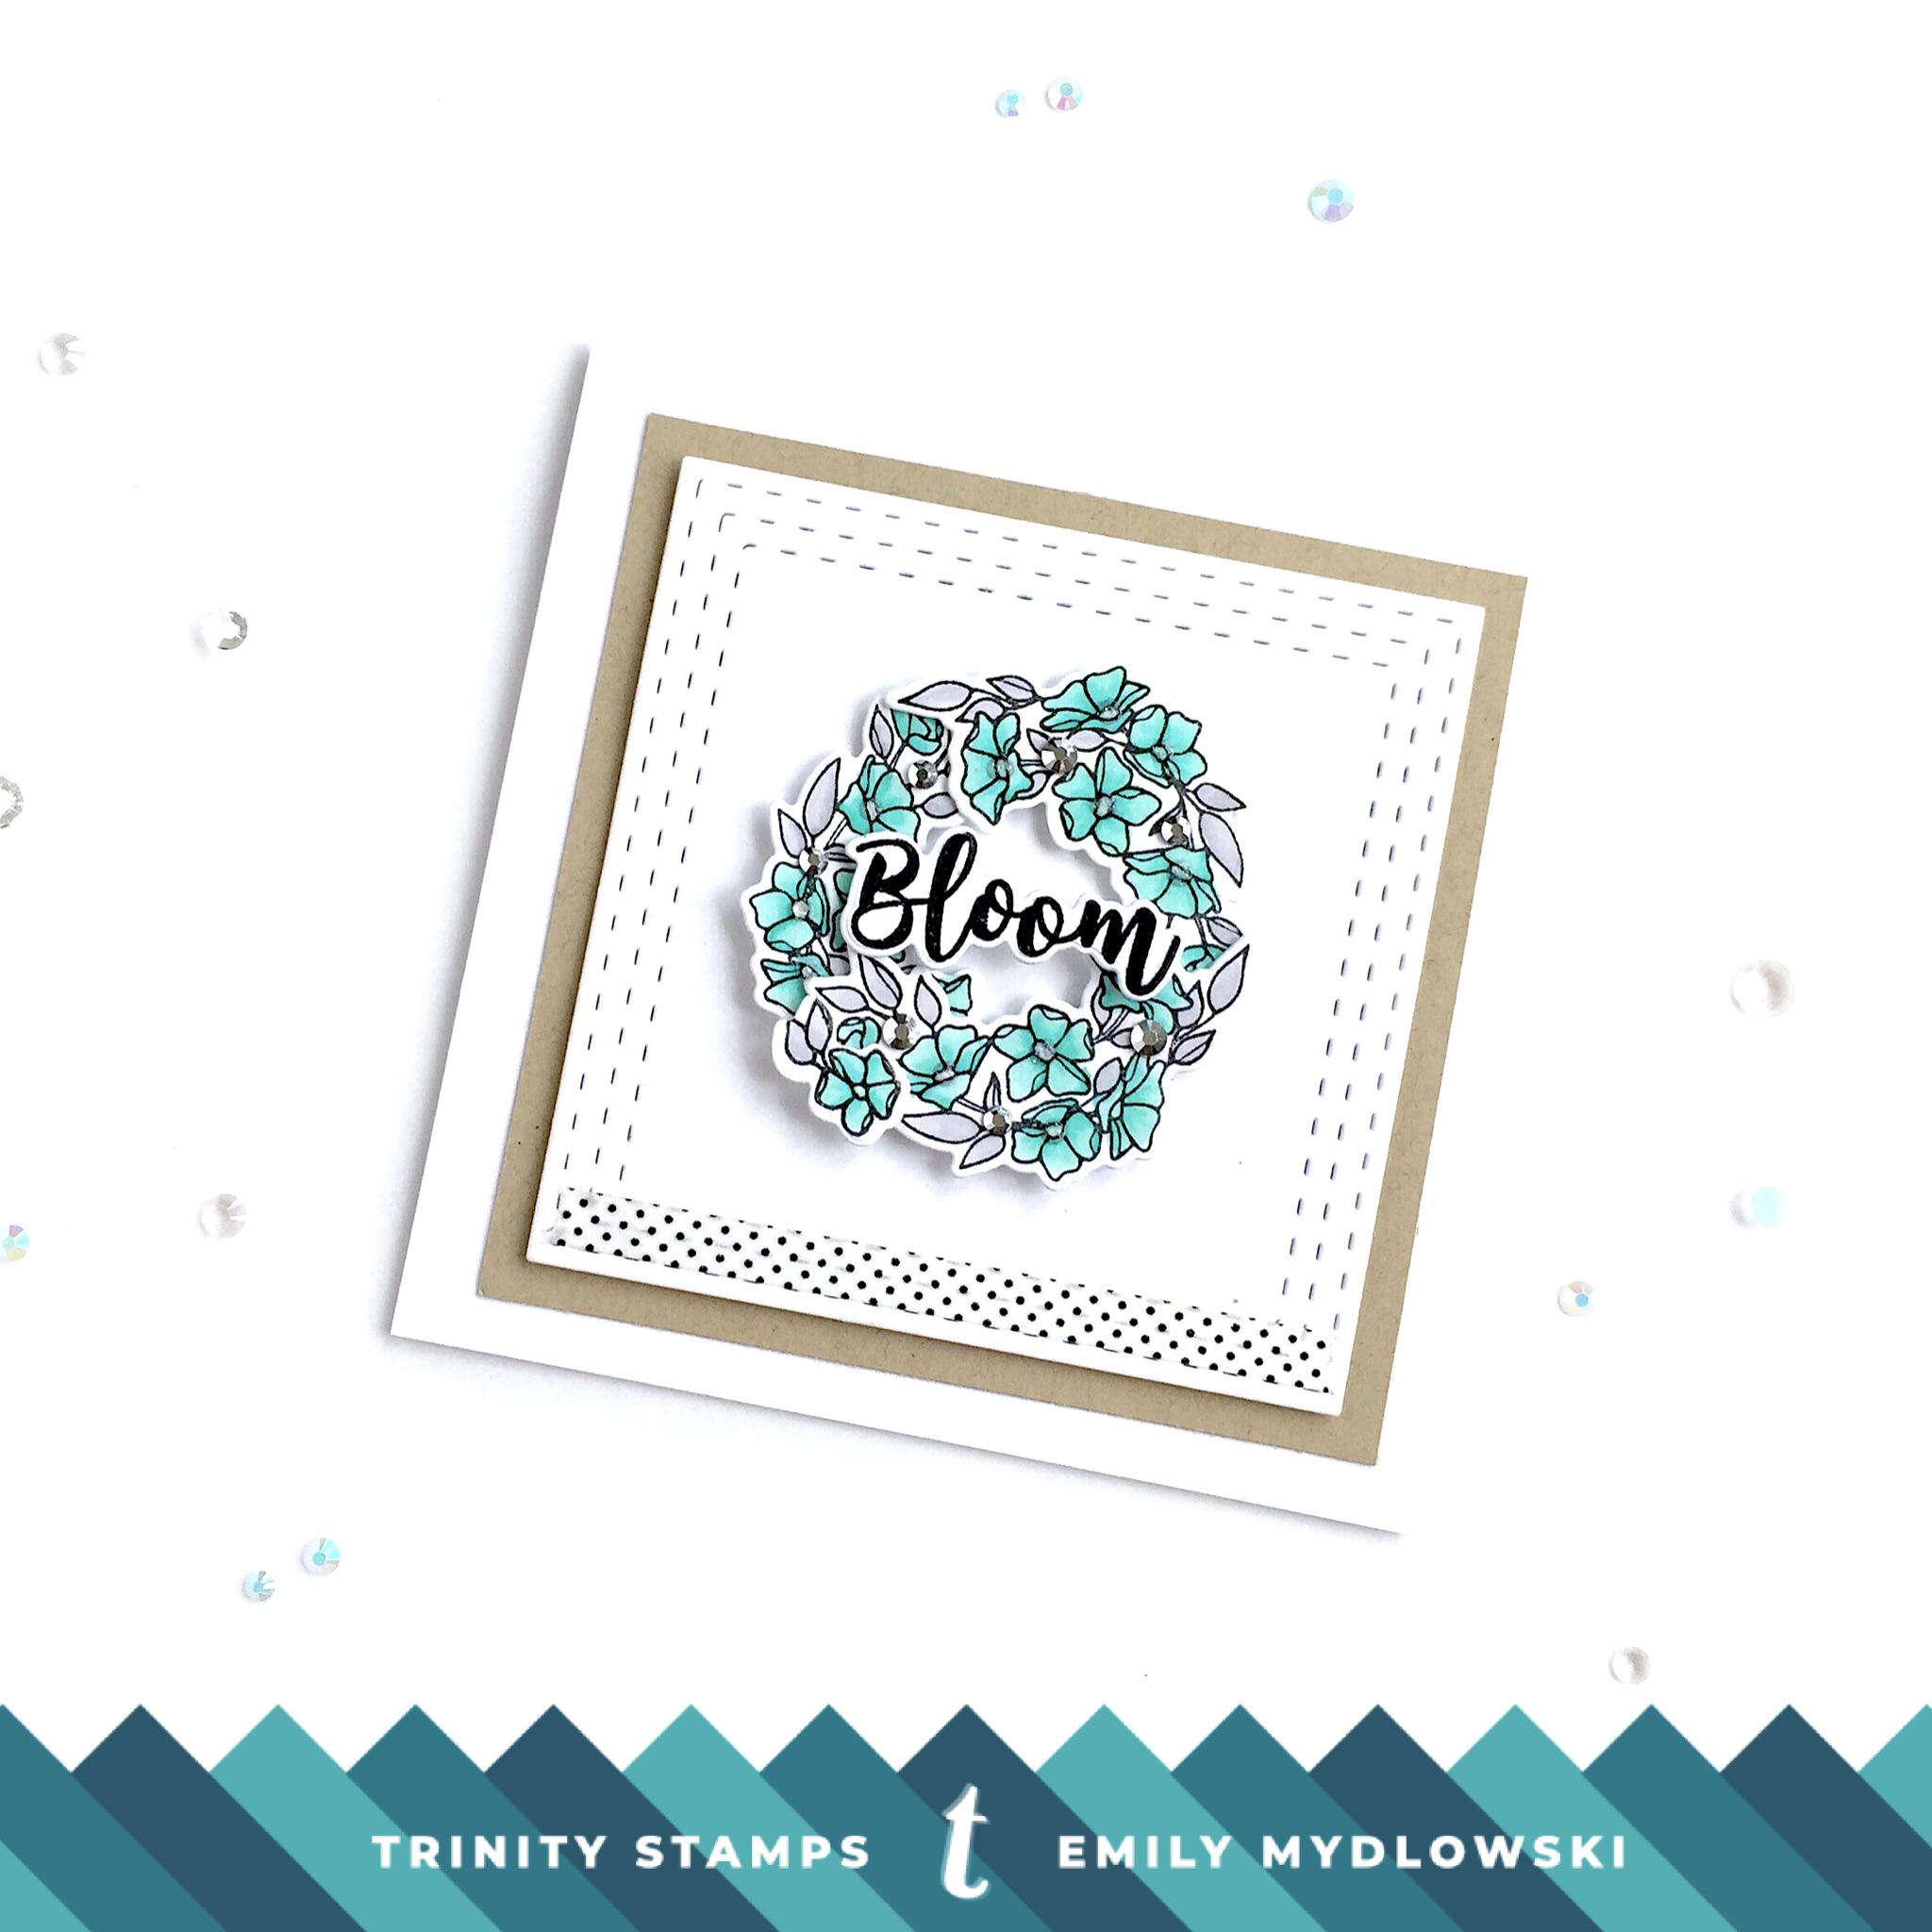
- I assembled the three corner images by adjusting and turning until I had a natural; organic wreath shape (not a perfect circle) that I was happy with.
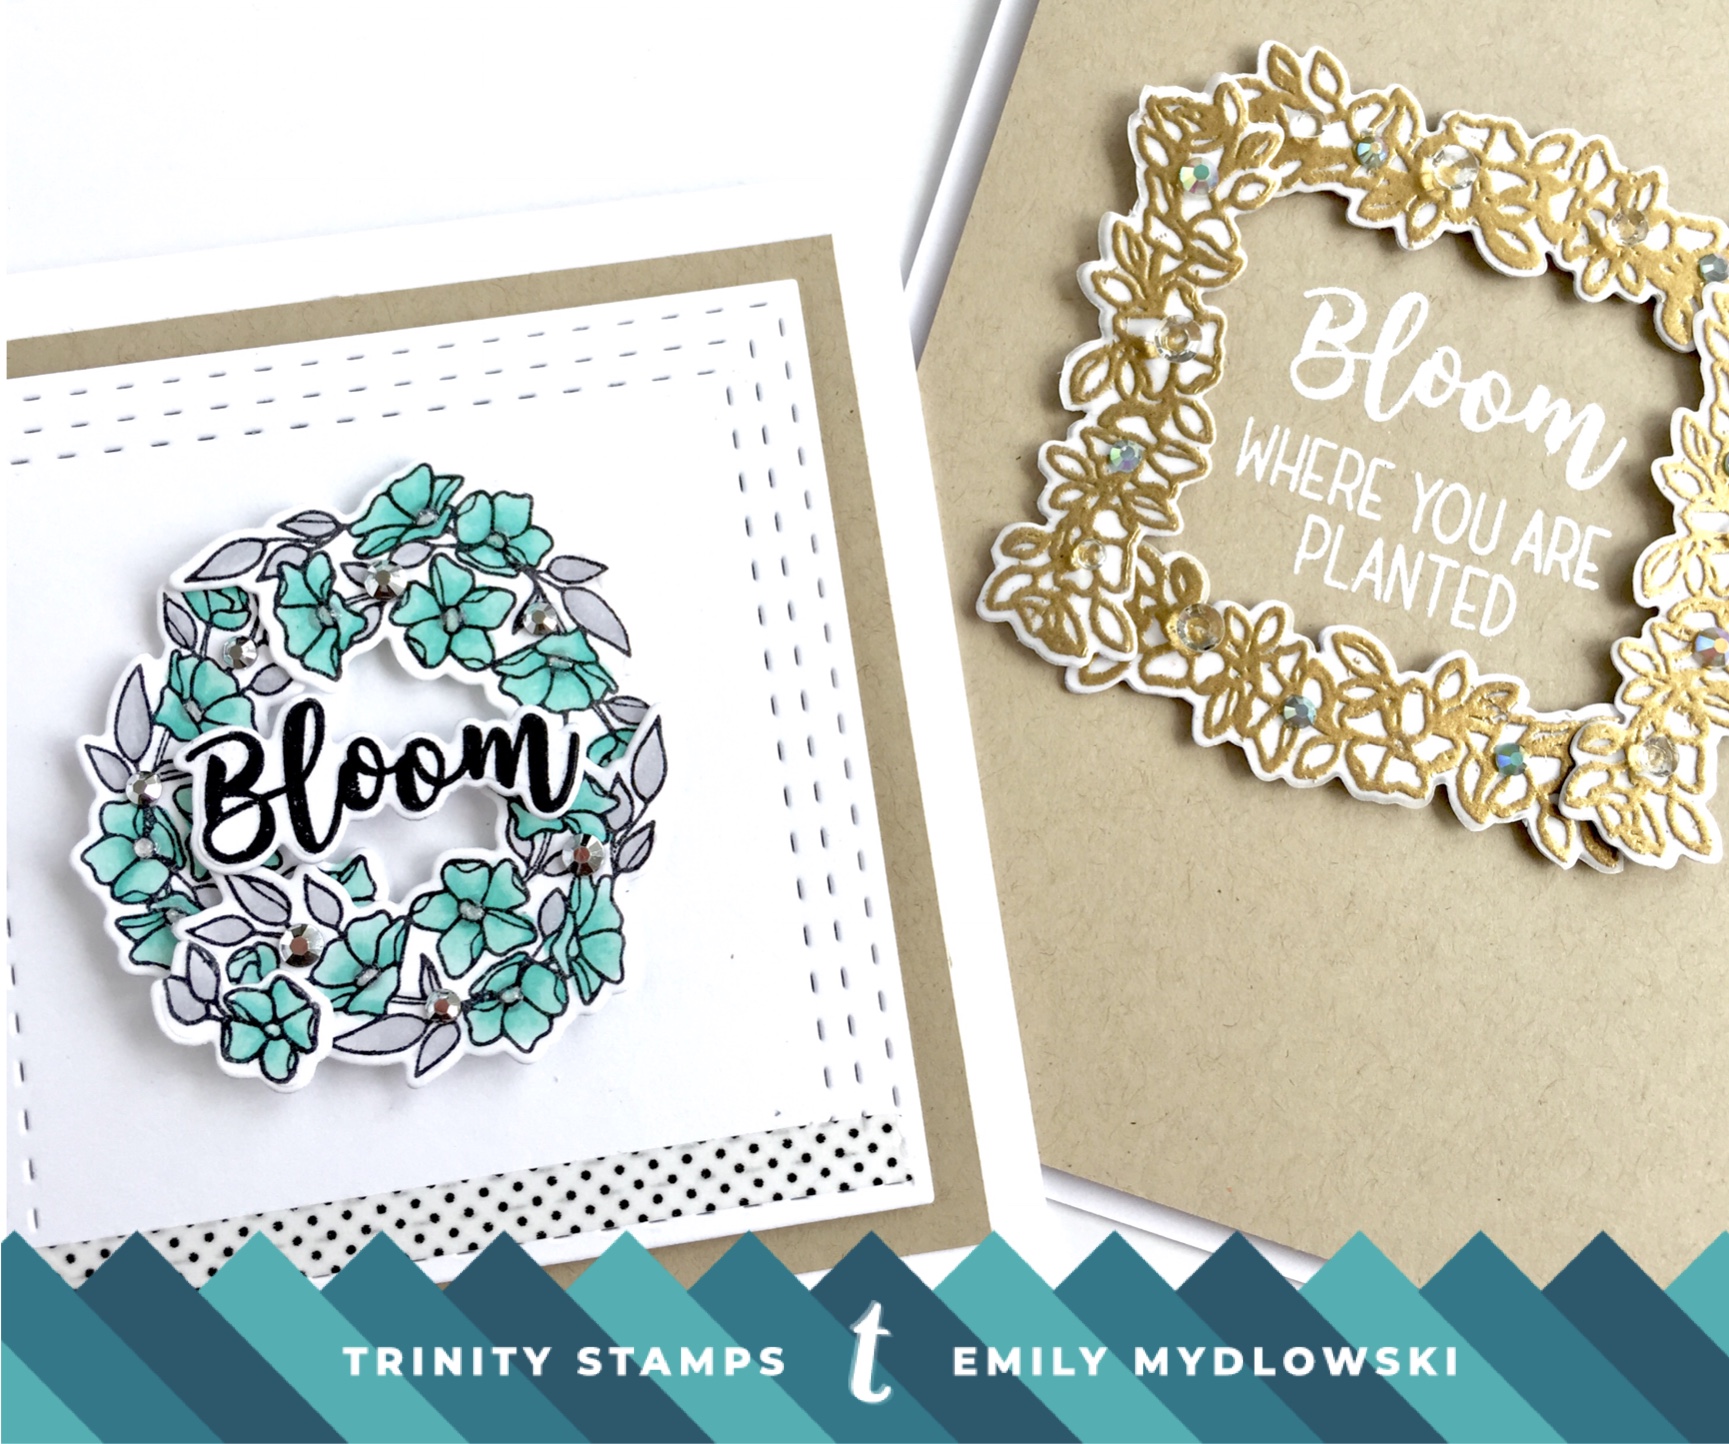
- Because I can never end a card without some extra pop; I added some jewels and Nuvo drops to the wreath. I adhered the wreath image to a 4×4 layered & stacked base and added some skinny b/w washi.
For the second wreath, I created a square wreath to frame the sentiment.
- I stamped four flower bough images on vellum, covered it with Wow, Super Fine Rich Gold embossing powder and heat set the image.
- I die cut the vellum embossed images and also four die cuts on white card stock.
- Using teeny-tiny dots of Nuvo Glue, I adhered the vellum pieces to the white card stock die cuts. I love the look of vellum images on white card stock…it gives the images some extra dimension while creating a softness to the card.
- I embossed the sentiment to Kraft card stock, assembled the Wreath Frame around the sentiment and added some jewels for extra pop.
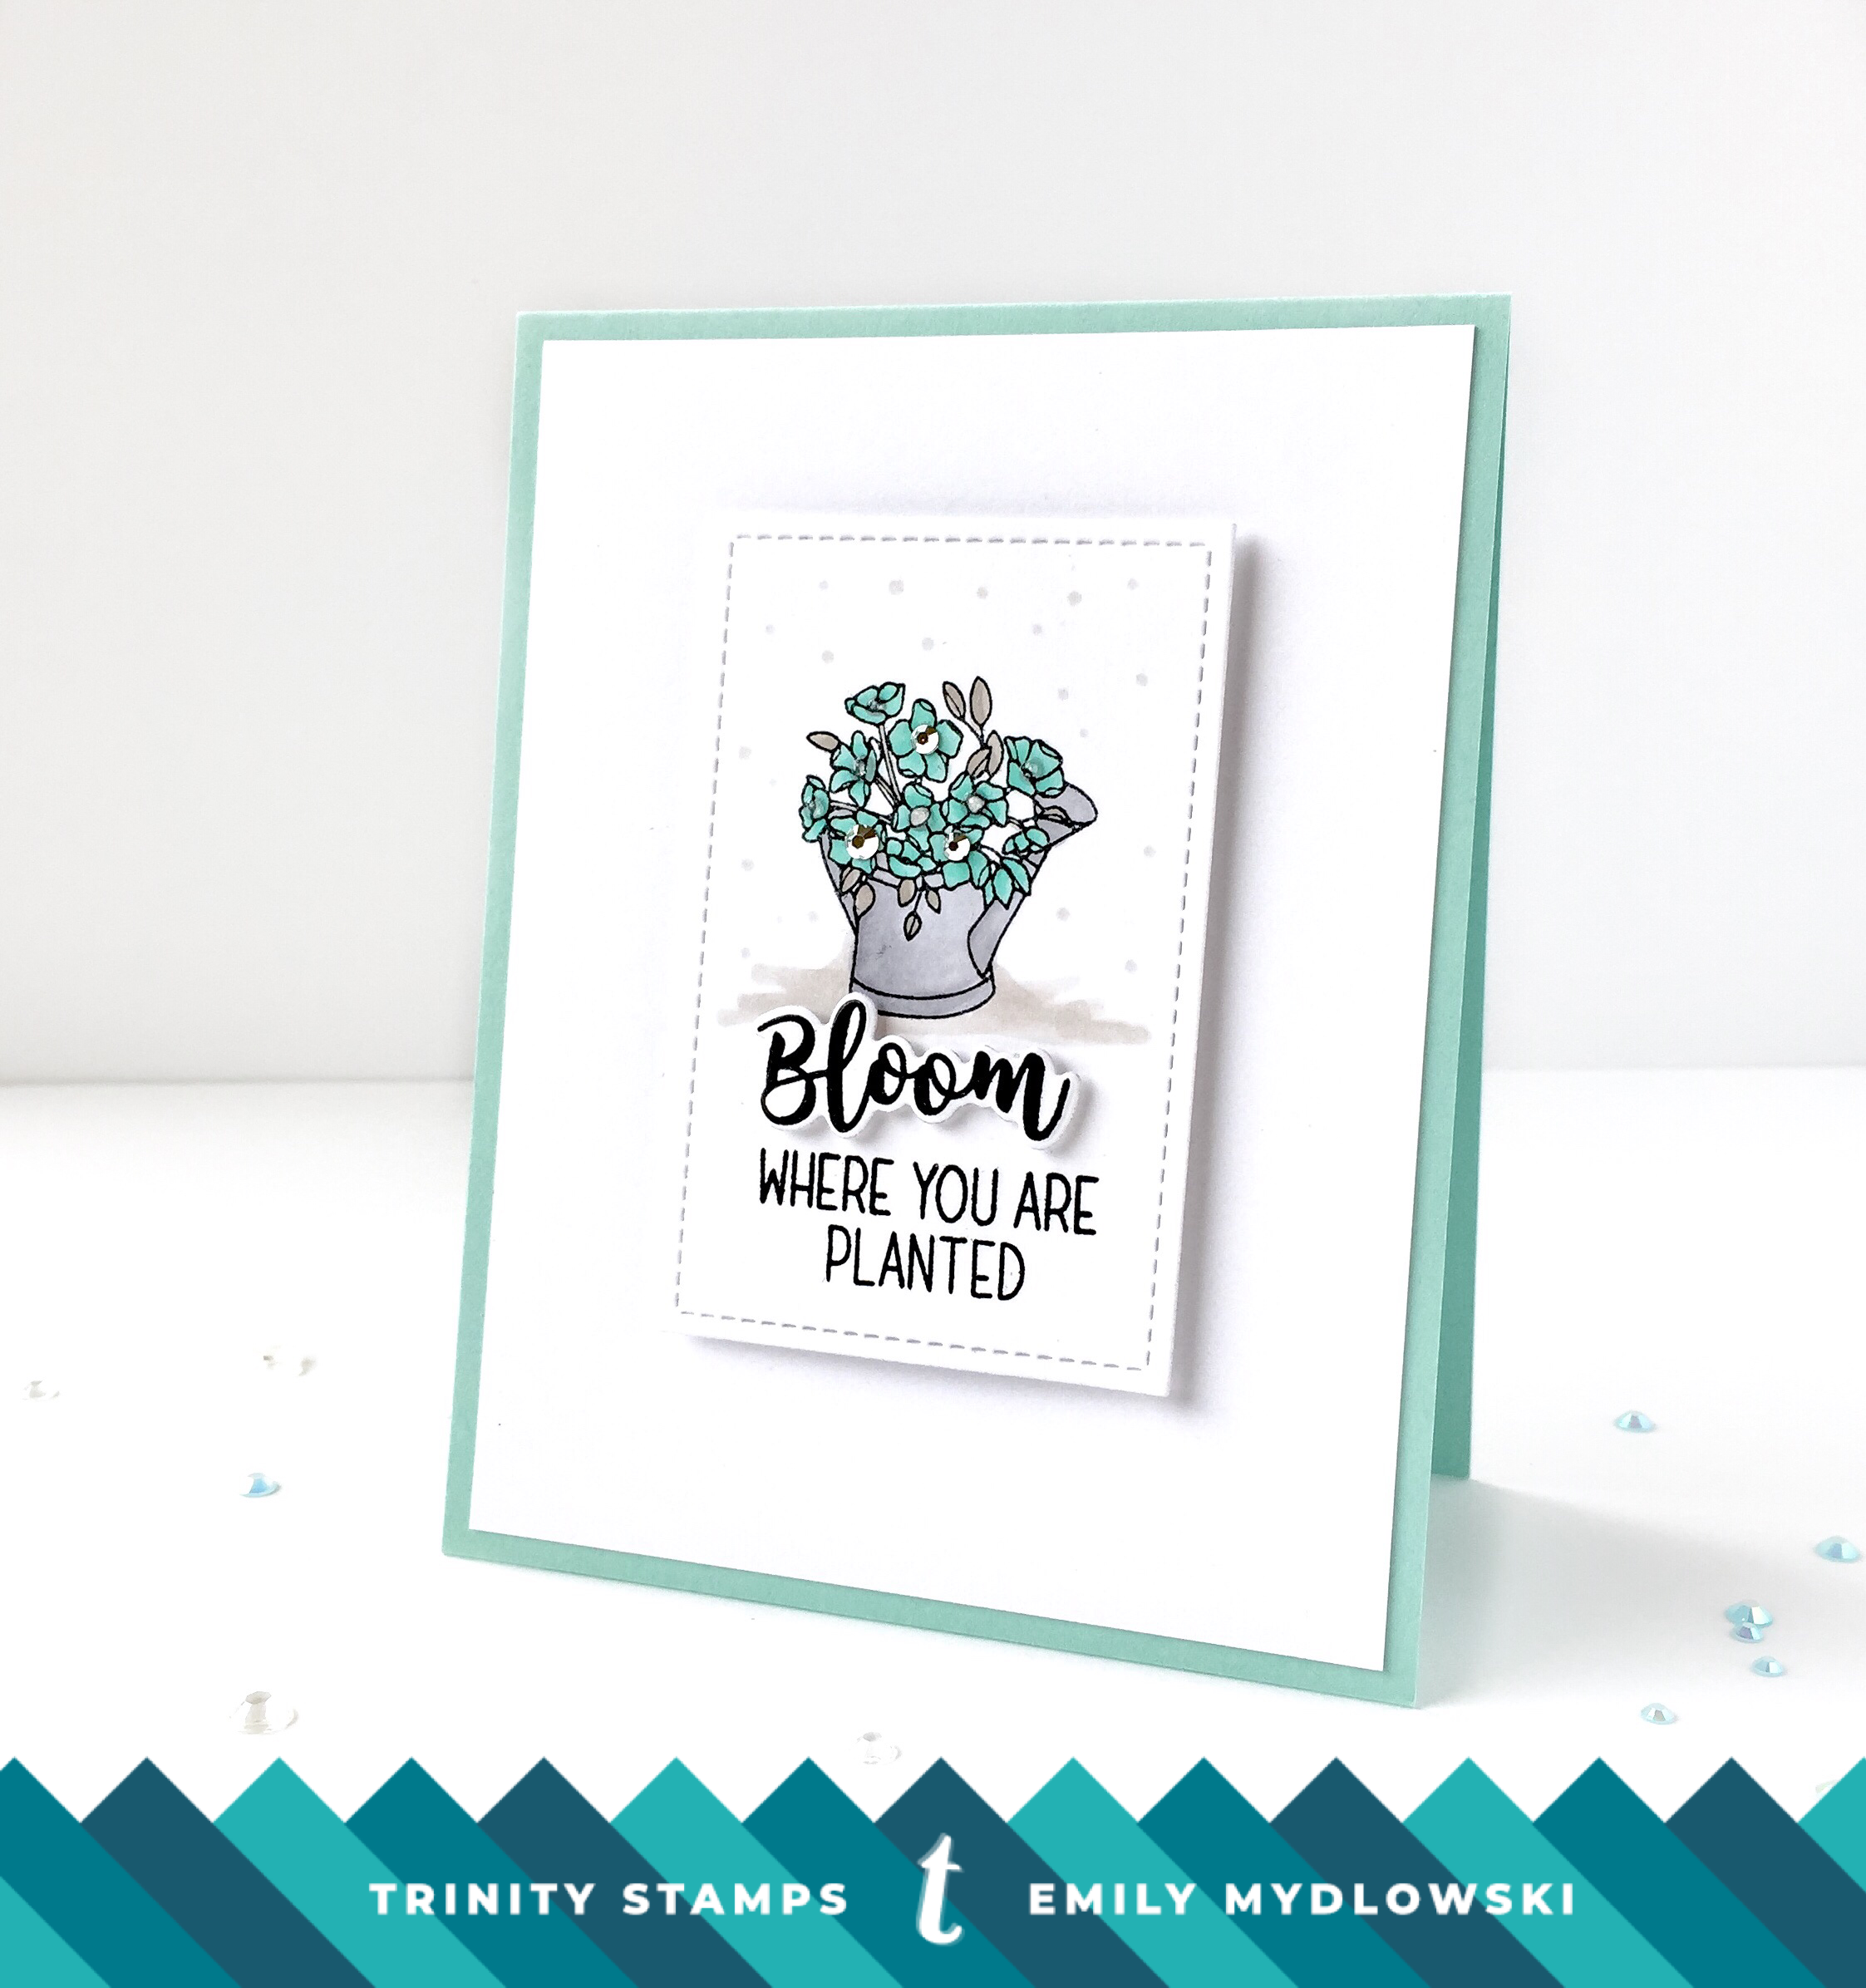
For the last project, I used the beautiful flowering can as the focal point to create a CAS card.
- I stamped the image to a stitched rectangle.
- Copic colored with aquas, natural grays and added some Warm Gray (W3) dots to bring in the Kraft color.
- Added some jewels to the flowers, adhered the image with pop dots and assembled to an aqua card base.
So there you have it, three projects with the small but versatile Hopeful Flowers set (with some help from Let Love Grow).
Hope you enjoy and Big Paper Hugs!
Emily


All of them are lovely!