
Walkman Giftcard Holder Tutorial
Happy Friday! Katie here with a fun throwback project. Get out your mixed tapes, because it is time to make a WALKMAN!
If you don’t know what a walkman is… stop reading… I can’t talk to you anymore. 😉
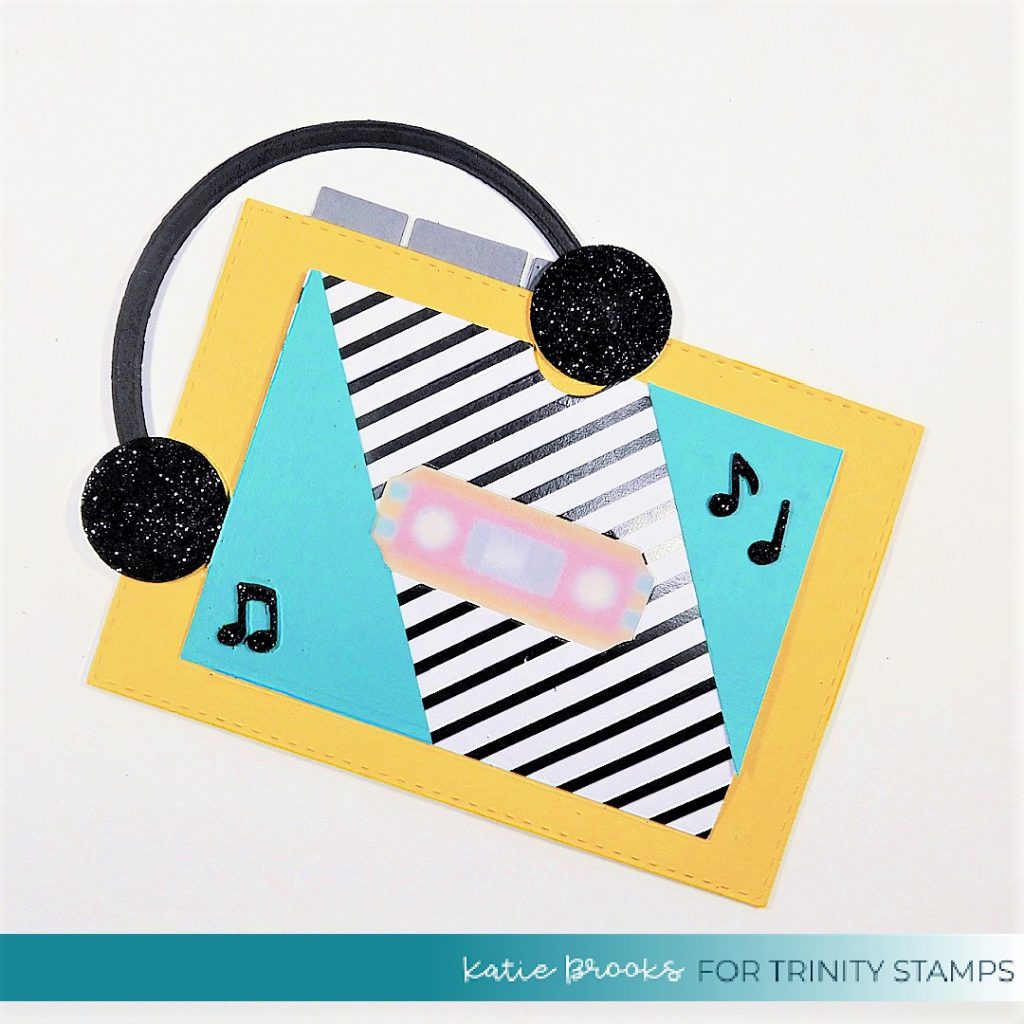
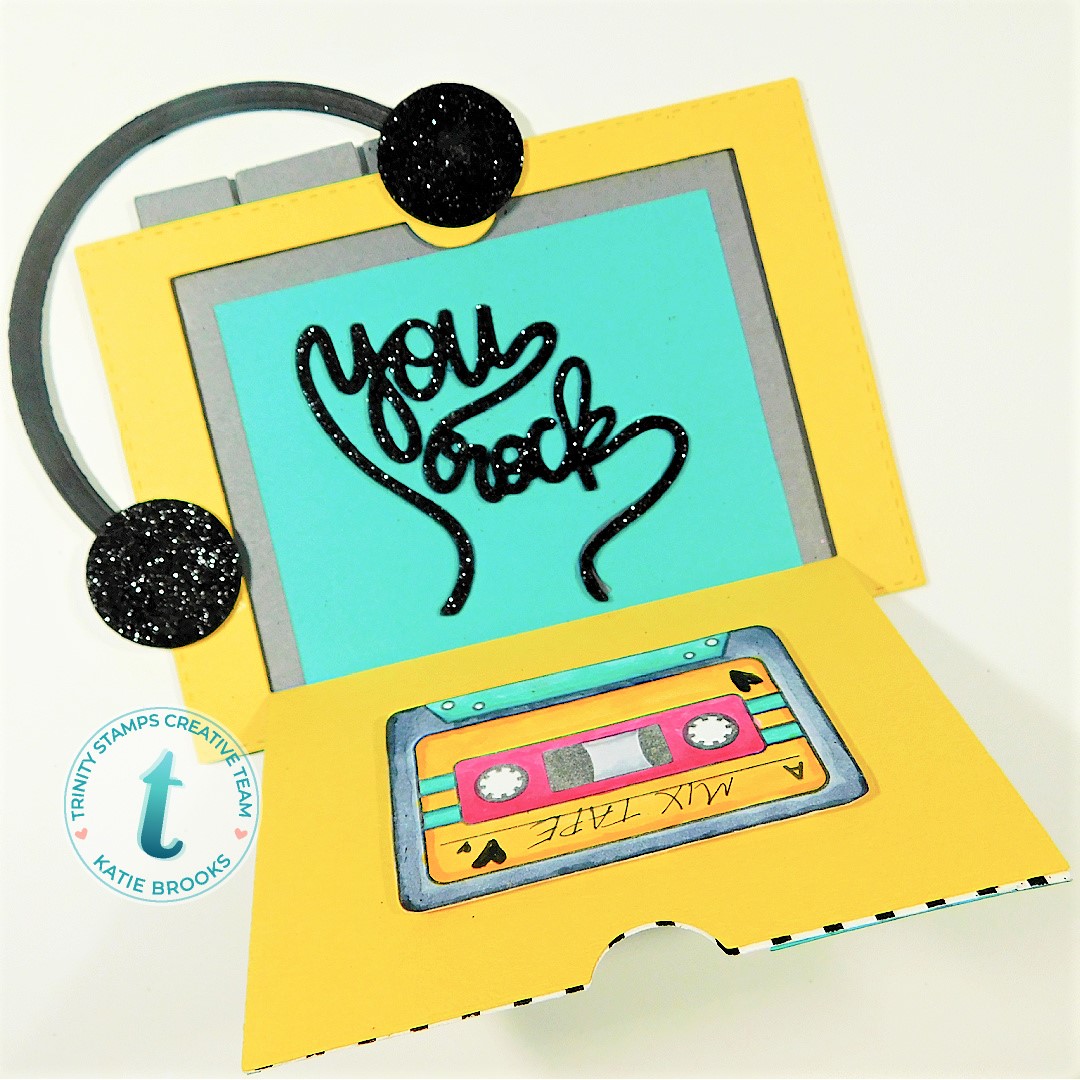
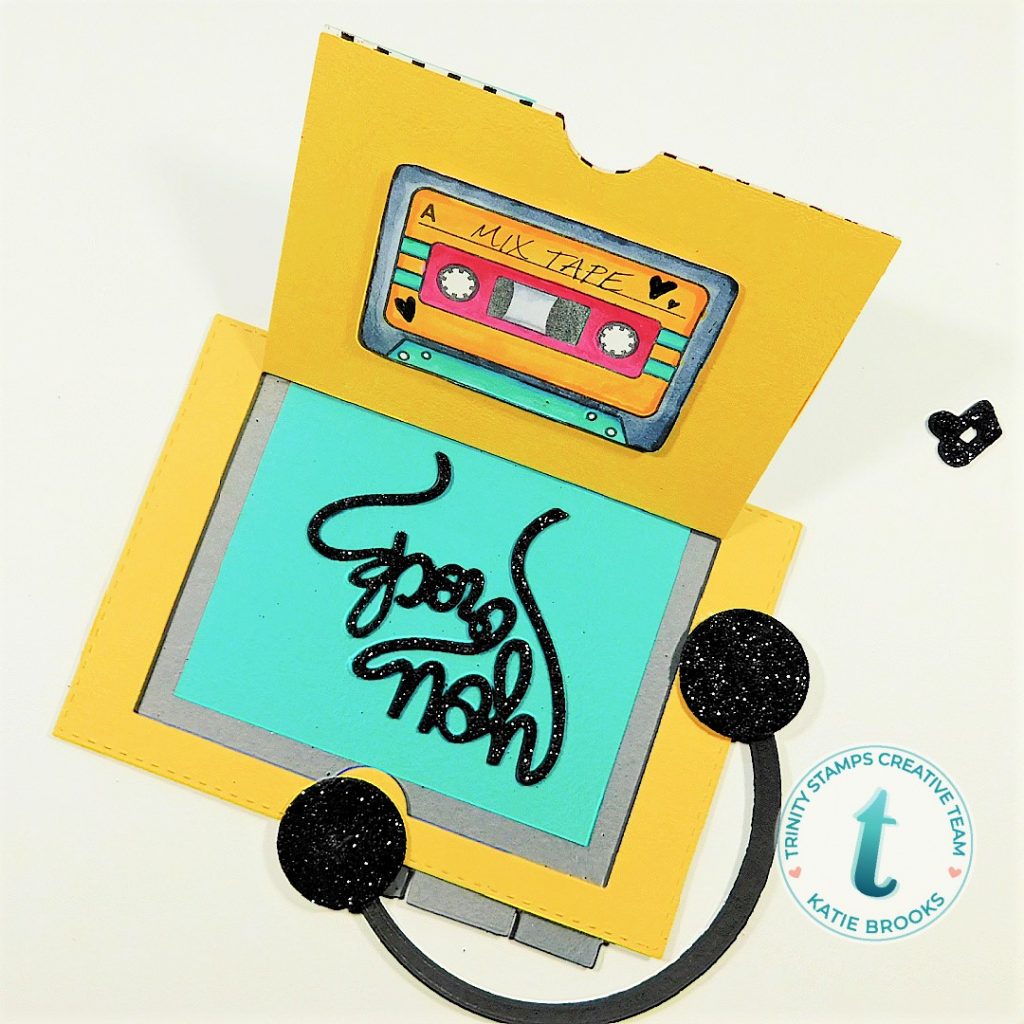
Here is the front of the Walkman, complete with the 80’s vibe! Can you see the tape through the window? Pretty radical! I am pretty sure my husband had one just like this (he told me his was yellow) so this is for him. This is really a fun card with a message inside an room for a gift card. You open up the flap and POW!

I do love the glitter foam, but it messes with my eyes a teensy bit. #oldladyeyes
OK, enough jokes, here is how I made this:
1. I started by stamping out 2 tapes from the from You Rock Stamp Set on Copic friendly paper and coloring it with my Copics (BG49, BG13, Y35, Y38, C7, C5, C3, C1, RV17, RV09). I could have used the die to cut it out but simply used my snips and mounted them back to back.
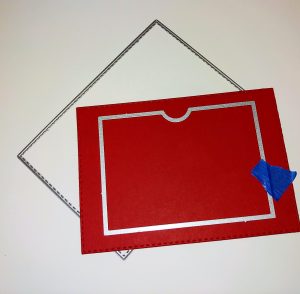
2. Next, I used my the 4 Bar Die with yellow cardstock to make the front of the Walkman (see red picture below, I started with red and changed my mind). Then I used the Lift the Flap Die set to create the tape deck opening.
3. I used the Lift the Flap again to cut out the DP from the Black and White Patterned paper to go over the opening.
4. Then I used the label from the 4 Bar set to create the window for the tape to peek through.
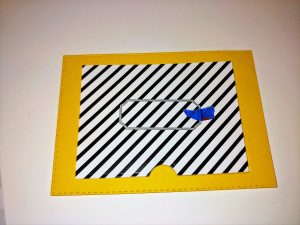
5. Once cut out, I put vellum between the yellow and DP layer like a tape deck window would be.
6. Next, I added my tape to the show through the window. I embellished the front of the walkman with some blue CS, simply cut at angles to give that 80’s feel and some music notes using the You Rock Die set and sparkly black foam.
7. Next, I created a back layer using some grey cardstock and the 4 Bar Die from before. I mounted the front on the back using foam tape so there was plenty of space between the layers.
8. I die cut the You Rock sentiment in both black foam and in a bit of blue cardstock. I placed it inside, opposite my mixed tape, using both so the message would pop when you open it. There is room in here for a gift card.
9. Finally, I added some tape deck buttons, simply cut out in grey cardstock between the layers. Then for the last touch, I added some headphones using the Embossed Edge circle stack die in black for the portion that goes over the head and smaller circles in black sparkly foam for the ear pads.
That’s all folks, I really hope you like it. I had a ton of fun making it and can’t wait to put an iTunes gift card inside and give it to someone who is radical!
Enjoy your Friday! ~Katie


Fantastic! I saw this on IG the other day and it made me think of fond memories! All kinds of great music that you really had to research and what tapes to buy to play! And hope someone else bought the ones you could not afford! Great card and super enjoyed the post!