
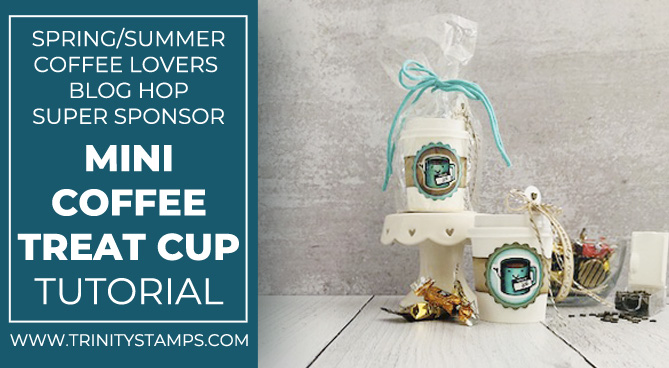
Spring/Summer Coffee Lovers Blog Hop
If you are looking for our NEW RELEASE Blog Hop Post you can find that by clicking HERE
Hi Friends!
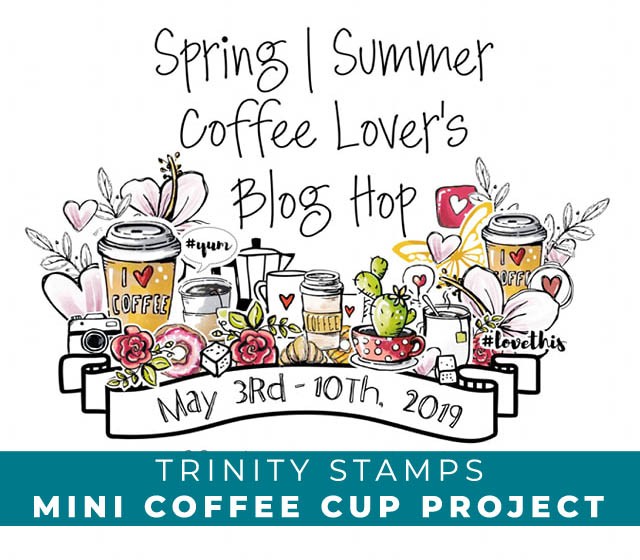
Taniesa here with you today for the Spring/Summer Coffee Lover’s Blog Hop. We are a proud SUPER SPONSOR for the hop and thrilled to be here. AND…If you know me you know that I LOVE coffee, so creating with a coffee theme is always extra fun!
In March, I had the pleasure of attending the Simon Says Create event in Ohio. The project I am sharing with you today was one of our make and takes. It was SUPER popular and there were some how-to questions, so I thought it was fitting that I would post a little tutorial for you today. 🙂
These are the items you will need for today’s project:
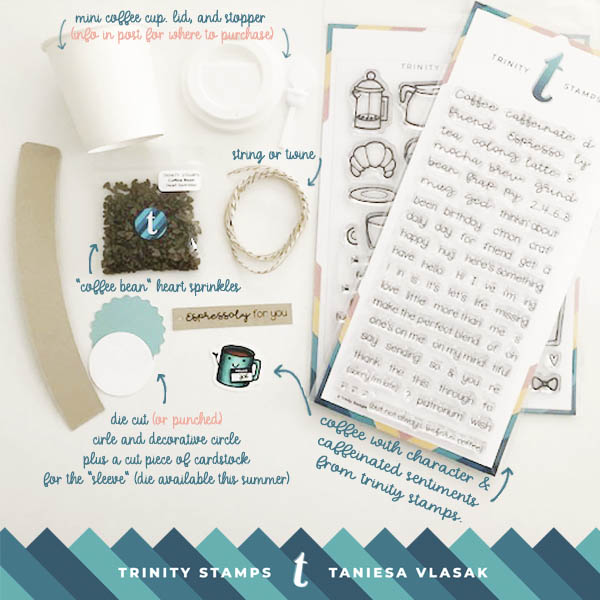
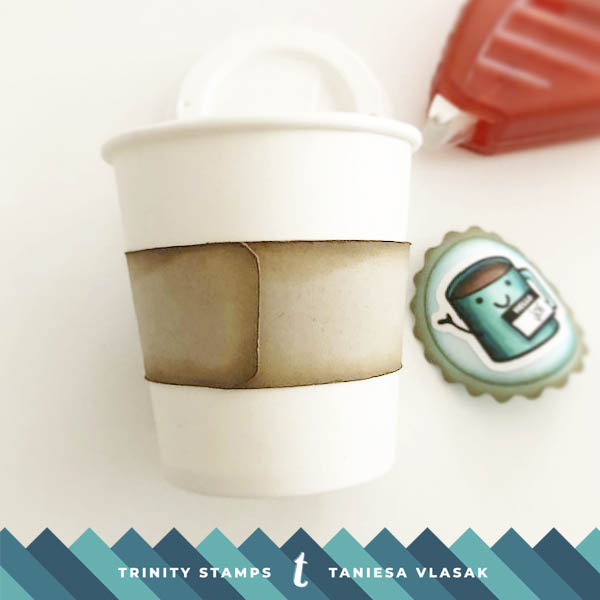
To make this adorable mini coffee cup treat holder you will need: stamps (I used Trinity Stamps Coffee with Character and Caffeinated Sentiments stamp sets), some cardstock circles and a band for the “sleeve” of the cup. We have a die that cuts the perfect size sleeve for this little cup coming soon! You will also need some heart sprinkles (I used the heart sprinkles in “Coffee Bean”) and twine or ribbon. Of course, we can’t forget the mini coffee cup, lid, and stopper (if you click the item name it will take you to the items I purchased on Amazon.)
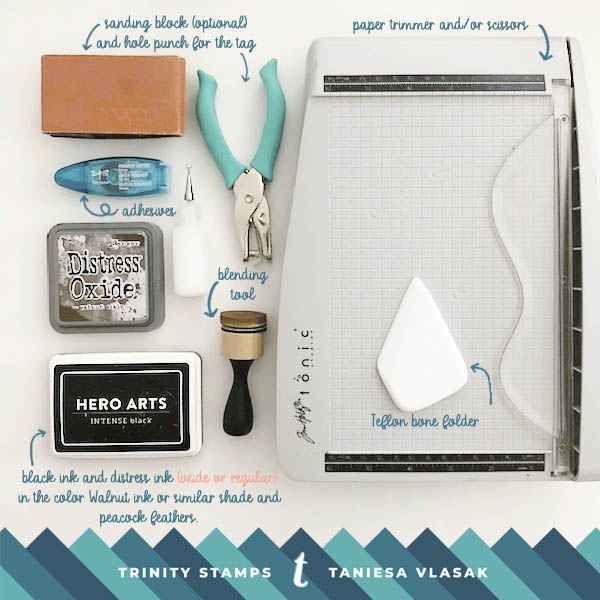
Above are some tools that I used to complete the project. You will want to use the ones that work for your project which may be the same or similar to what is shown.
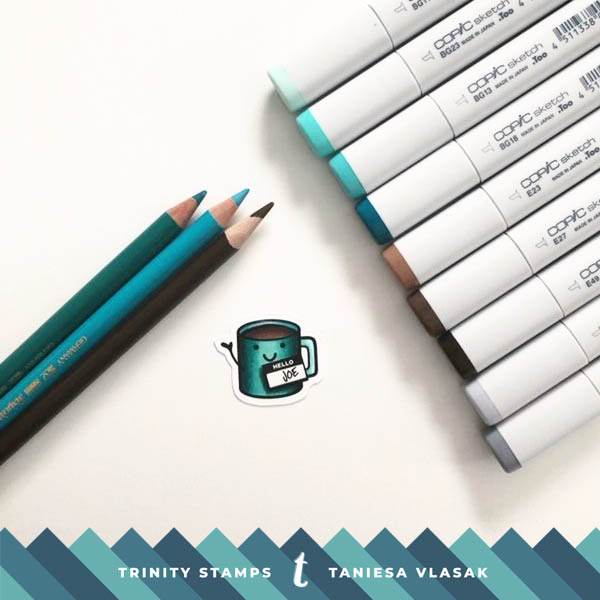
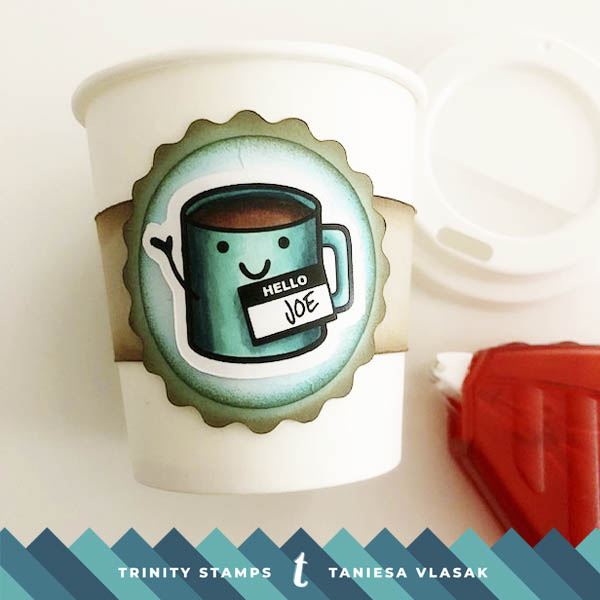
First, I stamped the sentiment tag and our little Mr. Joe coffee character. I colored my cup o’ joe with Copic markers but you could color with whatever medium you choose. I am not the best at Copic coloring… but I am getting better by watching our Design Team member Courtney do her video tutorials! Here is my little tip for helping with blends that are not quite right…. when I am done with my Copic coloring I take some colored pencils and lightly color in between the different colors. It definitely helps your blends that are not transitioning the way you like.
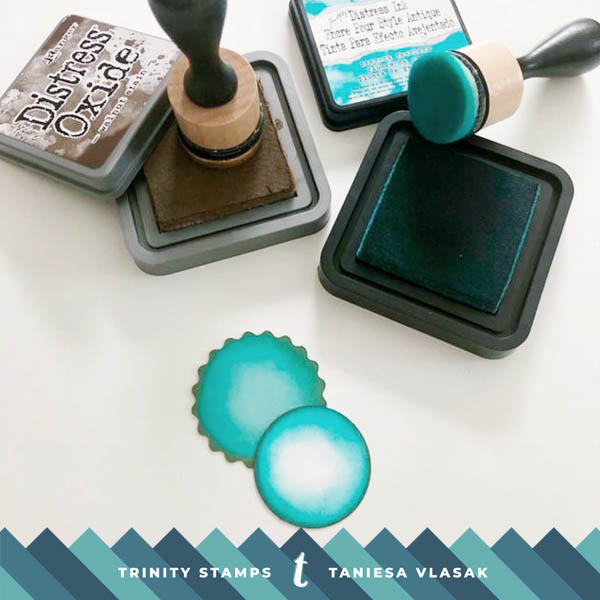
Next, you will can add some ink blending to your pieces. You don’t have to do this step but it does tie in all of your pieces together nicely. First, I blended the Peacock Feathers distress ink and then I lightly brushed Walnut Stain Distress Oxide ink around the edges. It is a combo that I didn’t think I would enjoy. bit I actually love how it came together.
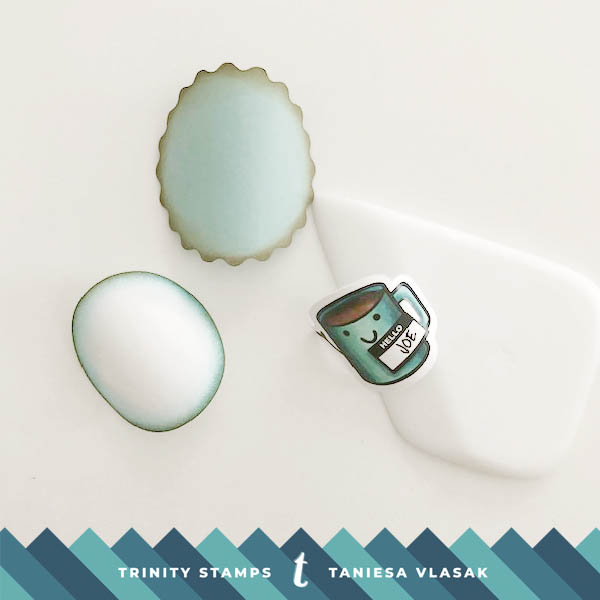
Now, this might seem silly at first, but I want you to take all of your paper pieces (including the sleeve strip) and curl them. You can do this on the edge of a table or you could use your bone folder. This step is important if you want your little circle to stay around the curve of your cup. If you do not do this step the ends can pop up. This isn’t necessarily a bad look, it is just a point of preference.

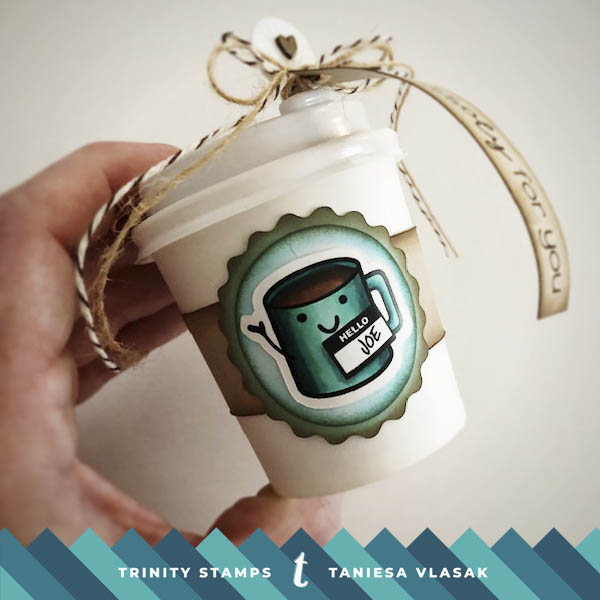
Once all of your pieces are curled like the image above, you want to glue the center pieces together (two circle pieces and your Coffee Character) and set it to the side along with your little sentiment strip tag.
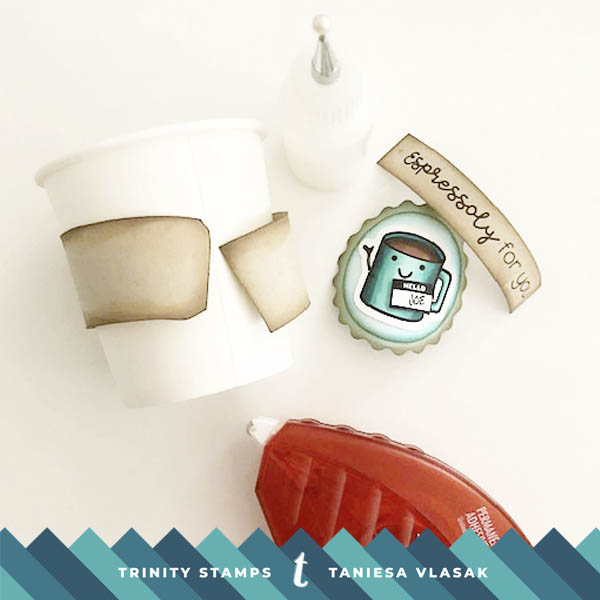
Take your sleeve and with the arch facing you like a rainbow arch, wrap it around your cup. You can choose to have the ends meet at the seam or backside of the cup or on the front side where you will place your circle focus piece, whatever you prefer. I decided to place my circle over the sleeve seam so I glued the edges to the front side of the cup. I glued my sleeve on with Tombow Xtreme adhesive. but liquid glue does give you a little wiggle room if you don’t get it quite right. Once the sleeve is in place you want to adhere your character circle stack to the opposite side of the cup seam/backside.
It’s all coming together, just a few more steps, including the all important CANDY step! LOL!
Now that we have the cup complete lets work on the top portion…. The stopper and lid!
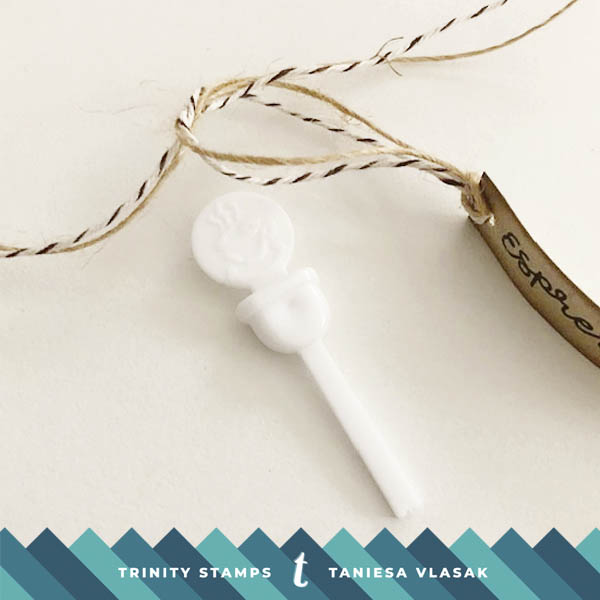
You want to punch a small hole in your sentiment strip tag and loop your twine/string through. Then start to tie a loop before you place it over the cup stopper… then slip it over and tighten. Tie a bow and trim off the excess.
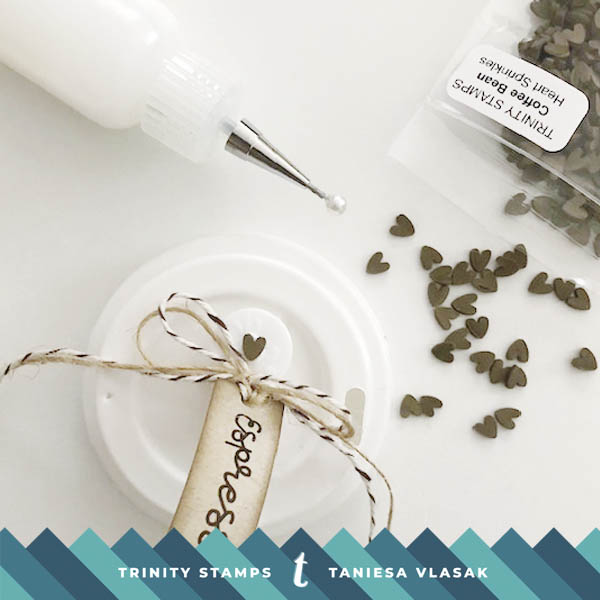
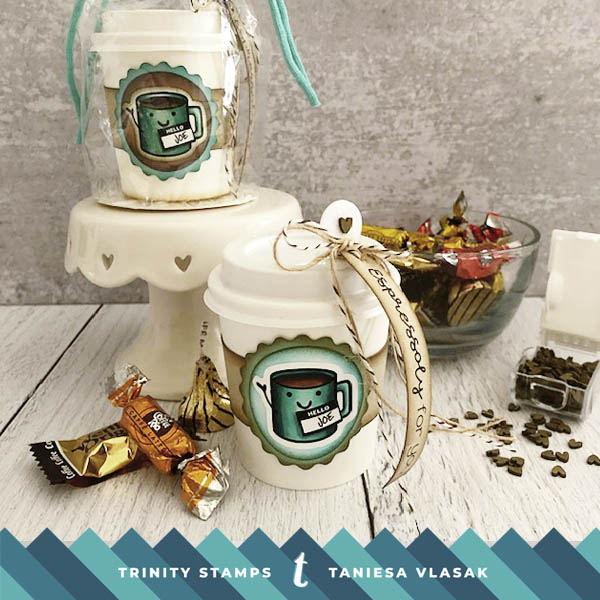
Glue a heart sprinkle on either side of your stopper stick. Glossy accents or any other strong adhesive works best as it is not gluing to a flat surface.
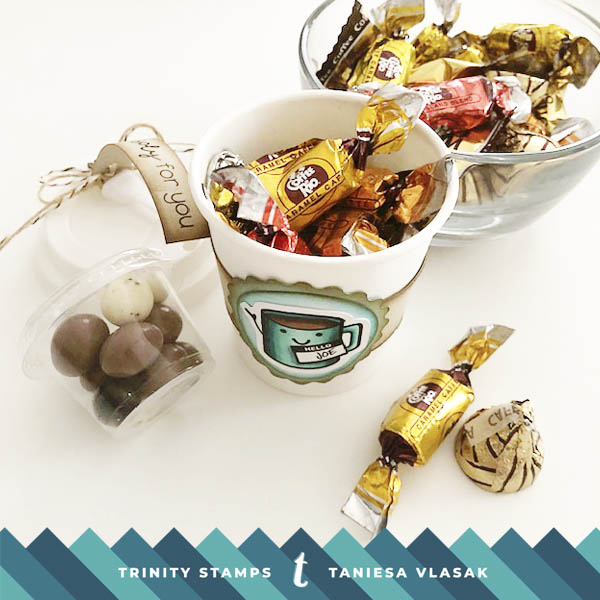
While your stopper is drying. Take your cup and fill it with whatever you choose. I chose to fill mine with a mixture of coffee candy and chocolate covered espresso beans. Included in my candy mix are Werther’s Caramel Coffee hard candy,
Coffee Rio assorted flavors, and Milk Chocolate Coffee Mocha Flavored Hershey’s Kisses. The chocolate covered coffee beans were a mix of dark, milk, and white chocolate and can be found HERE. All of the candy I used to fill the cups I made were delicious… I may have sampled one…. or five… of each. 😀
Place your lid and stopper on top of your cup and voila! You have a gift that is sure to make anyone smile… even if they don’t like coffee (so weird!). I had a bunch of kids do this make and take at the event and we filled those cups with lollipop drops! They LOVED it!
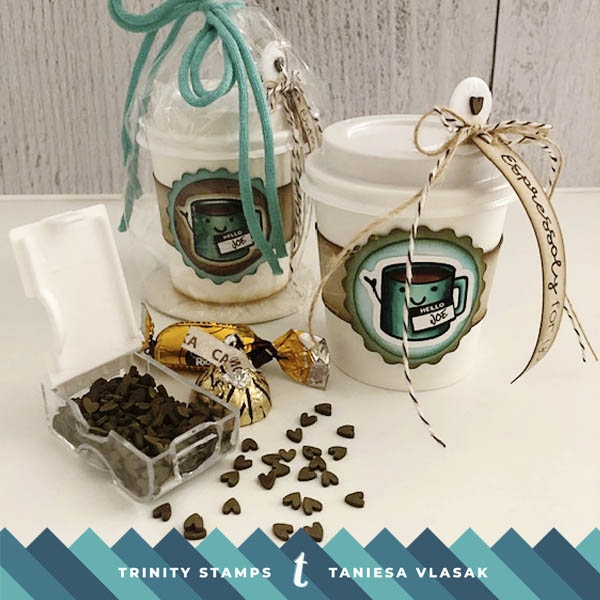
If you are gifting this to someone and have placed candy inside, you may want to wrap it up in something to keep it fresh. You can die cut a circle (about an inch and a half or bigger than your lid) out of heavy cardstock, like what you would use for your card bases, then glue the circle to the bottom of a clear cellophane bag. This allows it to stand up without tipping over and gives more stability to the packaged cup. Once you have placed your finished cup inside, tie closed with ribbon or string. Another packaging idea is to make your own gift bag from patterned paper or cardstock and a We R Memory Keepers gift bag punch board.
I hope you enjoyed my little mini cup tutorial and that you are enjoying this fun coffee inspired blog hop! Head over to the Coffee Lovers Blog Hop main page to check out so many more wonderful projects. Be sure to visit us again soon. I may just have to do a tutorial on creating a cold coffee cup version of this project soon!
Still reading? Wonderful! Because we have a treat for YOU, we have another blog hop today to launch a brand new release with 7 new stamps, 9 new dies, 1 new stencil, and over 80… yes 80 new embellishments! So pop on over to that blog hop starting at 8 am PST for your chance to win a $25 Gift Certificate and some embellishments!
Thank you for stopping by!
Crafty & Caffeinated Hugs,
Taniesa


Thank you so much for being a sponsor of the hop – you are appreciated! This treat holder is so cute & a wonderful idea.
Such a beautiful project Taniesa!!!!
This is really cute! 🙂
This is incredible Taniesa!!
Super duper with cuteness overloaded! Thanks for sharing your talent and being a fab sponsor!
Super duper cute! Thanks for being a sponsor of the coffee lover’s blog hop!
That is just way too adorable and cute project. LOVE the idea!
Thanks a latte for being amazing, generous super sponsor!
I LOVE this treat holder!! SO cute!!
Thanks so much for being a super sponsor!!
Love it!
Thanks for being super sponsor!
Too cute. Thanks for sponsoring this fabulous event!
Oh wow, this is wonderful.
Thanks for sharing how you made it and
thanks for sponsoring the coffee hop.
Sampled 5 of each………..my kinda sampling. Very cute project. Thank you for being a sponsor.
Yup, I have one of those cuties! It’s amazing.
Thank you so much for being a returning Super Sponsor!
Omygosh! What a cute idea! I ❤️❤️❤️
What a wonderful tutorial! I so have to try this! Thank you!
OMGOSH… How CUTE!! Thank you for the Tutorial!! I totally love those tiny hearts!!!! Thanks so much for being a Super Sponsor for the Coffee Hop! You Rock!
Theresa
Great project! Thanks for being a super sponsor!
Thanks so much for being a sponsor and I love your little treat cups.
So cute!!!!Thank you so much for being a sponsor on the hop!
T- this is so cute and great tutorial!
What a super fabulous project! Thanks for being a Super Sponsor to this highly anticipated event!
Fun project gift idea. Thanks for sponsoring the blog hop
Oh my goodness these projects are just too cute!! Thanks for sharing and sponsoring.
Such a fun little treat cup! Love the tutorial too! Thanks for being a super sponsor!
Wow these are awesome and so cute! What a fun gift and I love the coffee hearts! Thanks for being a sponsor!
This is so cool and so pretty and SO cuuute!! Love it all and yes… those hearts… quite awesome!
Thanks for the great tutorial! Thanks for being a sponsor!
What a great idea those treat cups, like the stamped image you made for it.
Thank you from me toooo….for sponsoring the 2019 hop.
FABULOUS!!! Thanks SO much for sponsoring the Coffee Hop, too.
It’s always fun to stop by.
Blessings,
Karen L
Oooh I found my craft day project for next weekend!
Just darling products and amazing treat holders. So cute! Thanks for sponsoring the hop!
I love these treat holders!! I think they are so adorable especially those cute hearts!! You used my favorite stamp set that you designed. I would love to buy it. I have it on my long, long, long list of must have stamp sets!! Thank you for sponsoring this terrific hop, it is so appreciated!!
awesome color choice!
Oh my goodness!! Such a cute treat cup! Love it!
Thanks for being a super sponsor!
Love the mini treat cups! Very fun idea! Thanks for sponsoring!
OK this is just too cool! I love your treat cup!! Thank you so much for sharing it with us! Thank you for being a sponsor for the hop!
such darling projects – thanks for the ideas:)
These are completley adorable!!! Thanks for being a super sponsor!!
What a fun idea. Love it.
Simply fabulous Mini Coffee Cups!! Thanks for being one of our great sponsors!
Love these! x