

Mix it Up Monday: Glitter Rainbows
Hello Friends and Happy Monday! This week I thought it would be fun to mix and match some of the new standalone dies (Rainbow Die Set & Cloud Day A2 Card Scene Builder Die & Hello Senti Mini) with the cute jumping frogs from the Puddle Jumpers Stamp Set. You can also grab Whatever the Weather Die and Stencil Bundle at a great prices that has all of the die cut elements I used in today’s cards.
Then I thought why not I get all *Lady Glitter Sparkles* (“Trolls” movie reference—that made me giggle throughout the card-making process) and use glitter paper for the rainbows and sun images. Both cards remind me so much of my childhood puffy, glitter sticker book collection 🙂
RAINBOW CONNECTIONS
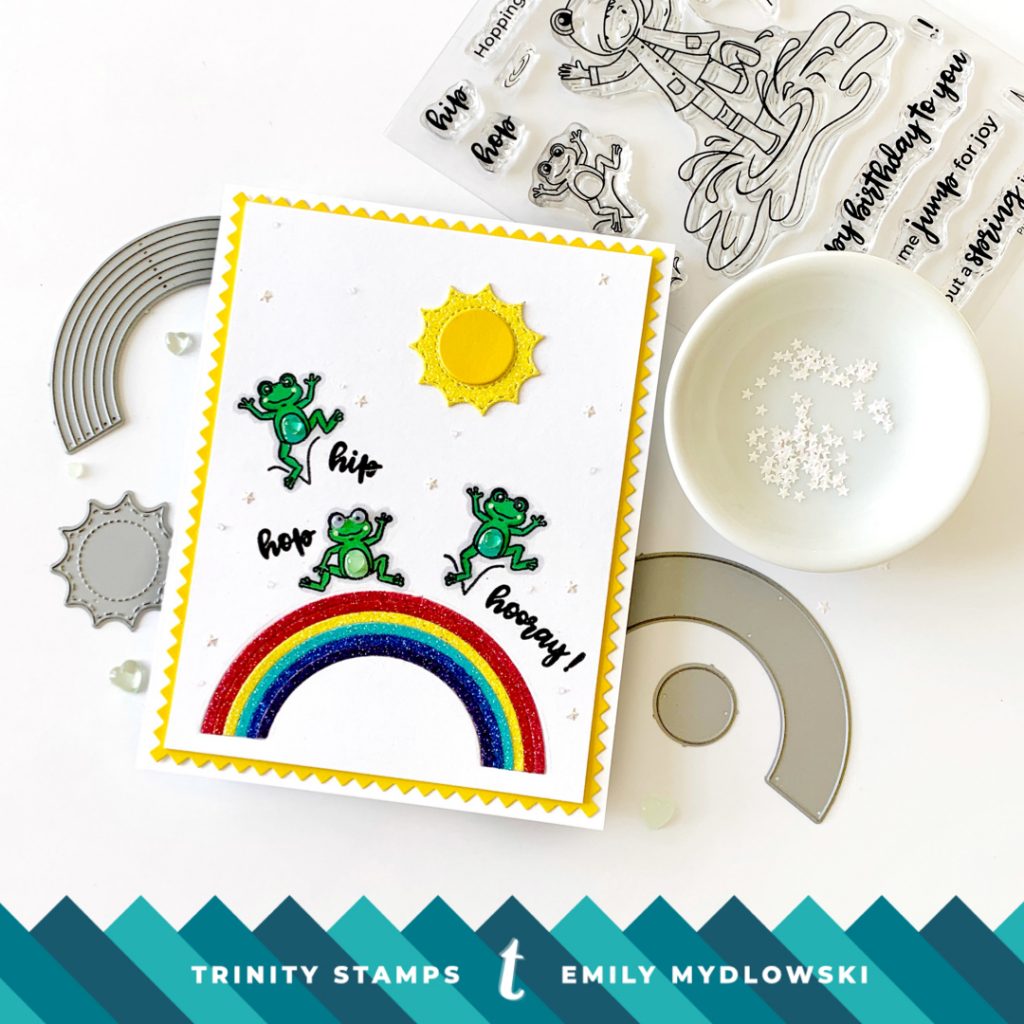
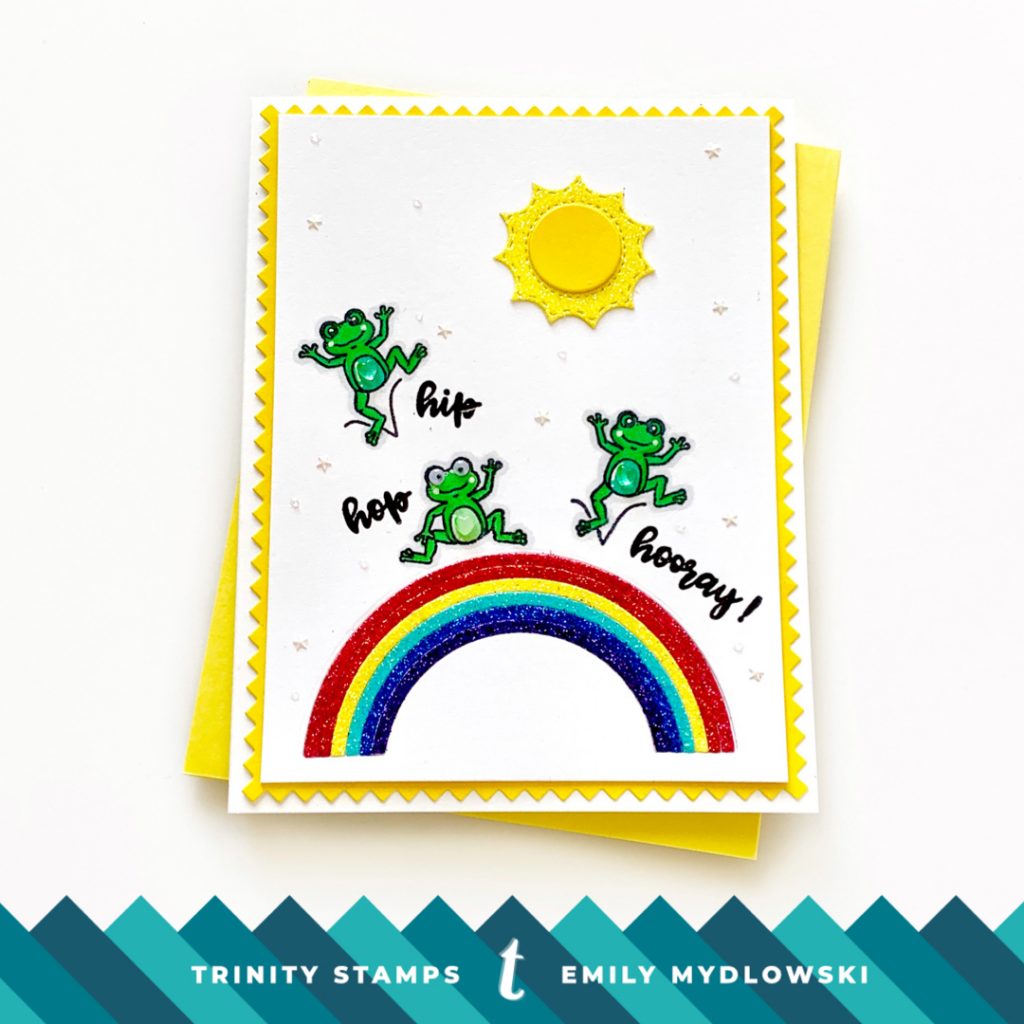
“Someday we’ll find it, That Rainbow Connection, The lovers the dreamers and me…” Yes, this song was playing in my head while making this card (and I may have been singing it for days after). Then I moved on to “Hip, Hop Hooray!” and then that song was in my head for days after. Needless to say, I had a hopping good time creating this card. It’s fun, whimsical, bright and cheerful and how can you not smile when you meet Hip, Hop and Hooray for the first time when you open this happy mail.
For the Rainbow die cut, I like to create an inlay for the rainbow ribbons to fit into. Here’s how the entire card came together:
- Die cut rainbow ribbons from different color glitter paper. Die cut the sun and circle image (Cloudy Day Die) from glitter paper and yellow card stock.
- Die cut the rainbow inlay at the bottom of the card.
- Stamp and Copic Color Hip, Hop and Hooray (aka, the frogs) from the Puddle Jumpers Stamp Set. Add some Shimmer Glitter, White Gel Pen and some Wiggle Eyes for extra pop.
- Adhere all of the rainbow ribbons into the rainbow inlay. Glue the sun and then for extra pop add some Itty Bitty White Stars and Nuvo Glitter Drops.
- Then add the frog names, aka: the sentiment Hip, Hop Hooray!
- Add some Hint of Mint Green Hearts to the Frog’s bellies for a little more whimsey and adhere the entire card panel to a zig zag background and attach to a bright yellow card base.
Hello, Rainbow!
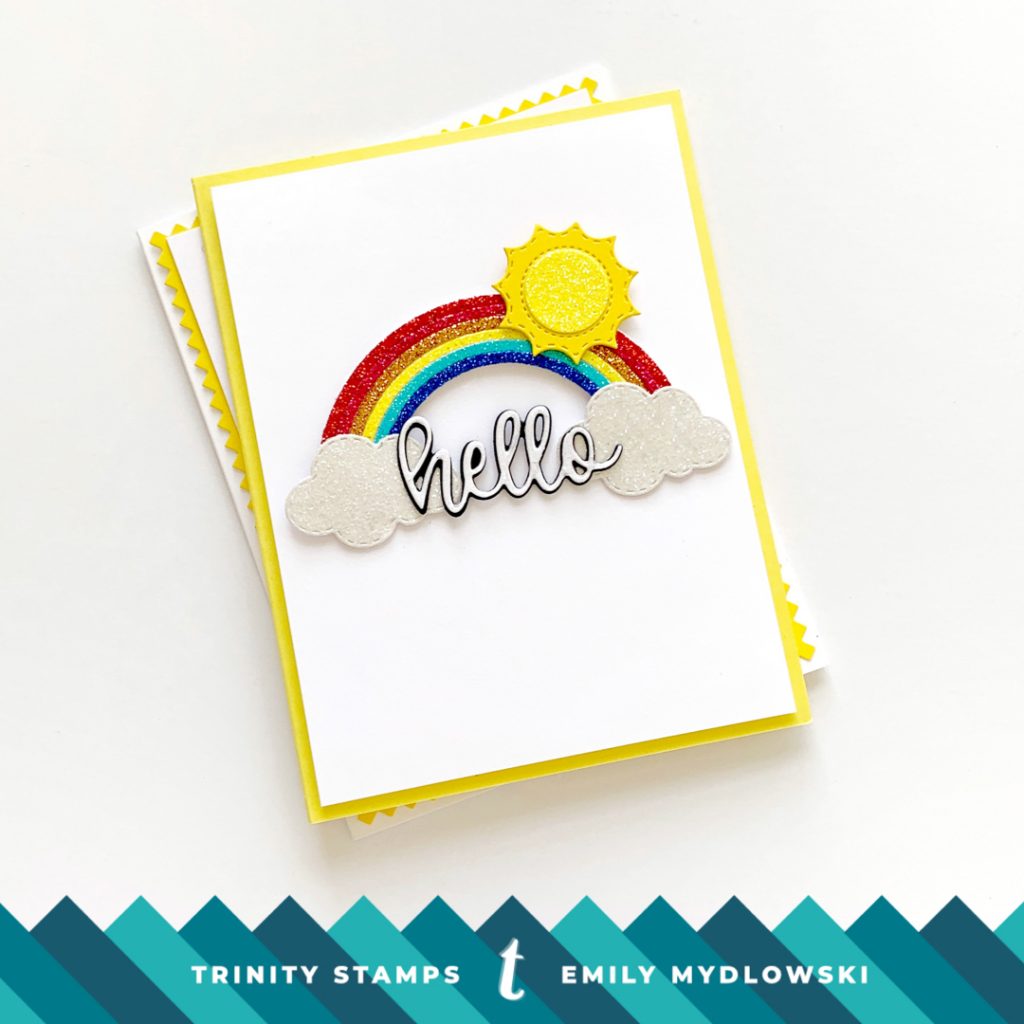
Because I love this Rainbow Die so much, I wanted it to be the focal point on my next card. This card ended up being soooo easy to create and I love the final clean and simple design. To create the card:
- I used the remaining rainbow die cuts from the Rainbow Connection card and then glued them them to a solid rainbow die cut.
- Then I die cut two clouds from the Cloudy Day Die and adhered them to each side of the rainbow.
- Then I die cut a sun and circle and adhered it to the rainbow.
- The Hello was die cut from the Hello Senti Mini and I added some Nuvo Glitter Drops for extra dimension and sparkle. Then I attached it to the clouds for a perfect perfect fit!
Tip: I adhered all of my pieces using glue dots. I find this is the best way to adhere elements to glitter paper so it actually sticks.
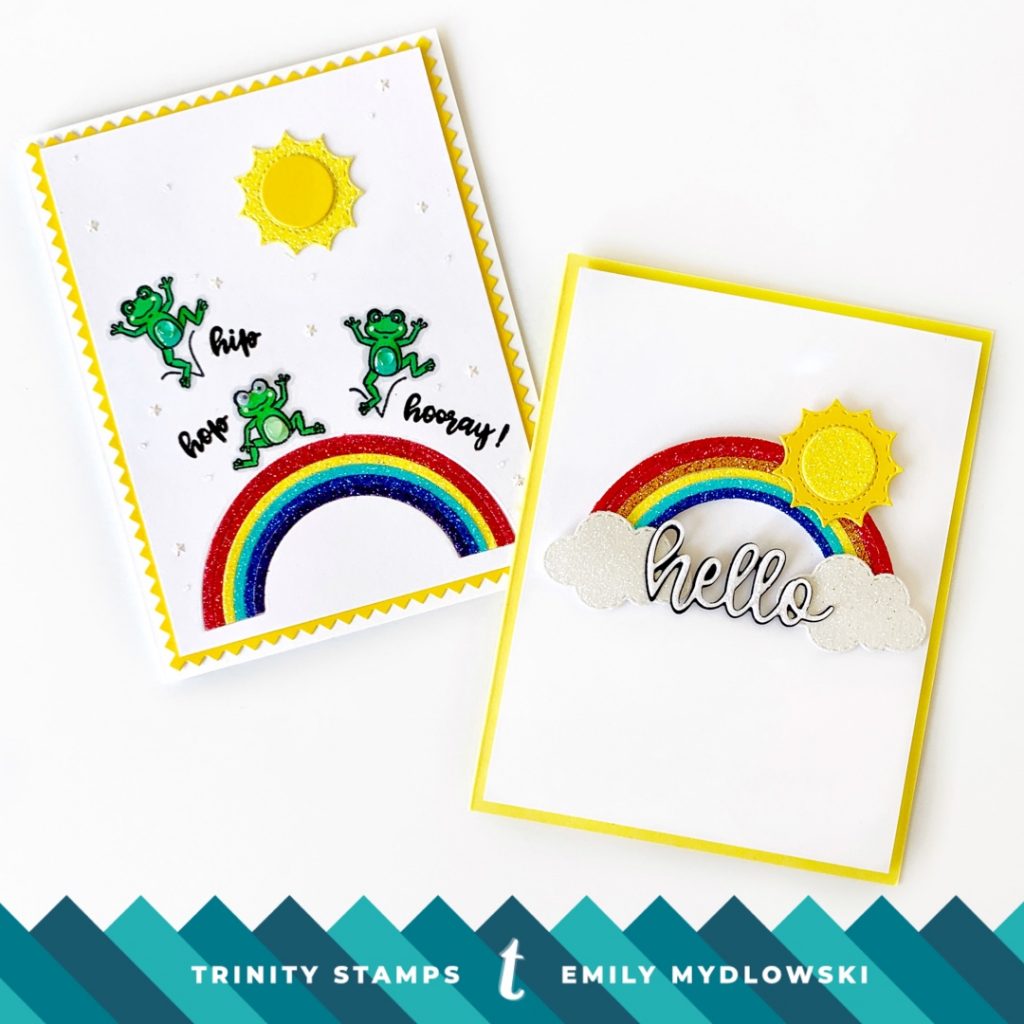
So there we go friends, two fun and Glittery Rainbow cards that are sure to turn a cloudy day into a Sunshine Day. I hope you enjoyed this post and I can’t wait to see you again next Monday!
Remember to check out/subscribe/follow the Trinity Stamps Blog, You Tube Channel and Instagram feed for more design team inspiration all week long. We always love to see your Trinity Stamps creations. Join us on the Trinity Stamps Facebook Community group, the Trinity Creativity Monthly Challenge and when posting to Instagram use #trinitystamps so we can see your awesome Trinity-Inspired designs!!
Big Paper Hugs!🤗
Emily @popsofpaper


Very cute