

Happily Ever After Release – Day 1 Sneak Peek
Hello, Trinity friends and welcome to Day 1 of sneak peeks for the Happily Ever After Release!! This release contains everything you need to create stunning wedding cards!!

I’m giving you a sneak peek of the Happily Ever After Stamp Set & Coordinating Dies today!! Let’s get to it!!

I started by stamping the wedding couple and sentiment from the Happily Ever After Stamp Set onto white cardstock with InkOn3 Blackout Ink. I added some simple shading to the couple with Copic markers, then used the Coordinating Dies to cut them out, along with the sentiment.
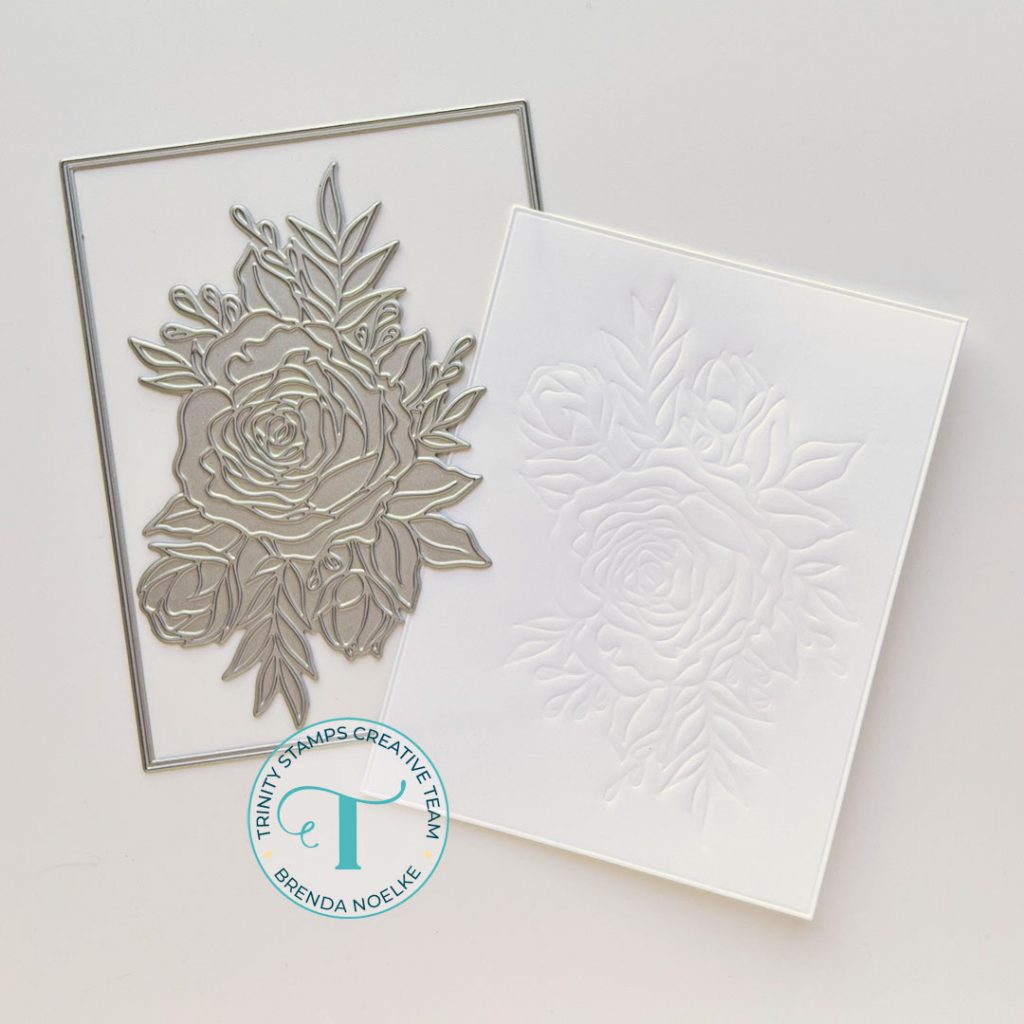
I like to keep my wedding cards simple and elegant with A LOT of white! I used the foiling plate from the Foiling Florals Foil & Cut Set to emboss a panel of white cardstock by running it through my die-cut machine with an embossing mat, instead of using it to foil. I did have a little bit of creasing on the cardstock, so I die-cut it with the second largest die in the Embossed Edge Rectangle Stack Die Set and it smoothed them out. Such a great way to stretch those foil plates!!
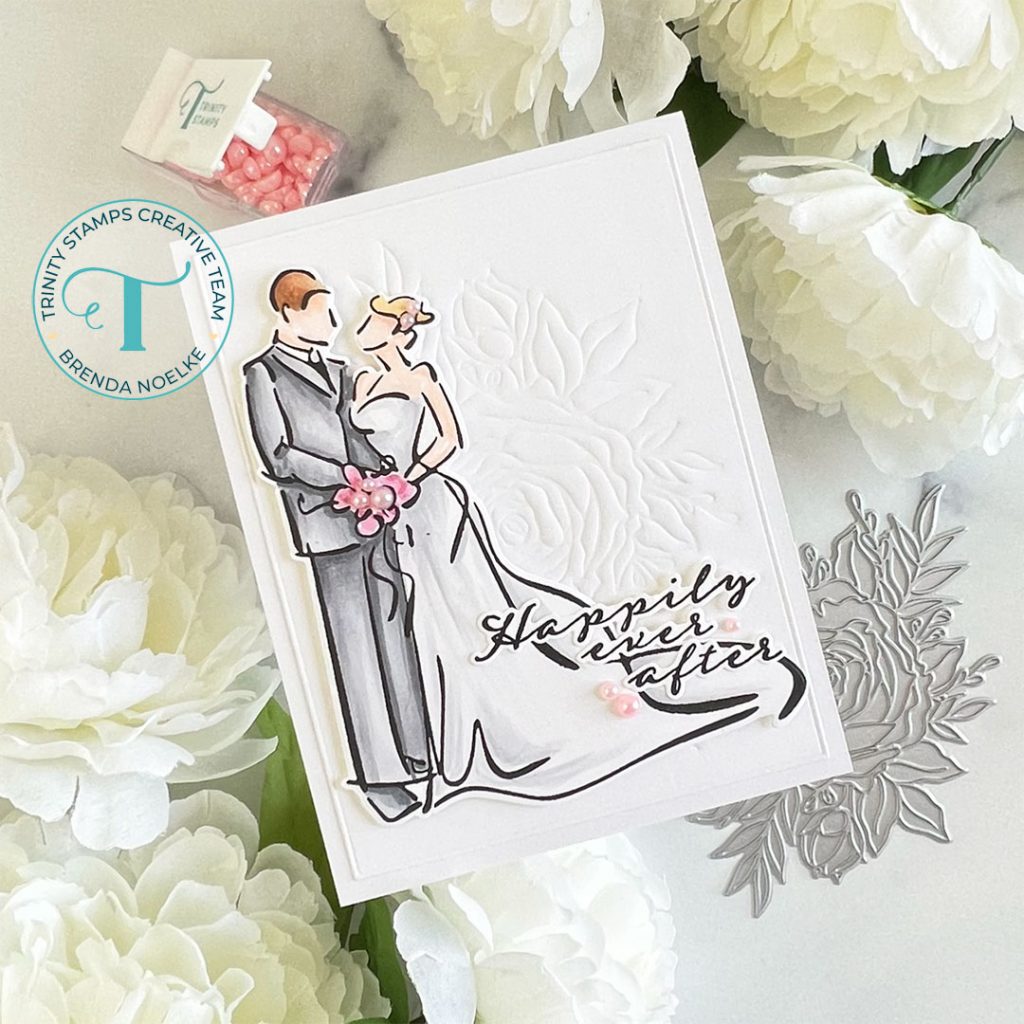
The embossed panel was adhered to an A2 white, top-folding card base.

The wedding couple was popped up with foam adhesive and the sentiment was adhered with a combination of liquid glue and foam tape.

A sprinkling of Pale Pink Satin Baubles was added to the bride’s hair, bouquet and around the sentiment for the perfect finishing touch!!

Be sure to check back here each day for more sneak peeks from the design team!! The release will be available on Thursday, May 5th!!
Thanks for dropping by today!! Have a wonderful Thursday and I’ll see you next week!!


