
Foiled Big Snowflake
Hi everyone!
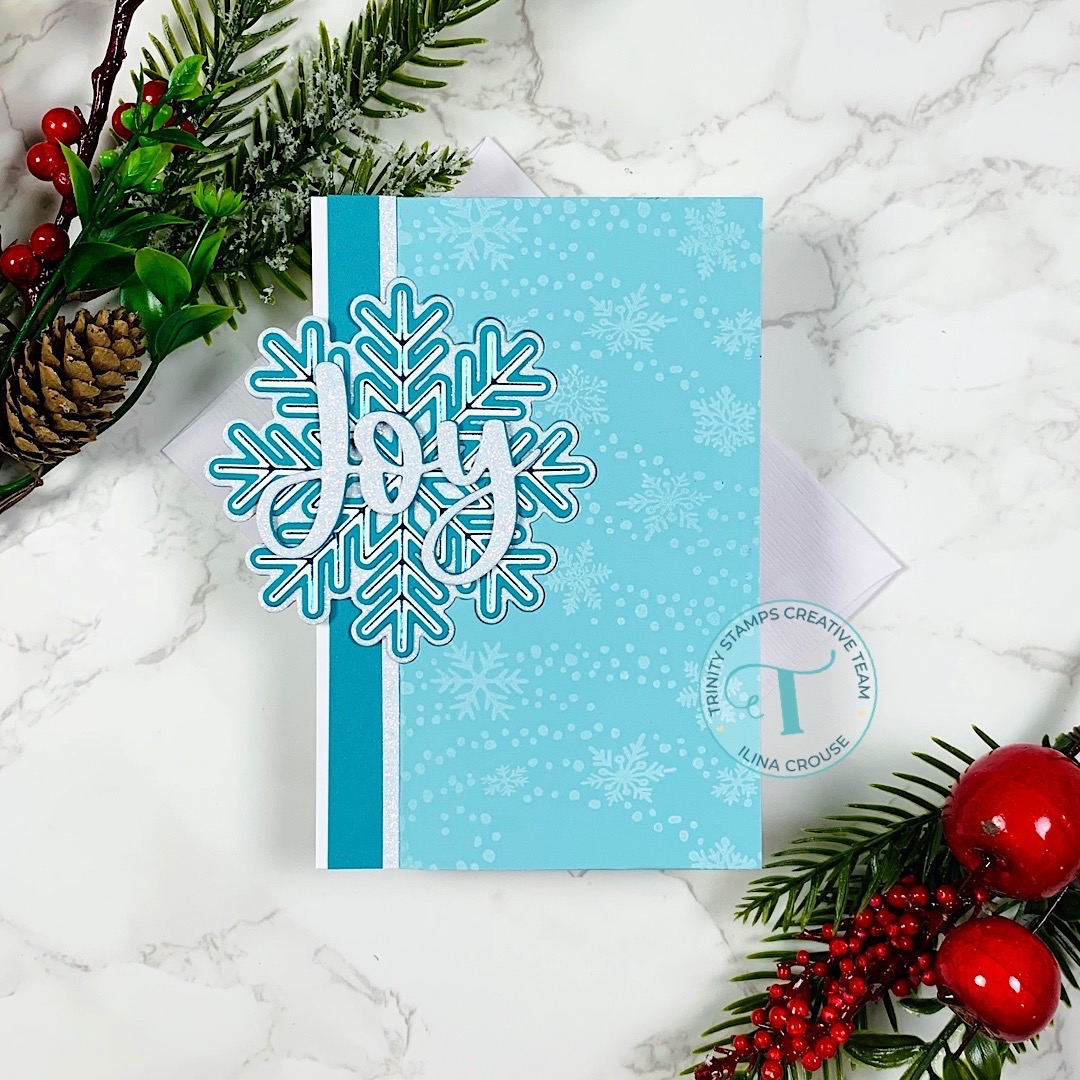
Ilina here! Today I am sharing a non traditional size card (5″x6″, but you can easily make it to 5″ x 7″ if you have large die cutting machine than can fit 7″ wide paper) using the Big Snowflake Cut and Foil set, along with Big Joy Cut and Foil and Winter Winds stamp set.
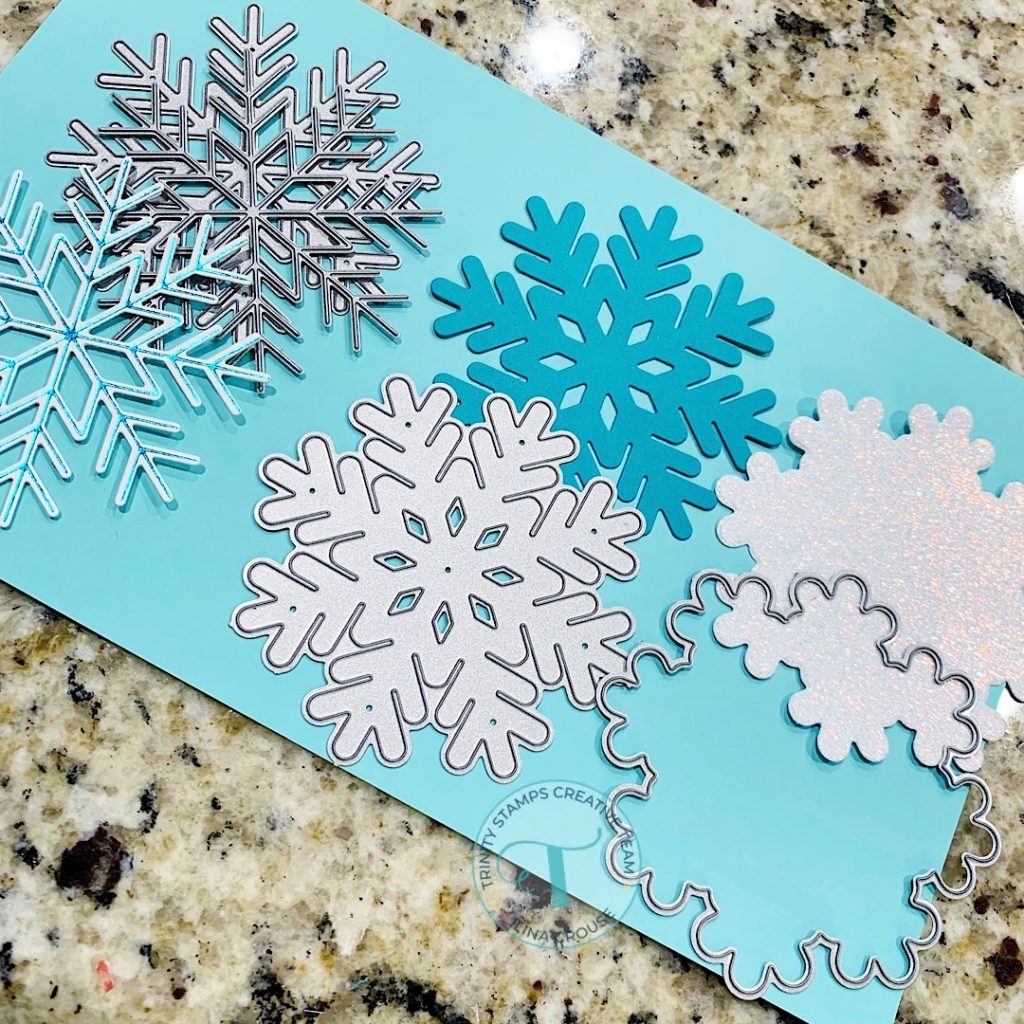
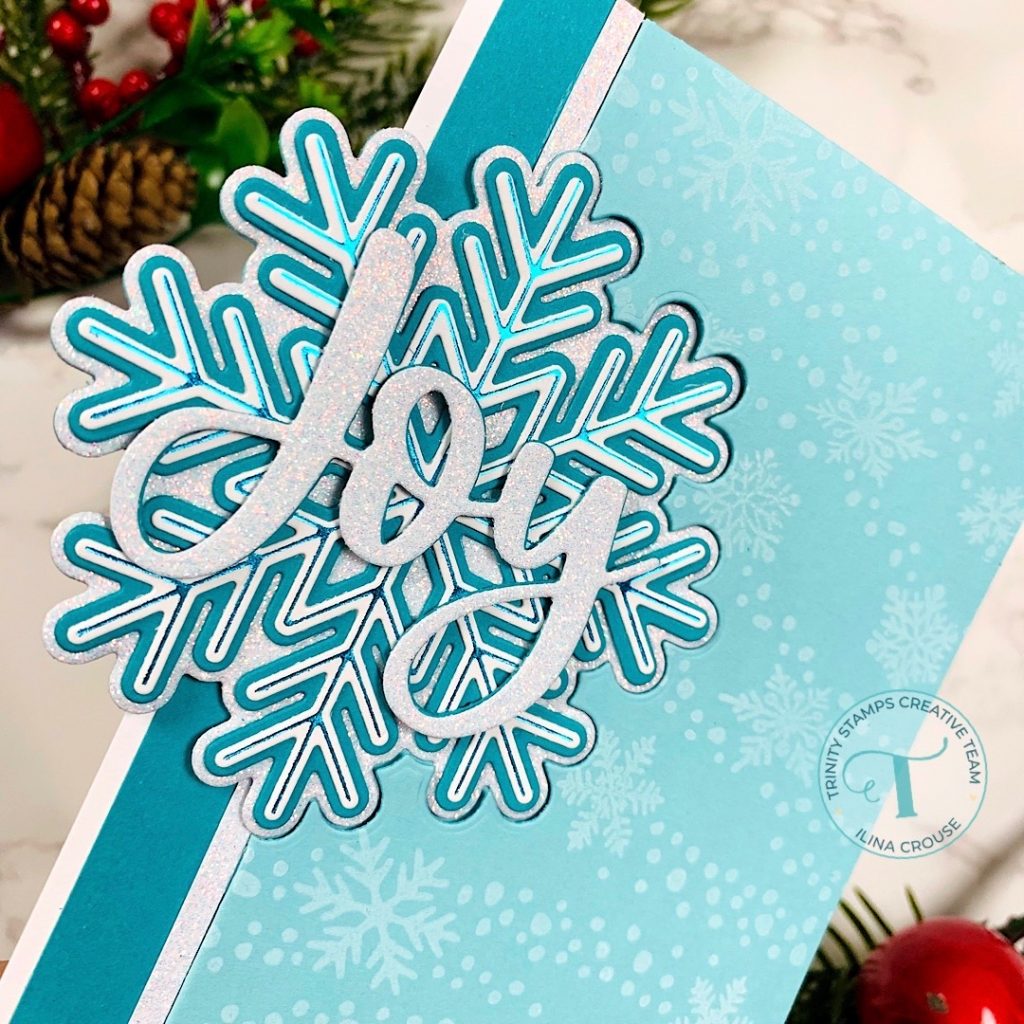
To make the card I started by foiling the snowflake using blue foil and white card stock. Once the snowflake was foiled I die cut it using the coordinating die. I die cut the other two layers using darker teal card stock and white glitter card stock.
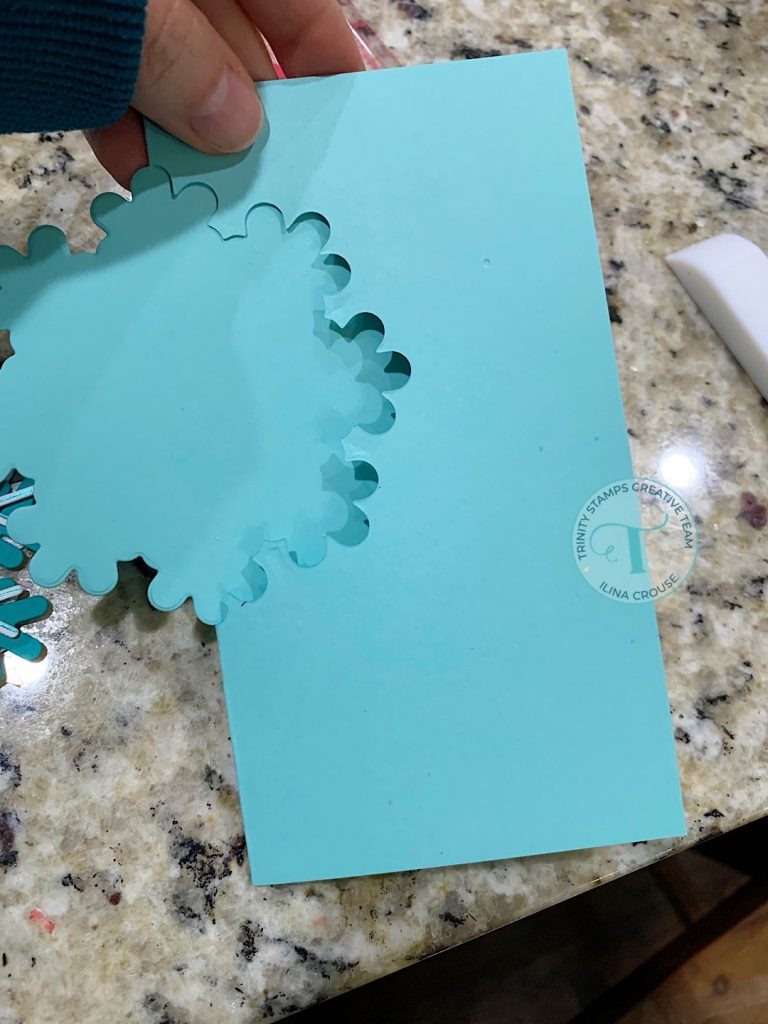
Next, I cut piece of aqua colored card stock measuring 6″x10″ and drew a pencil line at the 5″ mark. I used this line to position the largest snowflake die and secured it with removable tape.
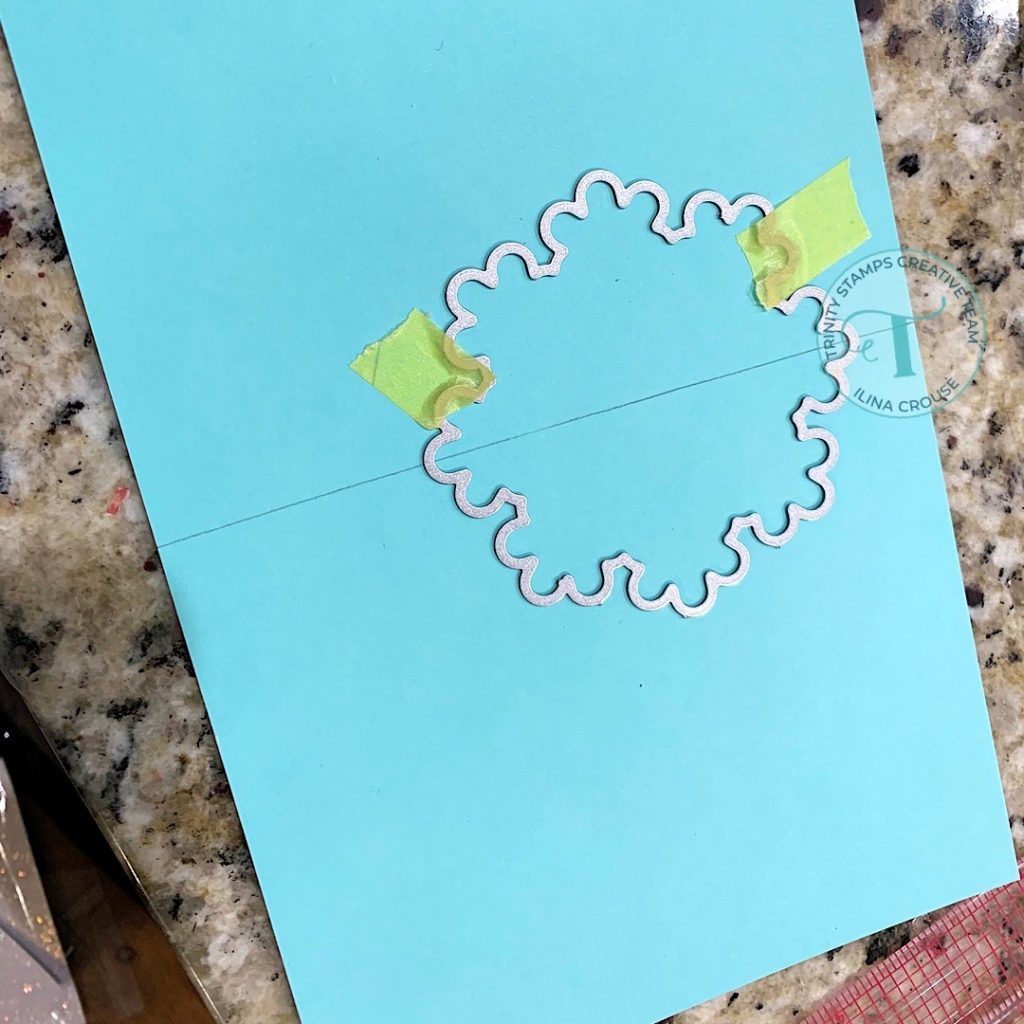
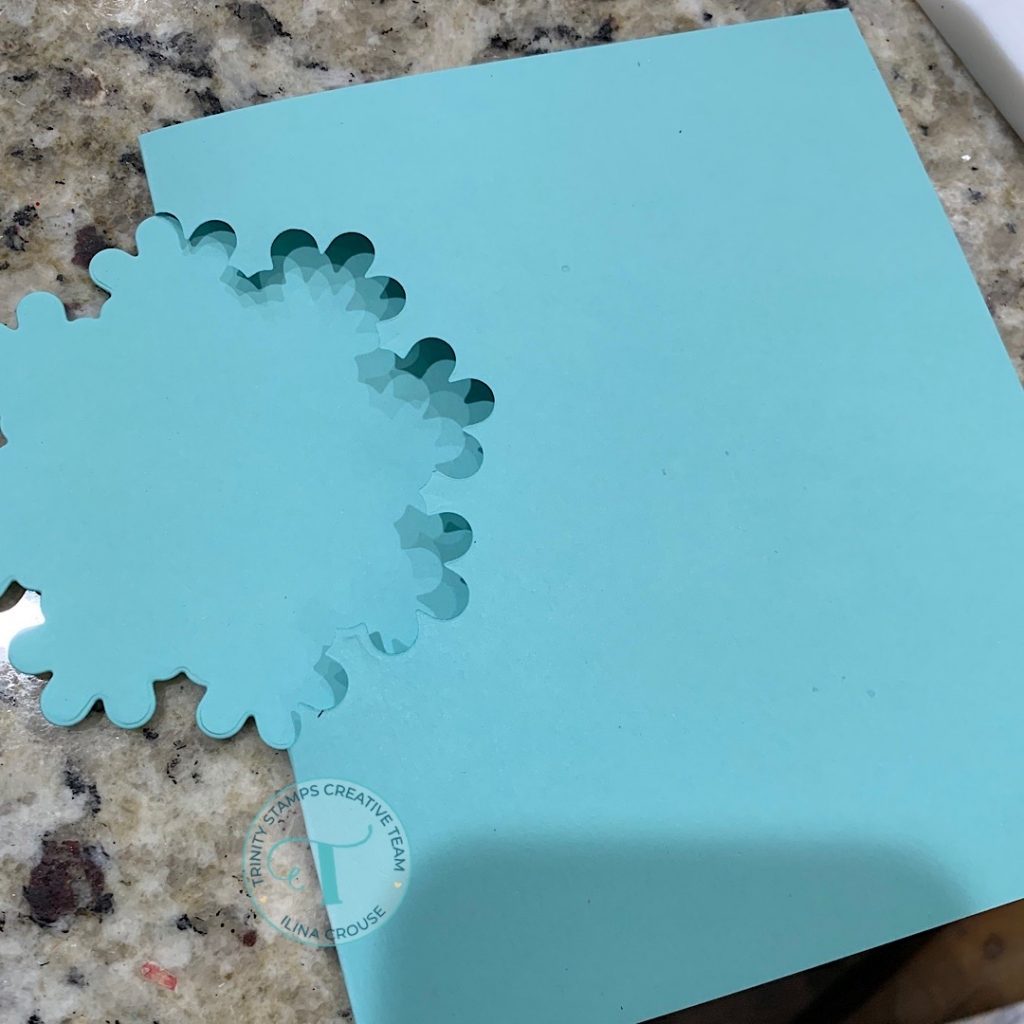
I partially die cut the snowflake piece on the left using the pencil line as a guide for positioning of my cutting plates. Once cut, I erased the pencil line and scored at the 5″ mark (where the pencil line was) making sure I don’t score over the snowflake section.Once scored I folded in half and trimmed to 5″ width with the hang over snowflake. (the solid piece from the score line to the edge came to be 3 1/4″ wide)

Next I stamped the Winter Winds stamp on the front of the card using white ink and let it dry. In meantime I cut piece of heavy weight white card stock to 4″ x 6″. I will adhere this piece on the back of the card.
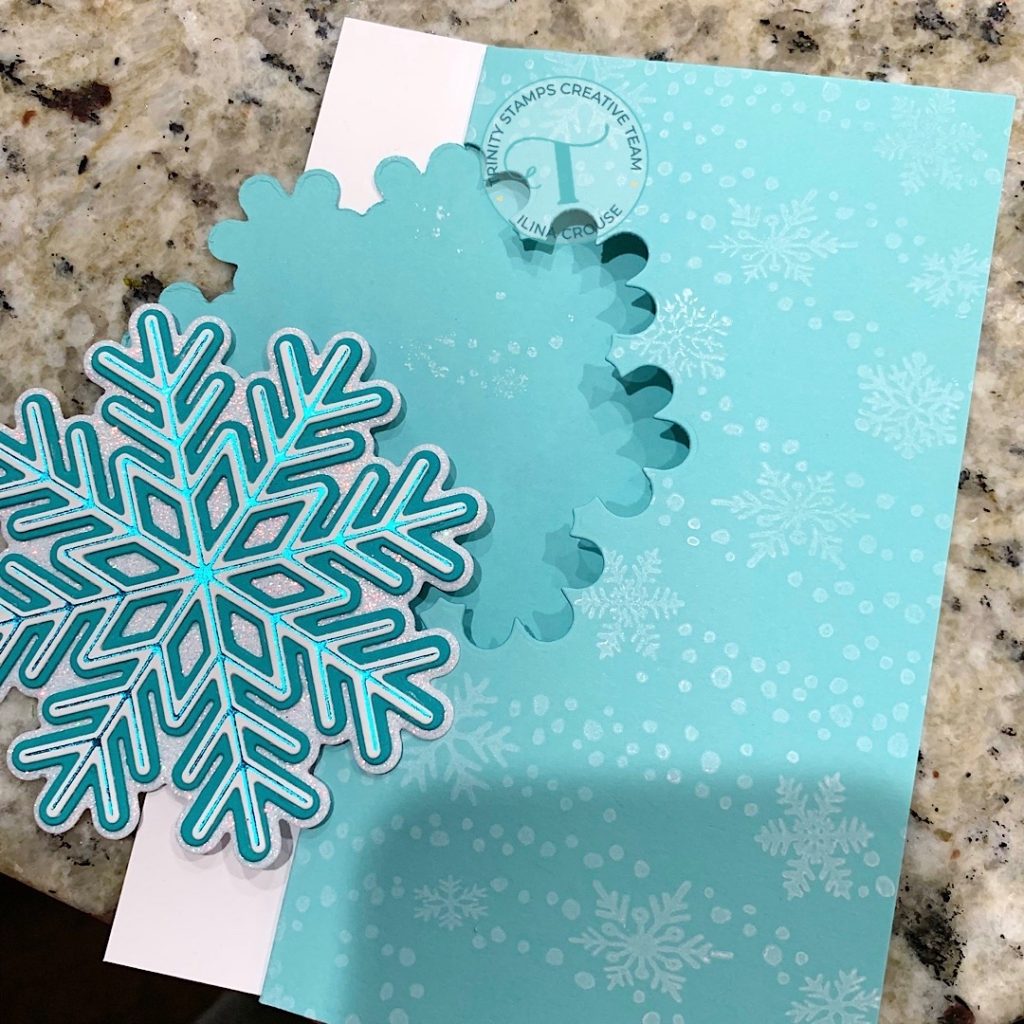
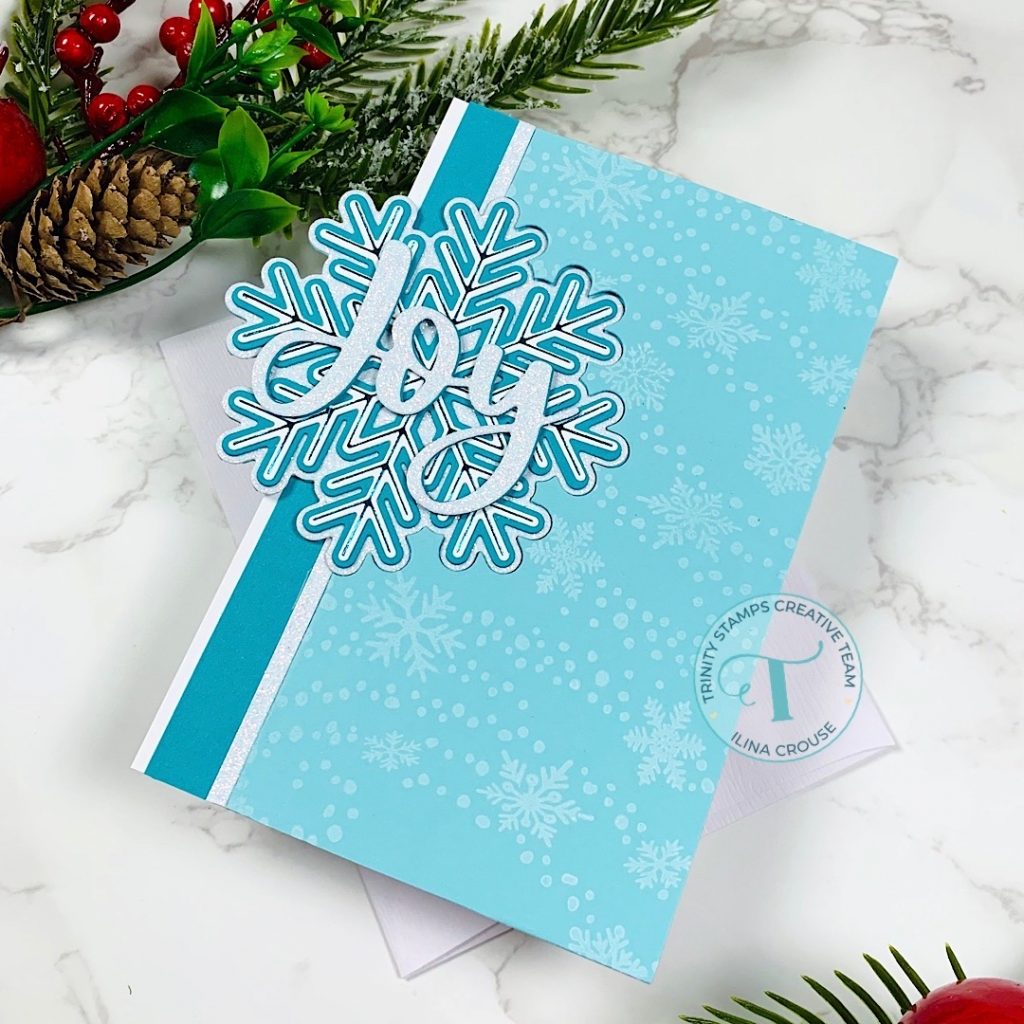
To finish the card I adhered the snowflake layers together and adhered on the card, then adhered the card to the white backing and added 2 strips of teal and white glitter card stock to add more interest. I die cut the Big Joy die from white glitter card stock and twice from teal and stacked them. Adhered in the middle of the snowflake to finish off the card.
Thank you so much for stopping by! Hope you have an amazing day!


