
Birthday Tunnel Pop Up Card


Hello! Today I am making a card based on a design by the wonderful Jennifer McGuire. She published a blog post a few months ago about making a tunnel pop-up card that I had to try. Hereis her blog post with the accompanying video on how to make the basic dimensions of the card.
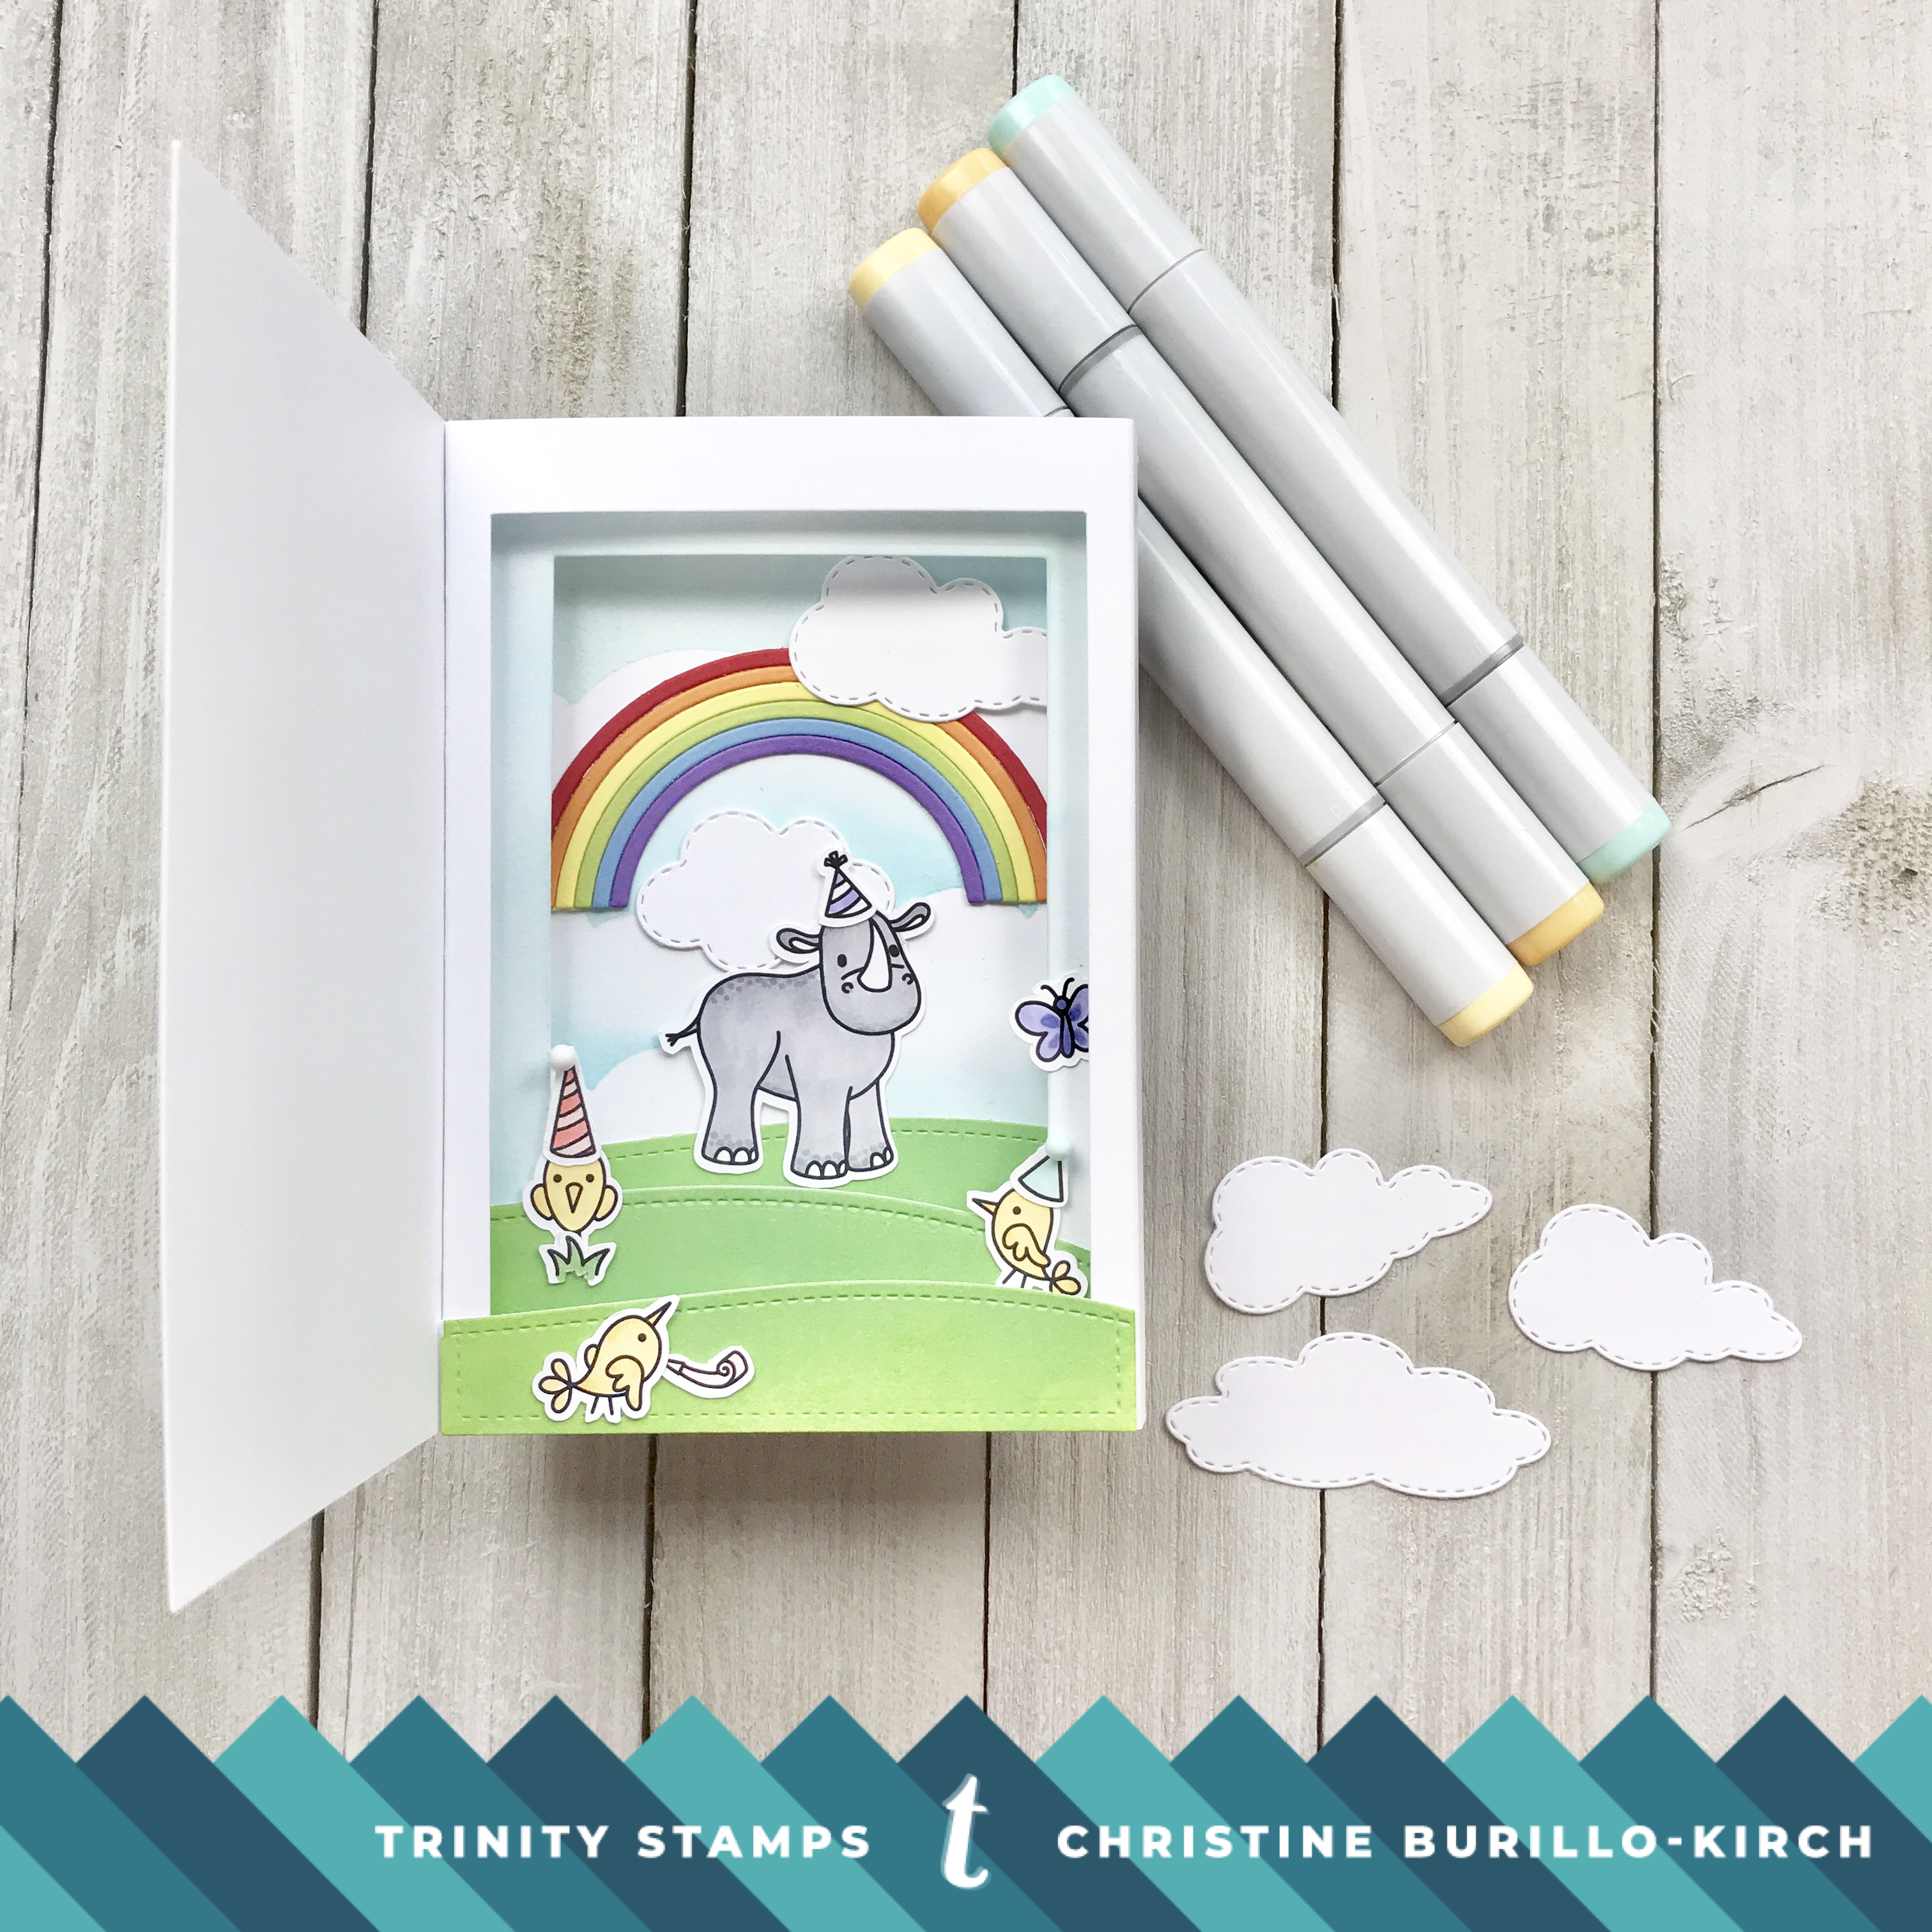
- I cut two 5 and 1/2 inch by 8.5 panels out of a 110 lb cardstock. The first panel I scored at the 4 and 1/4 inch length to form an A2 card base, after which 1/2 inch was cut off the back panel (the missing 1/2 inch accommodates the inside tunnel shadow box portion so that it can fold flat and still fit an A2 envelope. The second 5.5 by 8.5 inch panel will form the shadowbox portion of the card- score at 1/2 inch, 4.25 inches and 4.75 inches and fold along the score lines. Finally one piece of 5.5 by 4.25 piece of cardstock was scored at 1/4 inch on either side (will be the middle panel). I die cut a rectangle in the box portion and a smaller rectangle in the middle panel (see photo below)

- I used tumbled glass distress oxide ink with the Trinity Blendabilities brush to color the sides of the shadowbox and a small 5 inch by 3.75 inch panel that was adhered to the back wall of the shadowbox. I used mowed lawn distress oxide ink to color a panel which I then die cut with Castle Scene Builder Die setto create 3 panels of green lawn and adhered them on the three layers that make the tunnel portion of the shadowbox card.
- A made a rainbow using the Rainbow die setand various colors of cardstock. Clouds were die cut from the Cloudy Day A2 Card Scene Builder Die set.

- It was time to adhere all the panels together- Jennifer McGuire shows best how to do this in her video. I adhered everything with 1/8 inch double sided adhesive tape.
- I stamped, die cut and copic colored many images from the Rhino Bird Day Stamp setand die set.
- Finally I adhered all the images on the inside of the card with Gina K Connect Glue. For the front of the card, I die cut a panel and used a stencil from Honey Bee with some Creative Expressions Glitter Kiss (color is “Frosty Sparkle Kiss”) paste to create a focal point and placed confetti (Trinity Stamps hawaiian shores opal sheen confetti). I stamped and die cut the words “Happy Birthday” from the Let Love Grow Stamp set.
Thank you for stopping by!


Absolutely fabulous!