
Wishing You Luck!!
Hello Crafty Friends!!
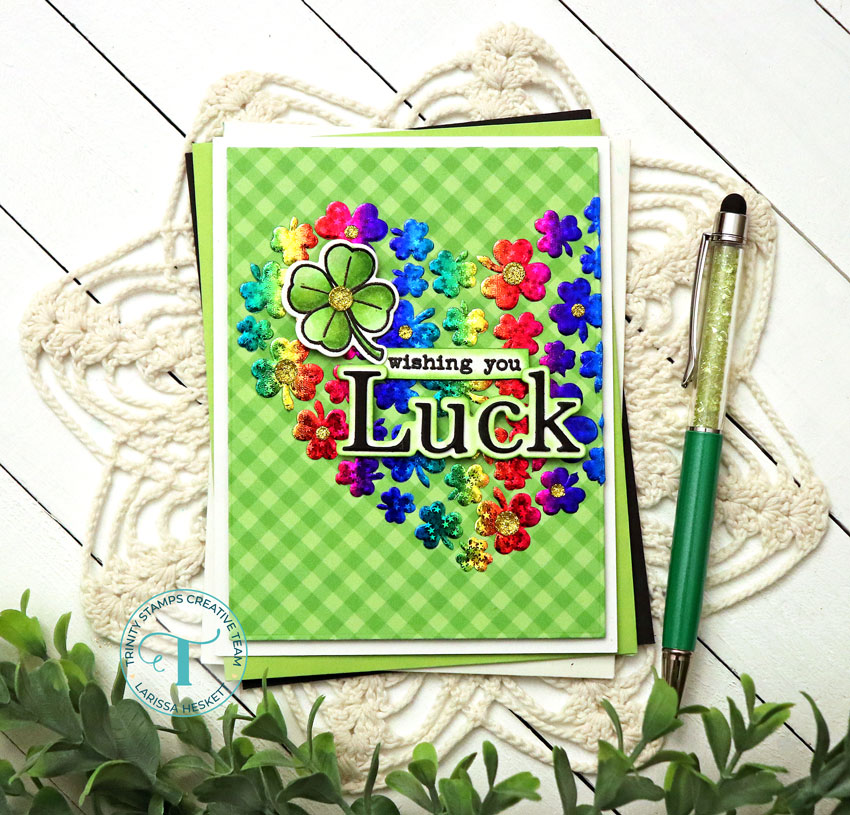
Larissa here today with a CHEERFUL Wishing You Luck Card using several of the NEW Products from the NEW February Release!! I LOVE how compatible ALL of these New Products are and that you can use them with several different techniques!!  I Started by Die Cutting a Piece of Doodlebug Gingham Patterned Paper using the Modern Embossed Rectangle Stack Die Set!! Then I Sprayed the backside of the NEW Heart Clover Stencil with some Therm O Web Pixie Spray!! (NOTE: the Heart Clover Stencil is SOLD OUT, but you can leave your email in the Notification Box and you’ll be notified as soon as its back in stock) Then I placed it onto the Card Panel and pressed it firmly into place!! I applied some Distress Oxide Ink in Lucky Clover, then applied a thin layer of Therm O Web Deco Foil Transfer Gel Duo using a Stencil Pal and then removed the Stencil and set the Panel aside to dry!!
 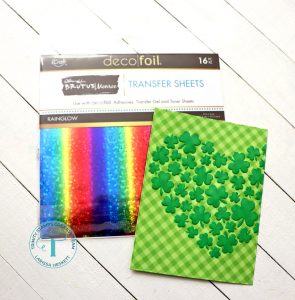 Once the Gel is completely dry, its Clear and you can see the Lucky Clover Distress Oxide Ink underneath!! Then I placed a Piece of the Brutus Monroe Rainglow Deco Foil over the Stenciled Design, Rainglow Side facing up!!
 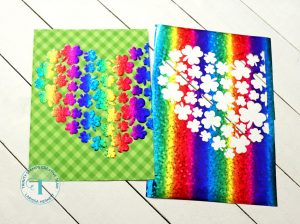 Then I placed it into a Carrier Sheet and ran it through my MINC Laminating Machine on the #1 Setting!! Once ran through the Laminating Machine, I removed the Negative Foil Sheet!! SQUEAL!! This part NEVER gets old!! The Results are SO BEAUTIFUL!! (SAVE: that Negative piece as you can us it for another Card!!)
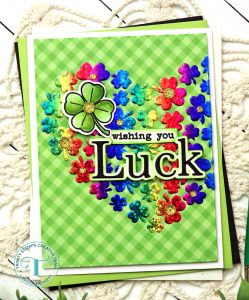 Next I Stamped and Embossed the NEW A Good Friend Stamp Set!! (NOTE: A Good Friend Stamp Set is SOLD OUT, but you can leave your email in the Notification Box and you’ll be notified as soon as its back in stock)
I colored the Image with Copic Markers!!
Green: YG00, YG13 & YG25
Then I Die Cut the Clover Image out using the coordinating A Good Friend Die Set!! To finish off the Clover, I adhered a Golden Glass Sparkle Rhinestone using the Crafty Glue Friend Liquid Adhesive and I LOVE the Gold Glitter Sparkle it adds!!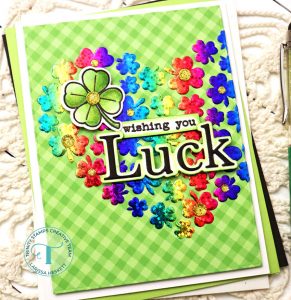 For even more Sparkle, I adhered a Golden Glass Sparkle Rhinestone to several of the larger Deco Foiled Clovers again using the Crafty Glue Friend Liquid Adhesive and I LOVE the added Gold Glitter Sparkle it adds to the over all Design!! I Stamped and Embossed the “Wishing You” Sentiment from the Simply Sentimental: Lucky Stamp Set onto some White Cardstock with Versa Fine Black Onyx Ink and Wow Clear Gloss Embossing Powder, I Cut the Strip Out and then Inked the Edges with some Lucky Clover Distress Oxide Ink!! I Die Cut the “Luck” Sentiment using the coordinating Simply Sentimental: Lucky Die Set, once from Black Cardstock and the Shadow from White Cardstock!! After adhering the layers together with Crafty Glue Friend Liquid Adhesive I Inked the Edges with Lucky Clover Distress Oxide Ink!! I adhered the Clover and the “Luck” Die Cut to the Card Panel using Foam Tape for some Dimension and adhered the “wishing you” strip to the Card Panel with some Crafty Glue Friend Liquid Adhesive!! I adhered the Card Panel to an A2 White Cardstock Cardbase using Foam Tape for some Dimension and the Card is ready to send!! So there you have it, a CHEERFUL Wishing You Luck Card using several of the NEW Products from the NEW February Release! I LOVE the possibilities with this NEW Heart Clover Stencil and I can’t wait to create more FUN Backgrounds!! I hope I’ve INSPIRED you to create some of these Cards for your personal needs!!
THANKS SO MUCH for stopping by today!! If you create something please share with us on Social Media using the #hastag #trinitystamps #trinitystampsllc as we LOVE to see what you’ve created!!
You can join us in our FB Community HERE!!
I hope you have a FABULOUS WEEK!! Make sure you continue to visit us as we share Projects to INSPIRE You with the NEW February Release Products!!
LARISSA HESKETT 


