
You Are a Blessing!!
HELLO CRAFTY FRIENDS!!
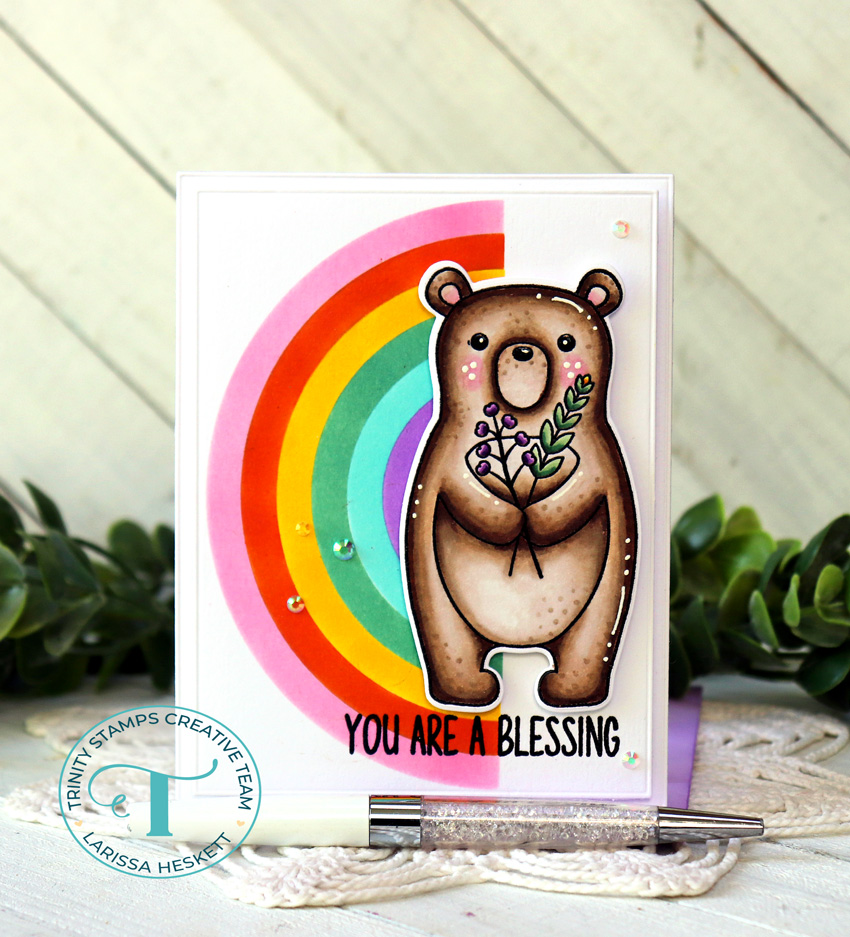
Larissa here today to share a SWEET Retro Inspired Card using the NEW Layered Rainbow Layering Stencil and the Blessing Bear Stamp and coordinating Blessing Bear Die Set!! Let’s get Started!! 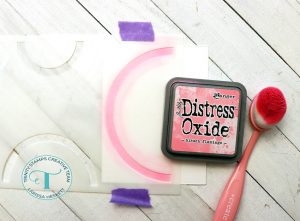
First I sprayed the Back Side of the Stencils with Therm O Web Pixie Spray!! I LOVE how it helps to hold my Stencil into place with out the need for a whole bunch of Tape!! Then I placed it over my Card Panel that was Die Cut from some Distress Watercolor Cardstock using the Modern Embossed Rectangle Stack Die Set!! I placed the First Stencil into place over my Card Panel and then pressed it firmly into place!! Then I inked with Kitsch Flamingo Distress Oxide Ink!! I removed the Stencil and cleaned it and moved onto the next Color!! 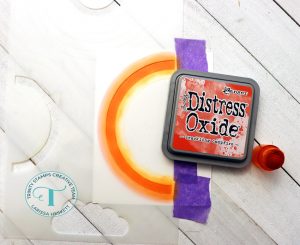
I placed the Next Stencil into place over my Card Panel, lining up the Rainbow Ray with the already Inked Rainbow Ray and then pressed it firmly into place!! I did have to add some Purple Tape onto the Bottom of the Stencil area to protect my Card Panel from getting Inked up, Then I inked with Crackling Campfire Distress Oxide Ink!! I removed the Stencil and cleaned it and moved onto the next Color!!
I placed the Next Stencil into place over my Card Panel, lining up the Rainbow Ray with the already Inked Rainbow Ray and then pressed it firmly into place!! Again I had to add some Purple Tape onto the Bottom of the Stencil area to protect my Card Panel from getting Inked up, Then I inked with Mustard Seed Distress Oxide Ink!! I removed the Stencil and cleaned it and moved onto the next Color!!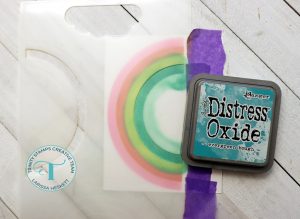
I placed the Next Stencil into place over my Card Panel, lining up the Rainbow Ray with the already Inked Rainbow Ray and then pressed it firmly into place!! Again I had to add some Purple Tape onto the Bottom of the Stencil area to protect my Card Panel from getting Inked up, Then I inked with Evergreen Bough Distress Oxide Ink!! I removed the Stencil and cleaned it and moved onto the next Color!!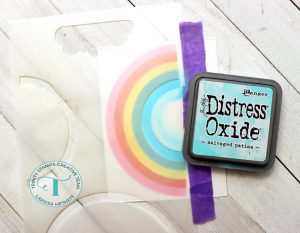
I placed the Next Stencil into place over my Card Panel, lining up the Rainbow Ray with the already Inked Rainbow Ray and then pressed it firmly into place!! Again I had to add some Purple Tape onto the Bottom of the Stencil area to protect my Card Panel from getting Inked up, Then I inked with Salvaged Patina Distress Oxide Ink!! I removed the Stencil and cleaned it and moved onto the next Color!!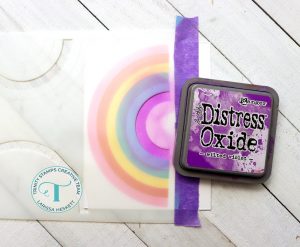
I placed the Next Stencil into place over my Card Panel, lining up the Rainbow Ray with the already Inked Rainbow Ray and then pressed it firmly into place!! Again I had to add some Purple Tape onto the Bottom of the Stencil area to protect my Card Panel from getting Inked up, Then I inked with Wilted Violet Distress Oxide Ink!! I removed the Stencil and cleaned it and moved onto the next Color!! 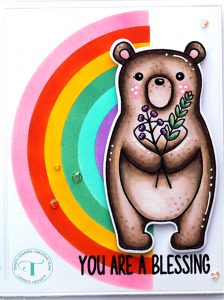
SWOON!! I just LOVE the Retro Feel of the Rainbow Colors and I like how its placed sideways onto the Card Panel!! Next I Stamped and Embossed the “You are a Blessing” Sentiment also from the Blessing Bear Stamp!! Then I Stamped and Embossed the SWEET Bear also from that Set!! Stamping again with Versa Fine Black Onyx Ink and Embossing with WoW Clear Gloss Embossing Powder!! Then I used Copic Markers to Color the Image in!!
BEAR: E40, E43, E44 & E47 CHEEKS & INSIDE of EARS: RV11
PURPLE FLOWERS: V00, V15 & V09 GREEN FLOWERS: YG61, YG63, YG67 Y11 & YR23
Next I used the coordinating Blessing Bear Die Set to Die Cut the Bear Image out!! Then I used some Black Gel Pen to fill in the Bears Nose and Eyes to help make them POP and added some White Gel Pen Details to add some Highlights!! I LOVE the way these little details make the Bear come to LIFE!! 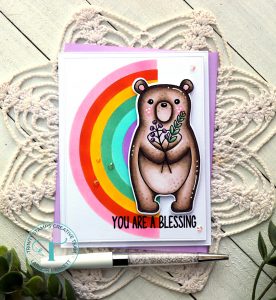
To finish off the Design with some SPRAKLE, I added some of the Fairy Rocks Rhinestones Embellishments using some Ultra Bond Adhesive and I just ADORE how this Card turned out!! It has a Retro feel to me and yet anything with a Rainbow is SURE to BRIGHTEN the Day of someone SPECIAL!!
So there you have a Look at the NEW Layered Rainbow Layering Stencil and how to use it for a Scene on a Card in kind of an unexpected way!! This Layering Stencil is SO VERSITILE and can be used to create Larger 5×7 Cards as well!! I hope I’ve INSPIRED you today!!
Also, the NEW Autumn Impressions Release is NOW Available in the SHOP, so TREAT yourself to something and get CRAFTY!! I honestly get GIDDY when I think about ALL of the AWESOME ways the NEW Products will be used to create New Projects!! So PLEASE, make sure you share them with us on Social Media using the the #hastag #trinitystamp #trinitystampsllc as we LOVE to see what you create!! Also you can join us in our FB Community HERE!!
THANKS SO MUCH for stopping by today and I hope you have a FABULOUS WEEKEND!!
Larissa Heskett


