
Wishing You a……
Hello Crafty Friends!!
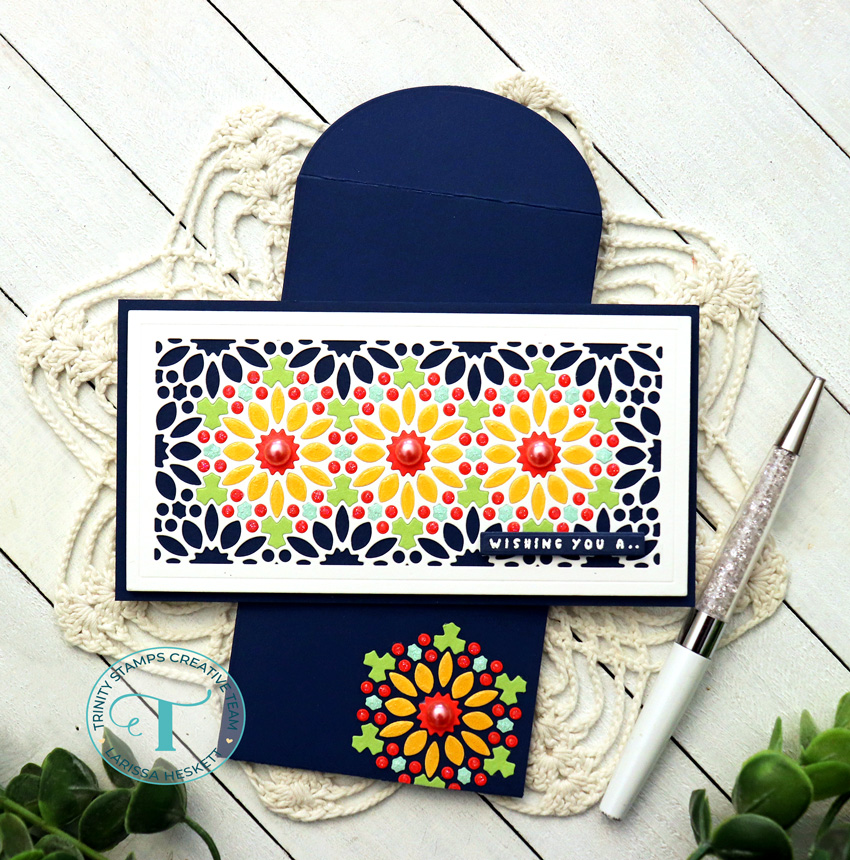
Larissa here today to share a BEAUTIFUL Happy Mother’s Day Card and Coordinating Envelope!! I just LOVE Inlayed Designs and the Mini Slimline Blossom Die makes for Several Options when it comes to ways you can Inlay the Design!! Let’s get Started!! 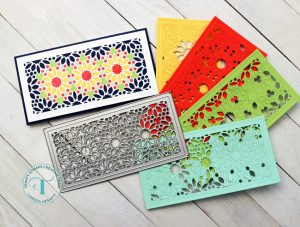 I Started by Die Cutting the Mini Slimline Blossom Die from White Cardstock and then again from some Yellow, Coral, Green and Turquoise Cardstock!! Then I Die Cut my Cardbase Panel from some Navy Blue Cardstock using the Mini Slimline Clean and Simple Panels Die Set!! I adhered the Mini Slimline Blossom Die Cut from White Cardstock onto the Navy Blue Cardbase Panel and then I adhered the different Cardstock pieces from the Colored Cardstocks to create my Inlayed Design!!
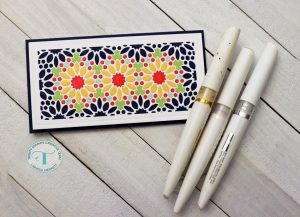
I wanted to add some Sparkle and Shine to the different elements so I added some Nuvo Shimmer Pens in Silver, Gold and Rose Quartz!! I LOVE the way it SPARKLES in real life and it really helps to make the different parts of the Design Shine!! 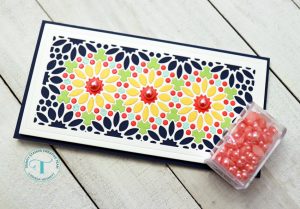
I added some of the BEAUTIFUL Coral Reef Satin Bauble Embellishments to the Center of the Inlayed Blossoms using some Zots Bling Adhesive Dots!! 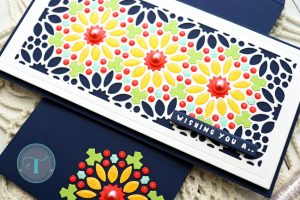
Then I Stamped and Embossed the “Wishing You A..” Sentiment from the Tiny Fairy Silhouette Stamp Set, stamping with Versa Mark Ink and Embossing with WoW Bright White Embossing Powder onto some Navy Blue Cardstock!! Then I adhered it to the Card Panel using some Foam Tape!! 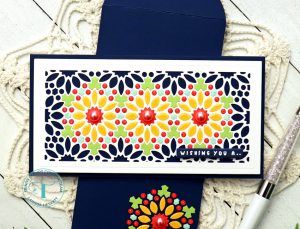
I LOVE how CHEERFUL and HAPPY this Design turned out!! You could use ANY Color Combination and change out the sentiment for ANY Occasion, as well as inlay the ENTIRE Card Panel too!! The options are ENDLESS!! 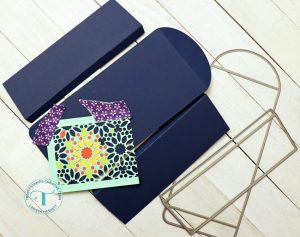
I wanted to create a Coordinating Envelope so I Die Cut some Navy Cardstock using the Mini Slimline Card and Envelope Builder Die Set!! Then I wanted to create a coordinating Design onto the Envelope Front!! I used the Turquoise Cardstock Die Cut as my Guide taping it to the Envelope Front and then I inlayed the Blossom Design just as I did for the Card Panel!! Then I removed the Cardstock Die Cut and I was left with the Blossom Design!! I added some of the Shimmer Pen and another Coral Reef Satin Bauble to finish it off!! 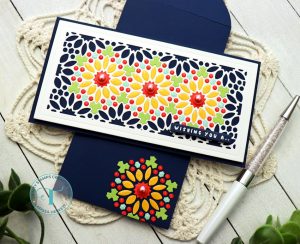
I finished off the Design with the Happy Mother’s Day Die Cut from some of the coordinating Cardstocks using the Scripty Mother’s Day Die Set and adhered it to the inside of the Card!! 
I just LOVE this Card and coordinating Envelope and I’m SURE it’ll bring a SMILE to my Mother’s Face!! I hope I’ve INSPIRED you today with this Inlayed Design and I hope you’ll give it a Try to create a Card and coordinating Envelope for someone Special!!
THANKS SO MUCH for stopping by today!! If you create something please share with us on Social Media using the #hastag #trinitystamps #trinitystampsllc as we LOVE to see what you’ve created!!
You can join us in our FB Community HERE!!
Have a FABULOUS WEEKEND and Happy Mother’s Day to all of those AMAZING Mothers out there!! Make sure you continue to visit us as we continue to share Projects to INSPIRE You!!
LARISSA HESKETT


