

Snow globe Shakers
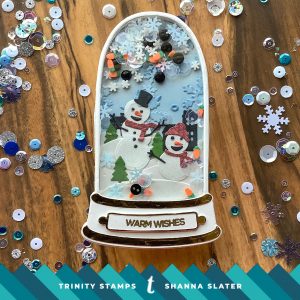
Hi Trinity Tribe, this is Shanna from Caffeinated Craftiness bringing you a fun holiday card shaped like a snow globe. Added bonus…It’s a SHAKER! The card features one of my favorites from the newest release for Trinity Stamps, the Tall Dome Shaker die set
You may have seen my live video on Facebook earlier this week showing you how to make these cards, if not then you are in luck! I will walk you through the process here as well!
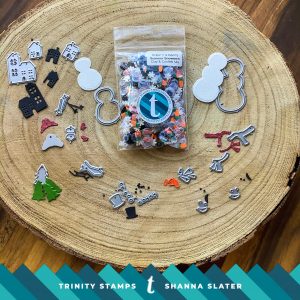
Pictured below are all the pieces you need to cut from the Tall Dome Shaker die set to make the card and shaker. You will need cardstock, fun foam, and acetate.

To build your card base you need to:
1. Glue your fun foam Window pieces together. HINT: keep the negative pieces in the middle to help stabilize them while you glue the edges.
2. Glue the foam window pieces to one of the solid cardstock domes. This creates the base.
3. Adhere the acetate to the back of the cardstock window piece. This will be the top.
Now that we have the base pieces made, let’s move onto the fun part….the inside of our shaker!
Here is a picture of everything I used for the inside of my snowman shaker. The dies are from both the Tall Dome Shaker die set and the Snowman Border Builder die set as well. I used the Summer Snowman embellishment mix as my shaker filler, and it was totally my muse for this snow globe as well! All those snowman pieces are too cute!
Next I assembled my snowmen and then proceeded on building my scene. I used the hillside dies included in the Tall Dome Shaker die set to cut some snow drifts and I adhered them to the negative piece from cutting the cardstock window piece earlier. By using the negative piece that was cut out I know for sure my scene will fit perfectly within the snow globe. After the snow drifts were adhered, I layered my scene, keeping dimension to a minimum so it did not exceed the depth of the shaker. After all the pieces were glued and dry, I used my anti static powder tool to go over everything so no open adhesive or static would catch the shaker bits. Next I added my shaker bits from the Summer Snowman mix and then glued the acetate panel to the top making sure the shaker sealed all the way around.
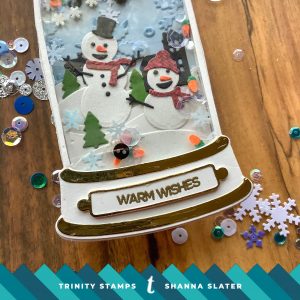
Next was the nameplate. I stamped and heat embossed my sentiment from the Holiday Greetings sentiment builder set and the glued the three cardstock pieces together for dimension. The metallic gold border piece went on top. The 2 last metallic gold pieces are the upper and lower edges of the globe’s base, and they were adhered directly to the top panel of the card.
Lastly it was time to make the shaker into a card. With the remaining solid cardstock base score 1/2 inch down from the top of the dome. Place glue on the top of the dome, above the score line only, and adhere to the back of the shaker, creating a hinged backing suitable for writing a personal message to your recipient. I somehow forgot to take a picture of the inside of the cards! Oops! I actually stamped and heat embossed additional greetings from the Holiday Greetings sentiment builder set on the inside of the card.
I actually made 2 of these fun shaped cards, the second card feature a couple of the critters from the Winter Friends stamp set and coordinating dies. I had a lot of fun coloring that puffin to look like a parrot!
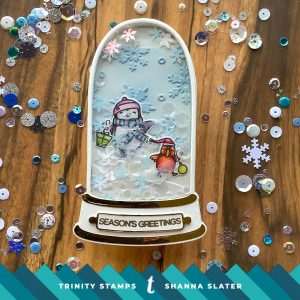
Here is a final picture of both the snow globe shaker cards I made this week, I hope you like them!

Feeling inspired?? Be sure to check out these links and follow along for more amazing Trinity Stamps inspiration!!
Trinity Stamps YouTube
Trinity stamps | imagination, inspiration, & conversation Facebook group
Well that wraps up this week’s post..See you all again soon! Feel free to hop on over and check me out on my blog or follow me on Instagram!!
~Shanna


Very cute!