

Sneak Peek & Tutorial: Slimline Wide Box Card Die Set
This is so super exciting- Trinity Stamps has a bunch of interactive slimline dies releasing this Friday October 23rd at 9am EST as part of the Warm & Cozy holiday collection! I love interactive cards- they are my favorite type of card, pair it with slimline size (my favorite sized card) and I literally did a happy dance and jumped up and down!
Today I’m using the soon-to-be released Slimline Wide Box Card Die Set and Slimline Series: Holiday Trimmings Paper Collection. A wonderful video will appear on the Slimline Wide Box Card Die Set product page this Friday, but I thought I would also share a tutorial here with tricks & tips to make it EASY for you to assemble one perfectly.
First make all the die cuts that you need to assemble the box card. You will need 2 die cuts of the largest die (shown below as “A”), one die cut of panel “B” (lower elongated rectangle panel), one die cut of the upper panel “D” (upper elongated rectangle panel), 2 die cuts of “C” (side square panel), 2 die cuts of “E” (side rectangle panel) and two die cuts of “F” (the inside the box shelves that you will glue your images to). Shown on a later slide is a larger backdrop panel (“G”) that you will need one of.
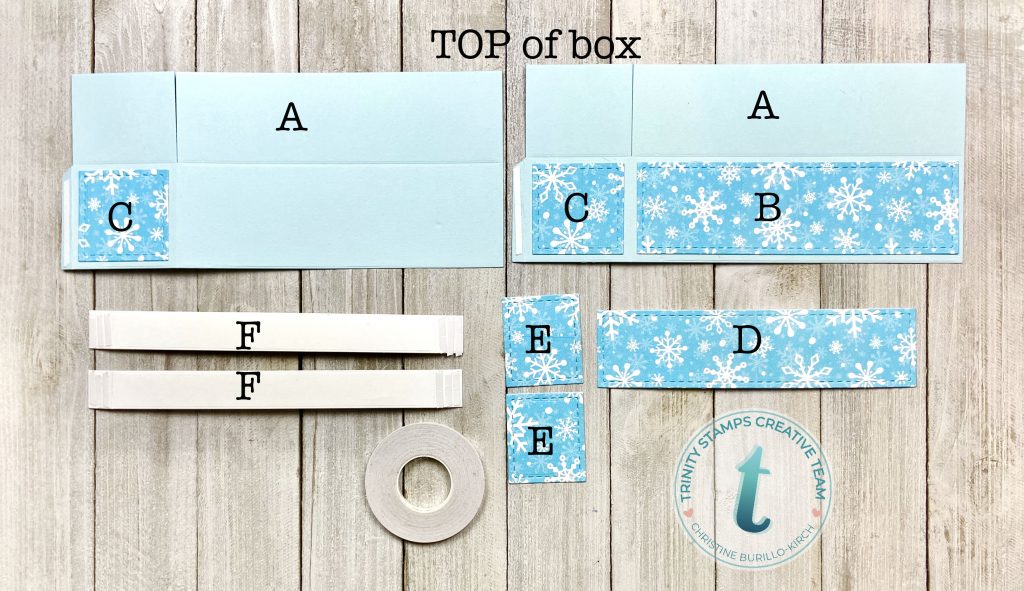
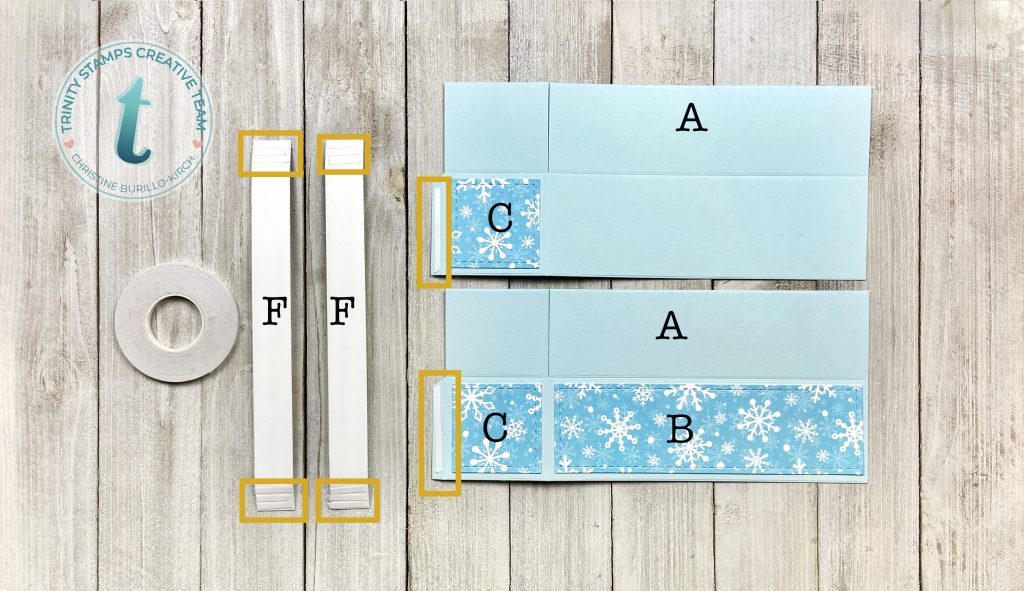
You will need to apply double sided adhesive tape (1/8 inch) to 6 tabs to completely assemble the base. Apply one strip of double sided tape to each of the tabs on the “A” base. Apply 3 strips of double sided tape on each of the 2 tabs on each “F” die cut.
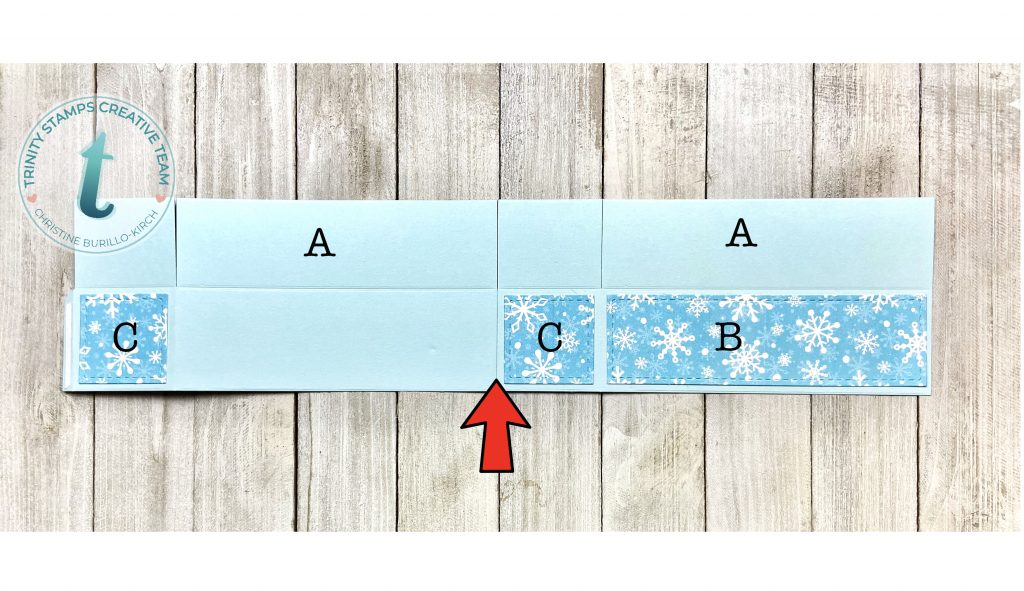
Now the fun part is here: the assembling of the box card! Take the release paper off the double sided tape on the tab from one of the “A” bases and adhere to the other “A” base as shown in the photo below (the red arrow shows where they are now connected). Leave the tab on the other “A” base alone as shown in the photo.
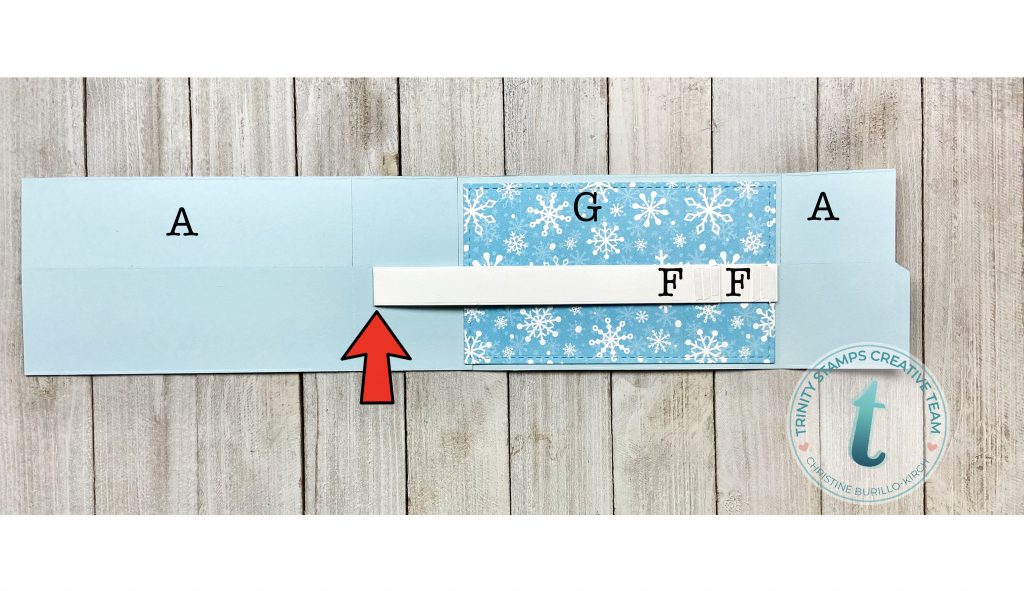
Now turn over the entire adhered base as shown below. We are going to work on the “inside” of the box. Panel G (mentioned at the beginning of the tutorial, but only shown now) provides the backdrop for the scene you will create in the box. Adhere it where the red arrow is (you can see where I put it in the photo after the one below).

After you have adhered panel G (backdrop) take the 2 “F” shelves and adhere them to the side panel a bit apart (but on the same level). After you have adhered them to the one side, fold them over as shown and make sure that they are level with each other, but one should jut out a bit more than the other. We are almost done!
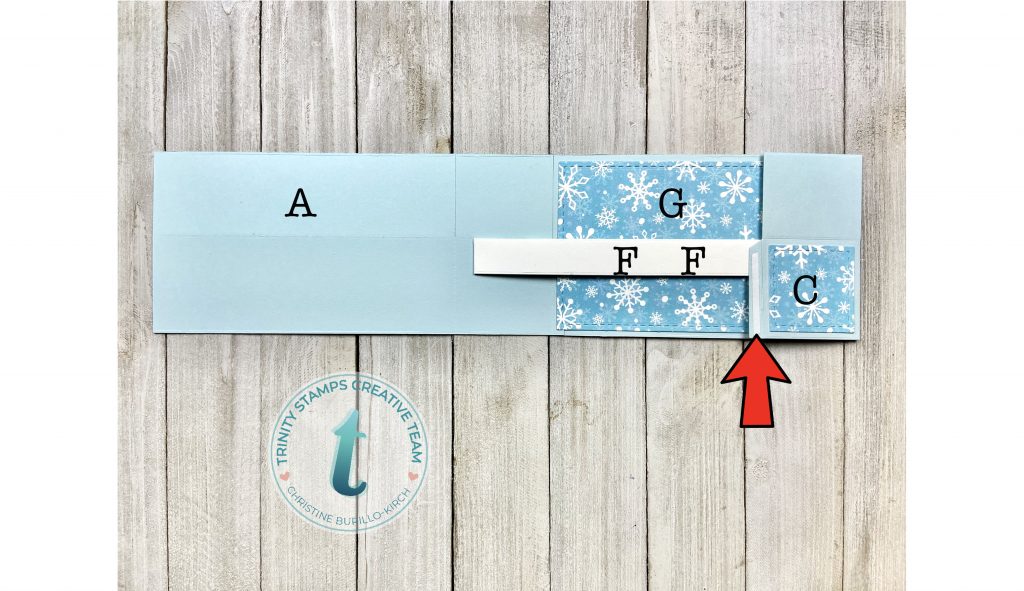
Now take off the release paper from all the double sided adhesive on the “F” shelves. Please fold over the right side box panel (right most part of the entire structure) along the score line so that it adheres to the “F” shelves. Finally, remove the final piece of release paper from the double adhesive tape on the tab next to “C” (red arrow points to it).
You are almost done! All you have to do is take a deep breath and fold the left most part of the entire structure along the score line (it is the only part that will easily fold vertically at this point) and bring it to the tab with the adhesive. Line it up and you should get the final structure below!
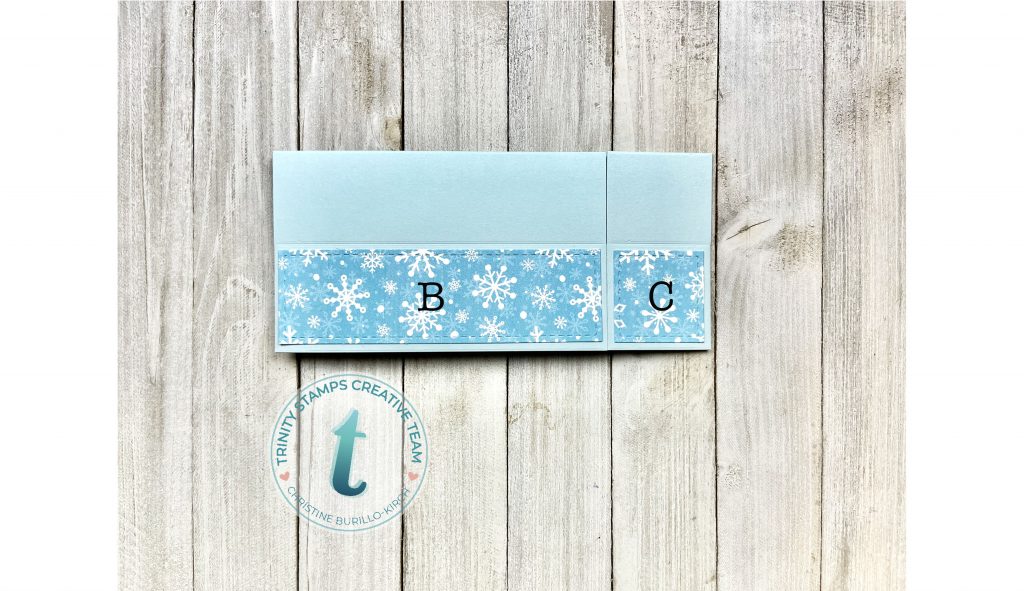
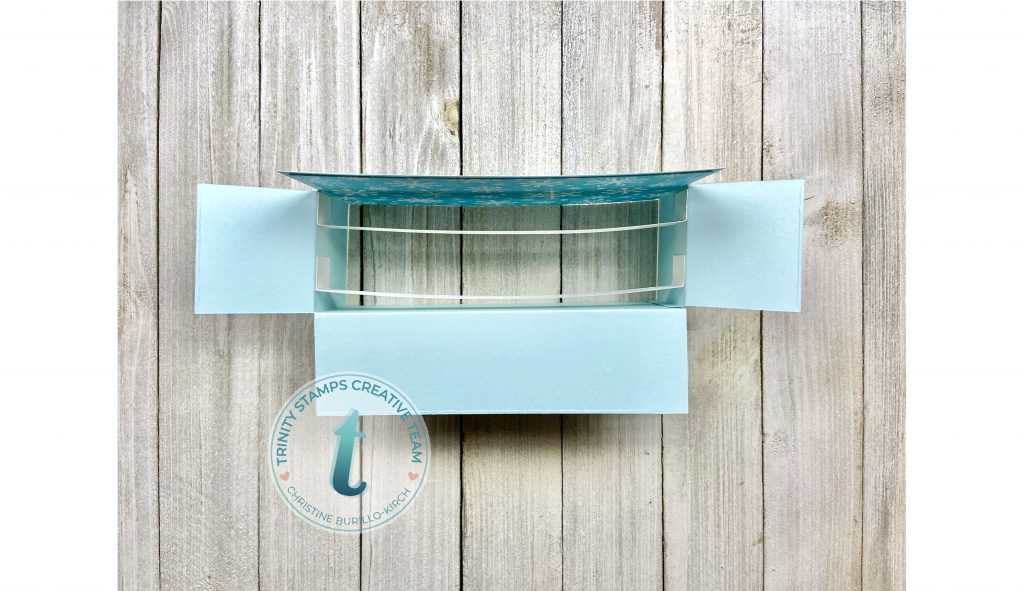
Now fold down all the flaps of the box as shown below, except for the flap that has the backdrop- please leave that flap unfolded.
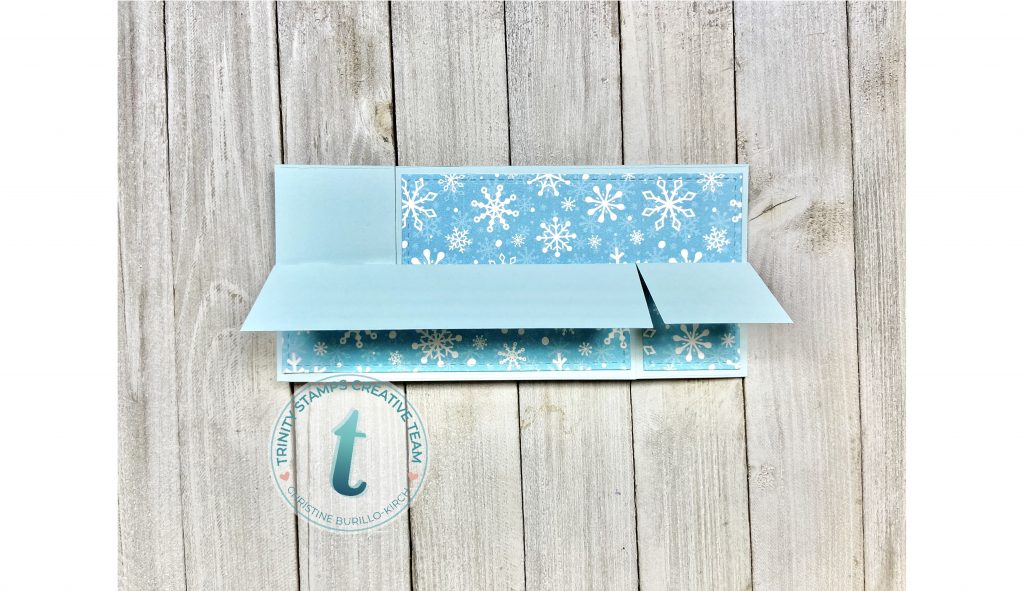
You now have the box card structure completed and everything else is just the icing on the cake! Your box card should look like the following photos when you look at it from different angles.

Now you can add whatever images you want to create a little scene that will delight the recipient of the card. I chose to use the Happy Little Tree Farm die set, the Bunch of Bows die set and the Scripty Christmas Die Set– also all part of the Warm & Cozy Release this Friday! I kept the scene simple and die cut all the tree part out of cardstock I had in stash as shown below. To create the illusion of depth, I ink blended some forest moss distress ink at the junction where I adhered the different tree pieces together.
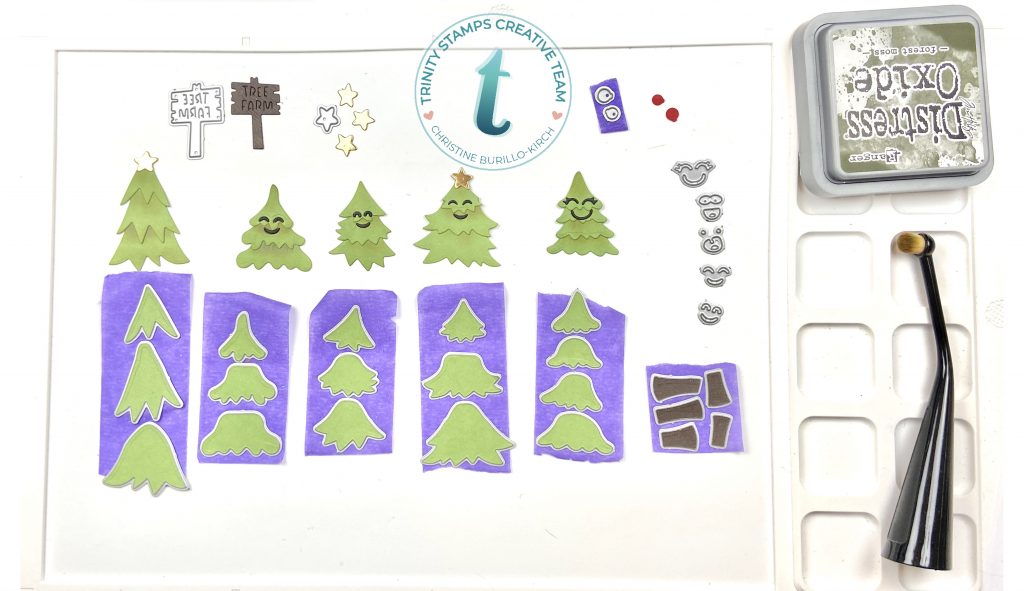
I created a bow out of red cardstock (a detailed video will be on the product page when it releases)with Bunch of Bows die set. The Merry Christmas sentiment was die cut out of gold cardstock with the Scripty Christmas die set.
Thank you so much for stopping by- I hope that this tutorial helped and I can’t wait to see your creations on Instagram and Facebook- please tag us when you share!


Beautiful!! Love those trees!! So glad I got them. 💙
Looks marvelous and I really like your tutorial and that script merry Christmas!