

Let’s Par-tea! A shaker card.
Hello my sweet friends, I am back!
I am super excited to share this shaker card with y’all.
Shaker cards are all the rage right now and I am just loving every second of it.
Alright, for my card I chose to play with the Trini-tea Cup card die set and the Par-tea time stamp set from trinity Stamps. 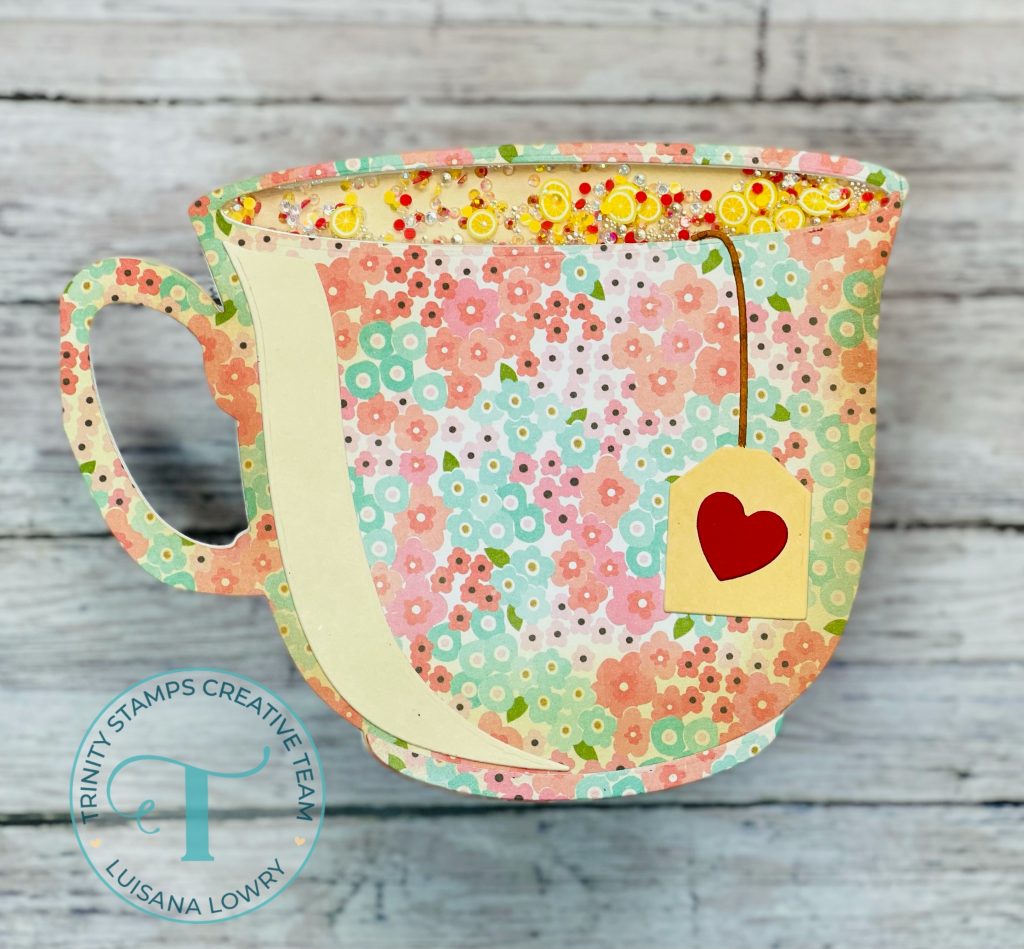
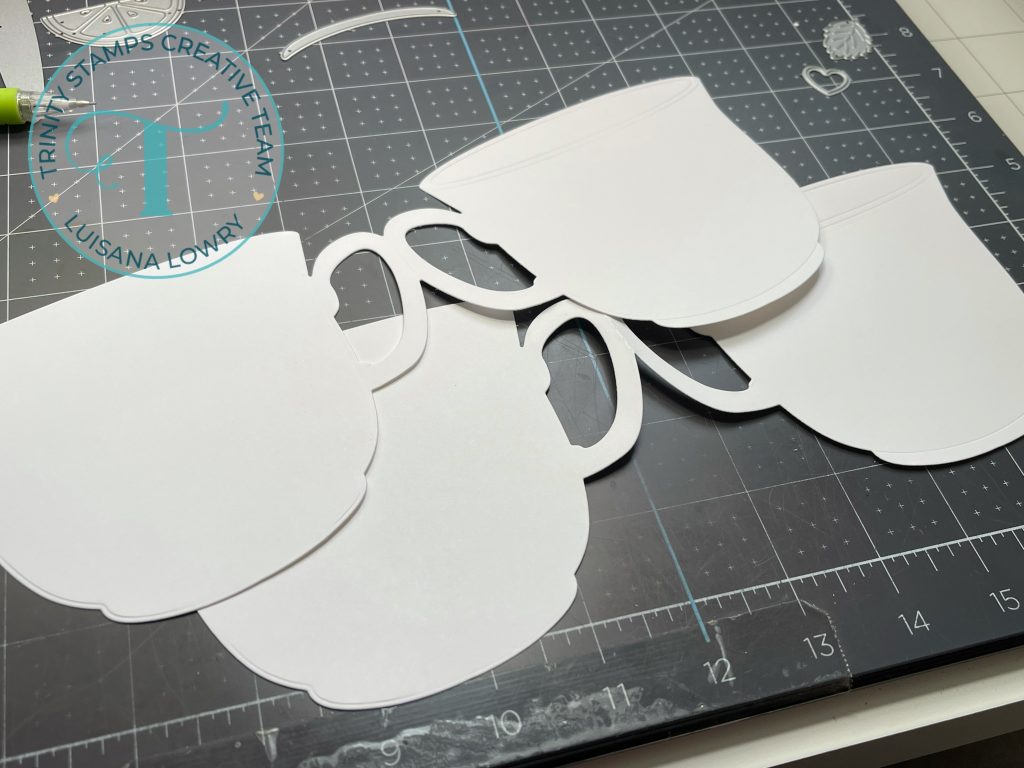
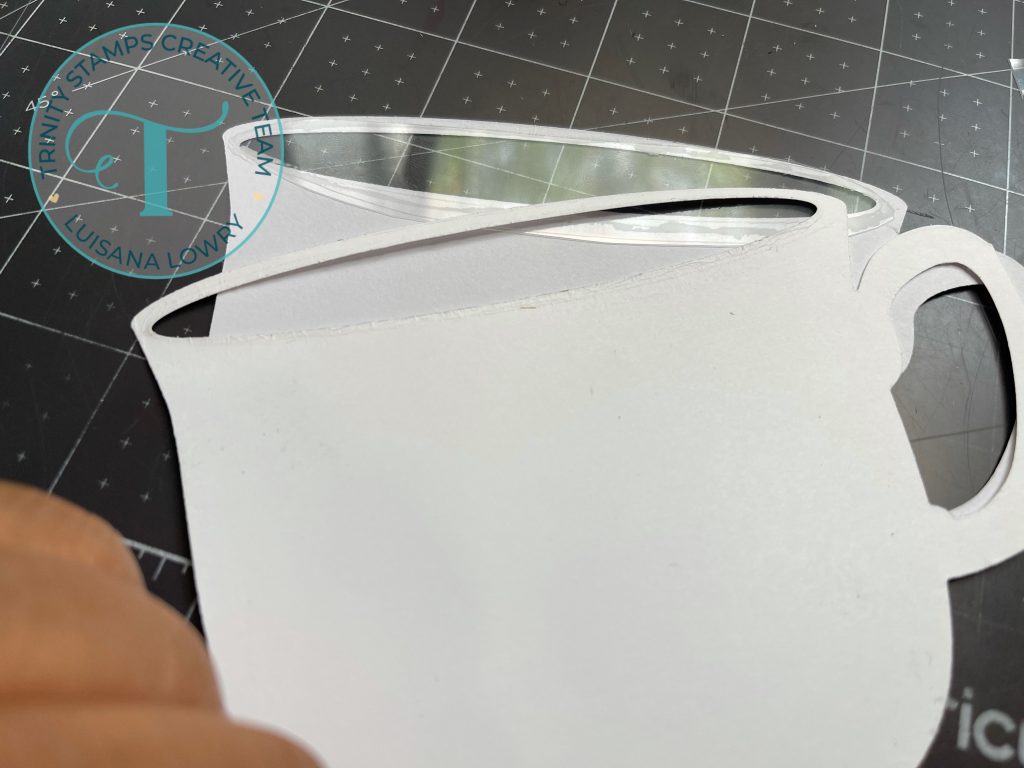
I began by die cutting 3 (only 2 shown in the pic) different pieces of white cardstock using the tea cup dies. I needed 3 for my shaker plan to work. Then I decided I wanted to make the teacup look like a vintage floral old fashioned cup so I searched through all my paper pads until I found this one, it had the perfect paper for my project. 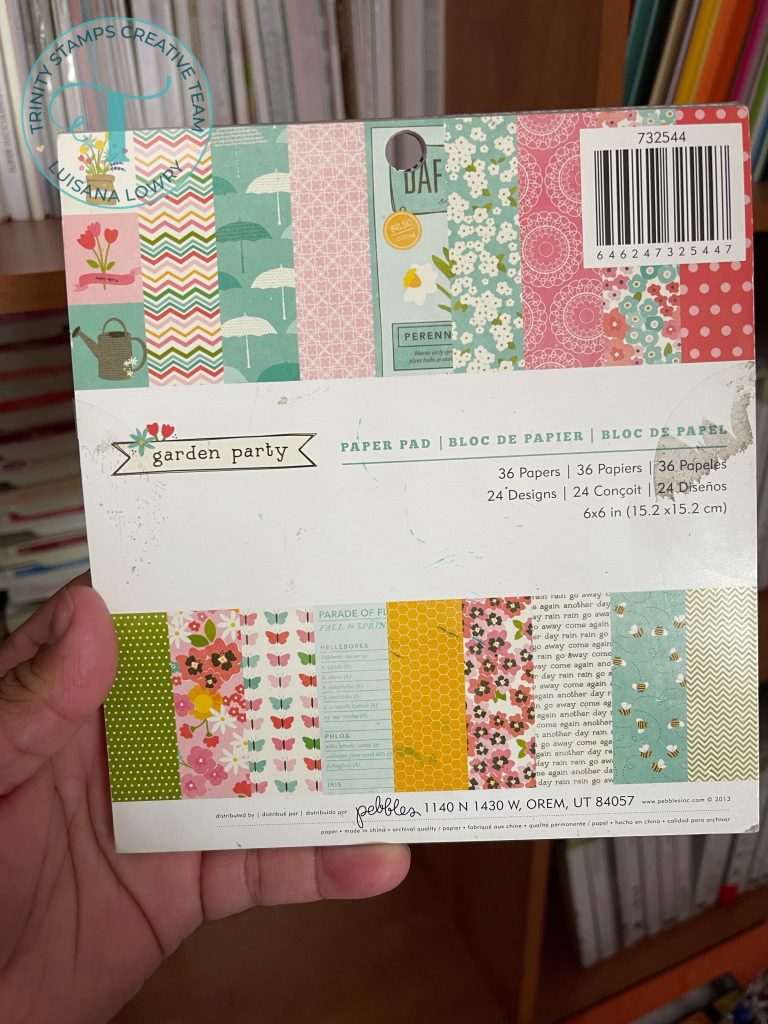
I proceeded to die cut only the front part of the tea cup using my floral paper.
This part is a little tricky but totally doable. I needed to cut a window for my shaker bits to go into, and I chose the part of the cup where you’d see the tea to be my shaker portion.
to get the perfect alignment I used washi tape to put together my floral layer and one of the white die cuts I had done. I was specially careful to make sure it was perfectly situated before doing the next step. When I was happy with it I place the die on the area where the tea is meant to go and secured it with more washi tape and ran it through the die cutting machine. This gave both layers the same opening in the exact same spot. 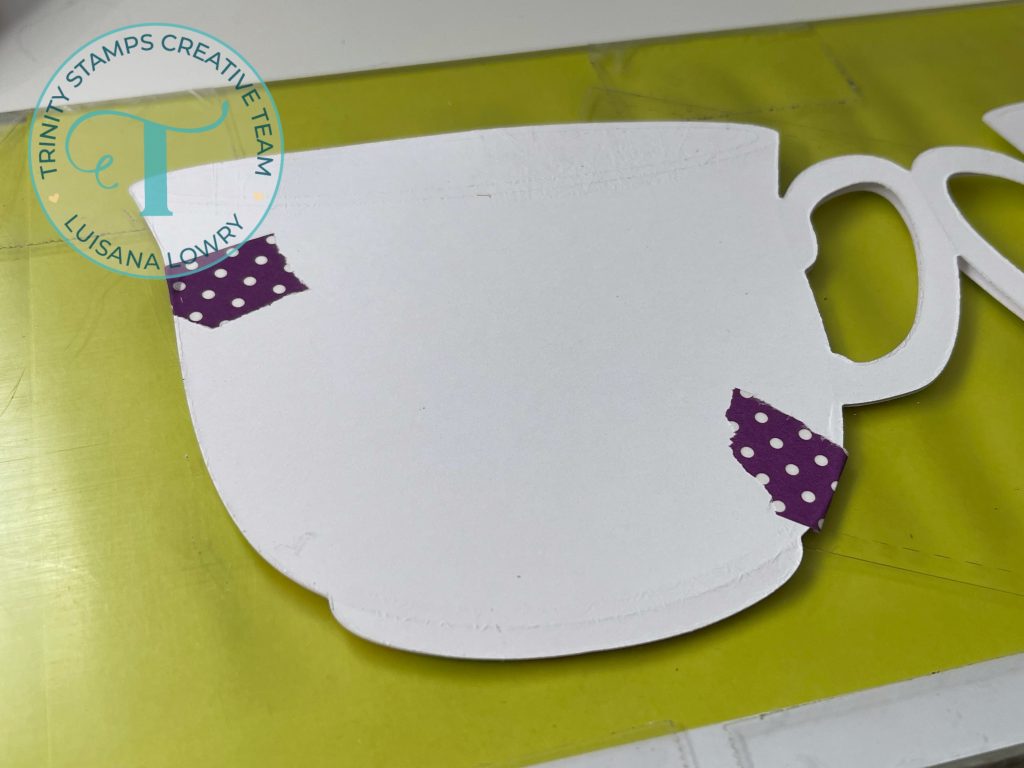
Next was time to do the acetate. Since the shaker window was going to be really small, I used one of the pieces that came out of the previous die cutting, the negative side of the teacup hole, as a way to measure or gauge how big the acetate needed to be. I cut only enough acetate to fit that window and glued it to the back of the floral layer. Next I glued the other piece with the shaker window to the back of the floral layer as well. This made it so that the acetate was sandwiched between the floral and the white teacups. it gave it a cleaner look. 
I wasn’t happy with the way it looked just yet so I grabbed a couple of distress inks and my blending brush and added some dimension to the edges of the teacup. Now its perfect!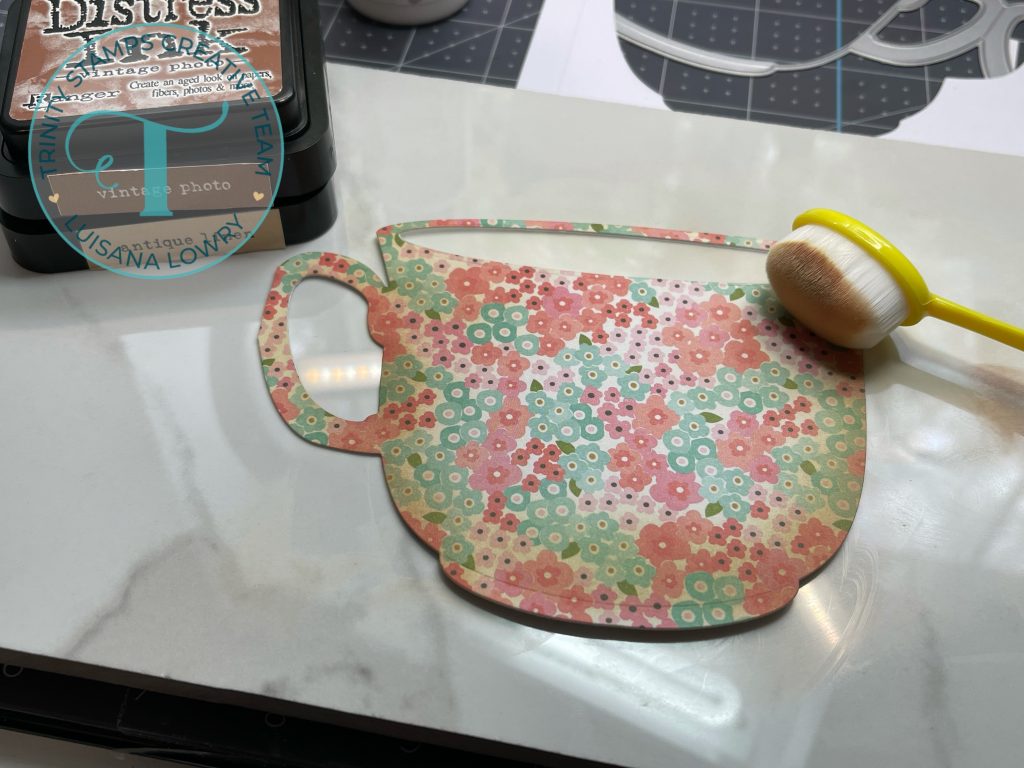
Next up I place double sided foam tape all over the back of the teacup with the acetate, leaving the window portion untouched. I had to trim my foam tape to fit my slimmer areas of my teacup but that was not a big deal.
Now comes the fun part and my favorite! Using an assortment of clay and other embellishments from trinity Stamps I filled my shaker window carefully. 
For the layer that is meant to go behind the shaker window I chose to make it look a brownish color using distress inks and a blending brush. I thought this way it will look more like real tea. 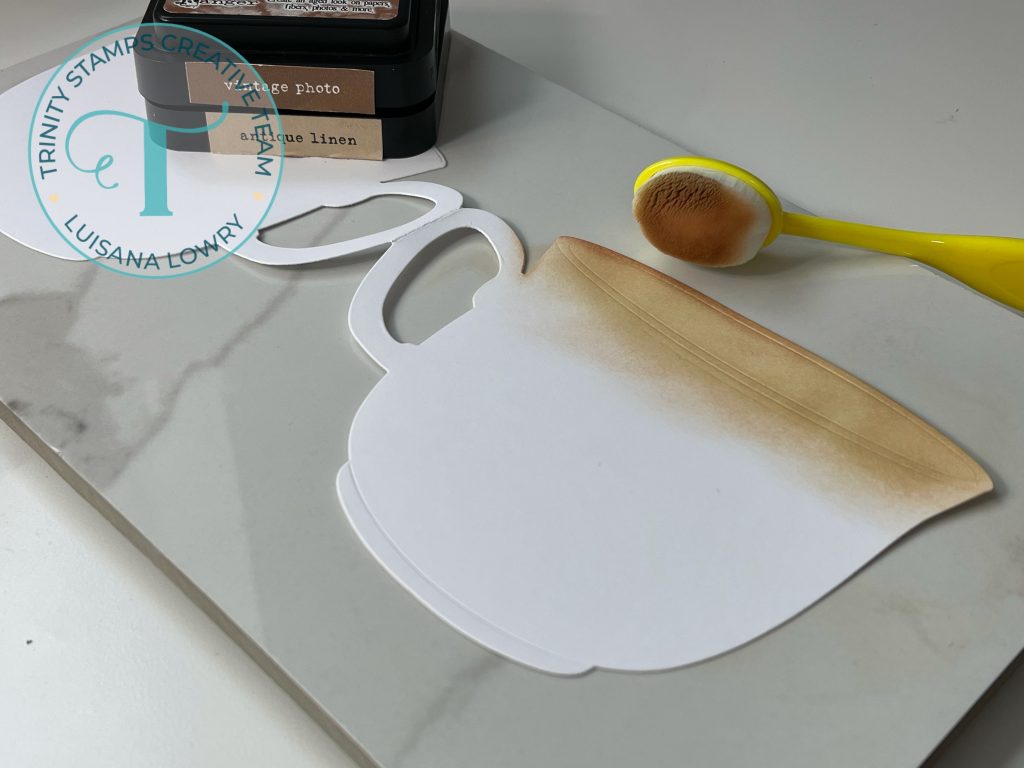
Now its time to remove the backing of the foam adhesive and very carefully place the back die cut layer we just inked to the shaker portion of the card. 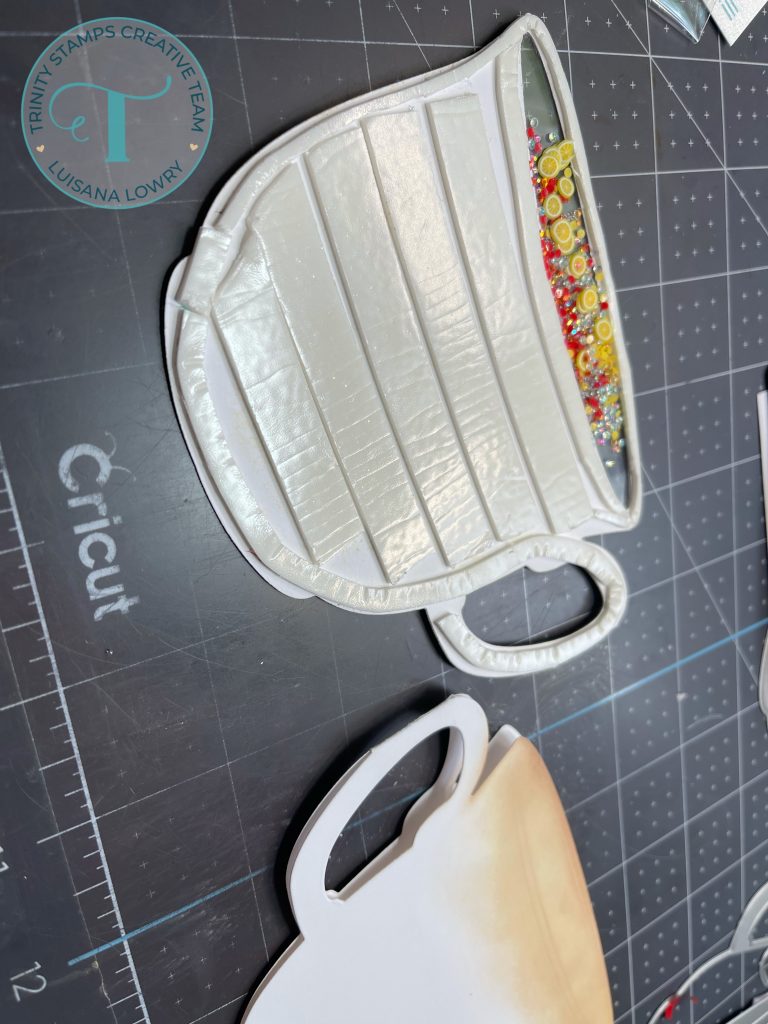
I wanted to keep the colors consistent throughout the card so I chose a white card stock and inked it with the same distress ink for the tea bag and the accent piece to the side of the teacup and colored the string of the teabag using a brown copic marker. Finished it off with a red heart in the center. Ain’t it sweet!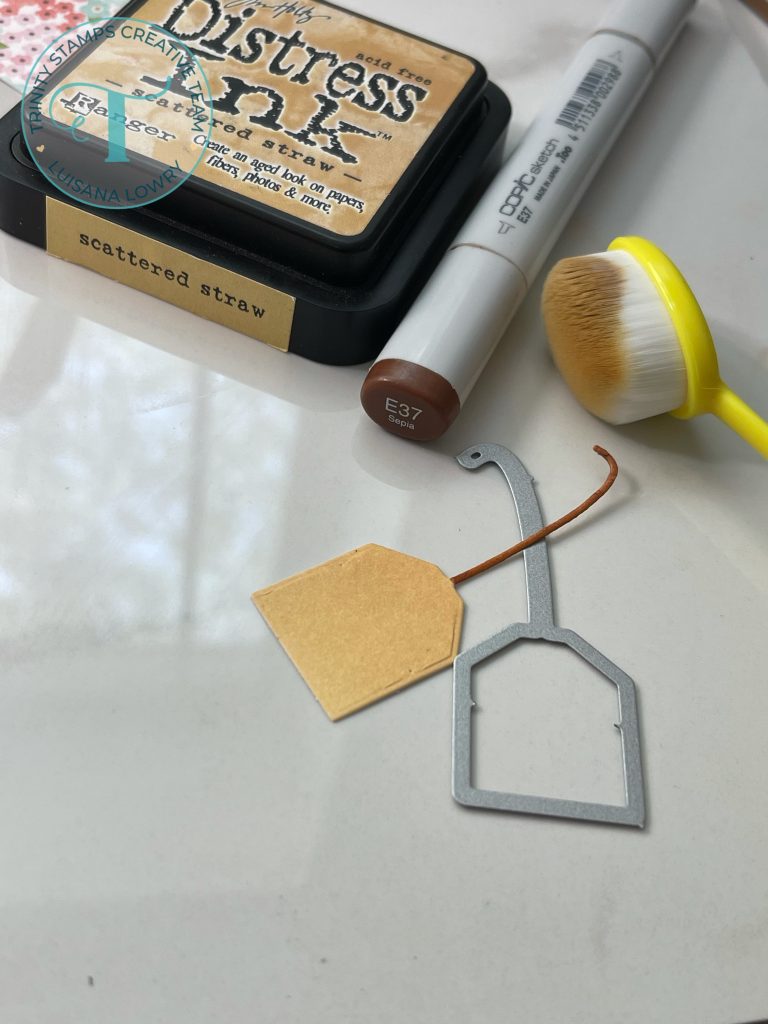
For the sentiment I chose “Let’s Par-Tea” from the Par-tea stamp set and inked it using green archival ink from ranger and shifting the stamp just a smidge and stamping it with black hybrid ink from Picket fence Studios, this gave my sentiment a fun shadow. 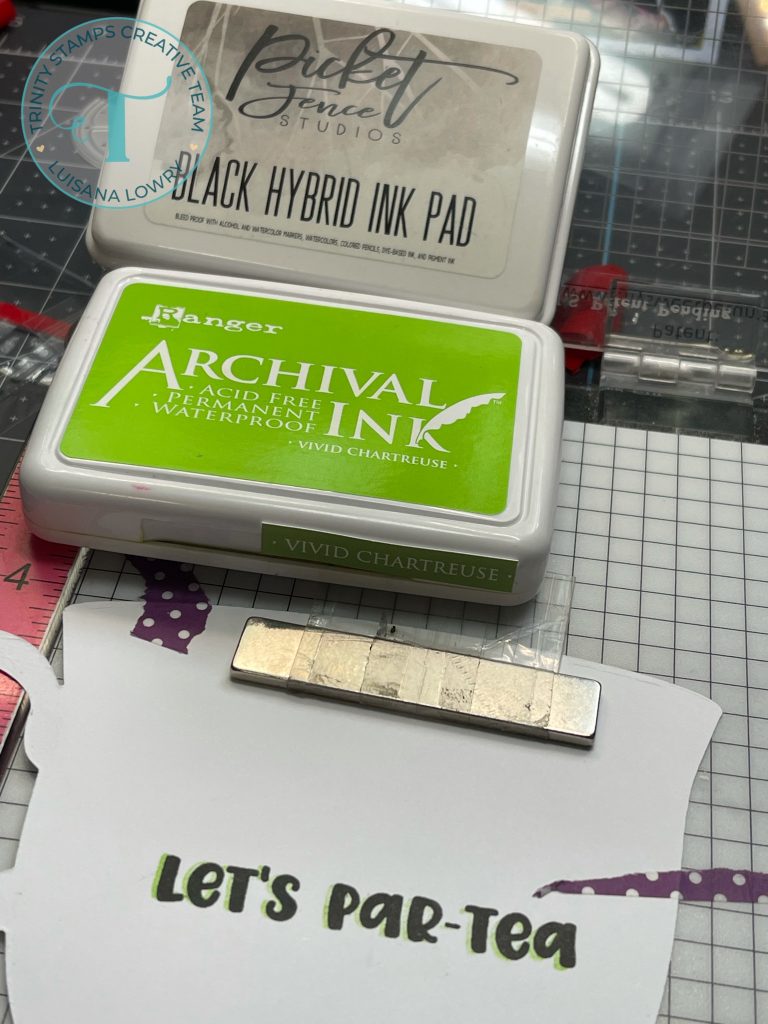
There you have it folks. This was such a fun card to work with. I hope you will give it a shot. 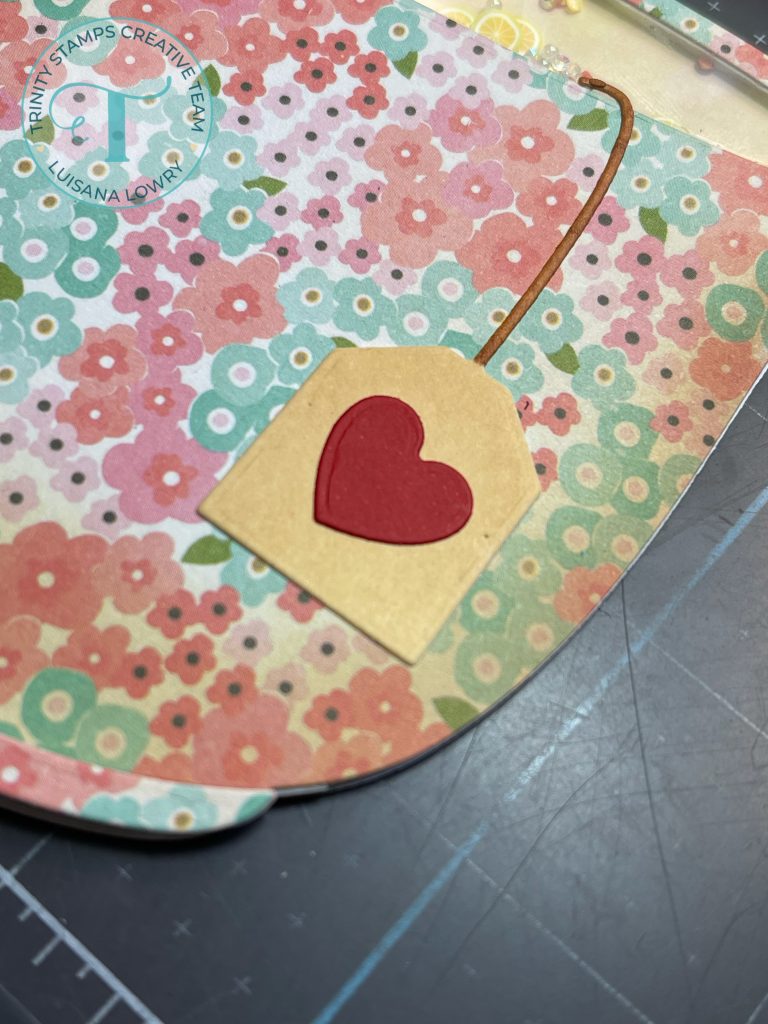
Thanks so much for reading and I will see you again next time.


