
Guest Designer – Anna Celdran-Mahtani
Hello! Anna Mahtani @craftyannastudio here again for another fun stencil technique. My inspiration for you today is creating a serene winter sky using the Layered Birch Stencil set. Hopefully, this will inspire you to get started on your holiday or winter cards, that is, if you haven’t already!
The 6”X6” Layered Birch stencil has three stencils that layer together to create a row of Birch trees as well as a scattered leaves stencil with wavy edges to be able to mask a ground or a snowbank.
I took the first of the three Birch layering stencils and taped it down onto a 6”X6” panel of white cardstock. I also added the ground mask at the bottom. Using a very light touch, I ink blended the trees using a bluish gray ink called Dark Night from Altenew. To make it look more like a Birch tree, I added ink here and there swiping it across trunk with a Fantastix foam brush tip blending tool. If you don’t have this in your stash, you can also use a cotton bud or the edge of your foam blending tool to add this detail.
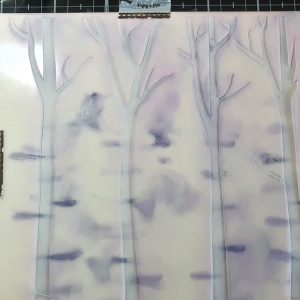
After ink blending, and without removing the stencil, I applied some Versamark embossing ink on top of the ink blended trees using a mini foam blending tool. After inking, I removed the stencil and applied clear embossing powder all over and heat set it, trapping the ink within the embossing.
After heat setting, I taped my panel down again to the mat, added the ground stencil, then added the 2nd layering stencil on top. This gave me another set of trees in between the existing embossed trees. Then I inked up the trees and embossed it, repeating the same process.
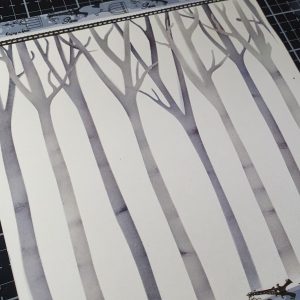
After I was done with the trees, I took the smallest circle mask from the A2 Foundation Circle stencil set and placed it on the upper lefthand side of my panel, where I wanted my moon to be. I also left the ground stencil on the panel and proceeded to ink up the background winter sky.
I used Distress Oxides for the background winter sky starting from the bottom, Shaded Lilac, Dusty Concord, Chipped Sapphire, then Blueprint Sketch and finished off the topmost part of the panel with Black Soot. And because the trees were clear heat embossed, they resisted the Oxide Inks.
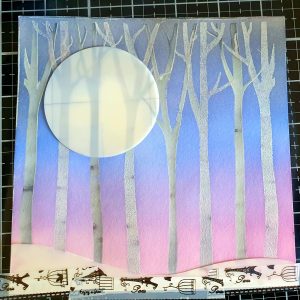
I removed the circle stencil and ground stencil, lightly ink blended some gray ink on the moon and the ground to create some depth. I also added the “shadows” of the trees on the ground using my Fantastix foam brush tip tool.
I used some watered-down white gouache paint and splattered it on the panel using a paintbrush. I also splattered some silver metallic paint to add some subtle shine.
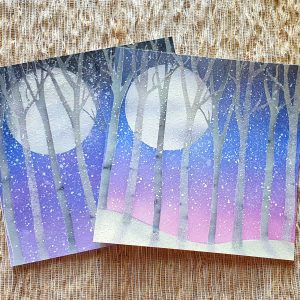
I had so much fun creating this scene that I also made another ink blended panel but this time without the snowy ground as I wanted to make a shaker card and didn’t need the ground to show on the card. Here is a photo of the scenes I created with the Layered Birch Stencil.
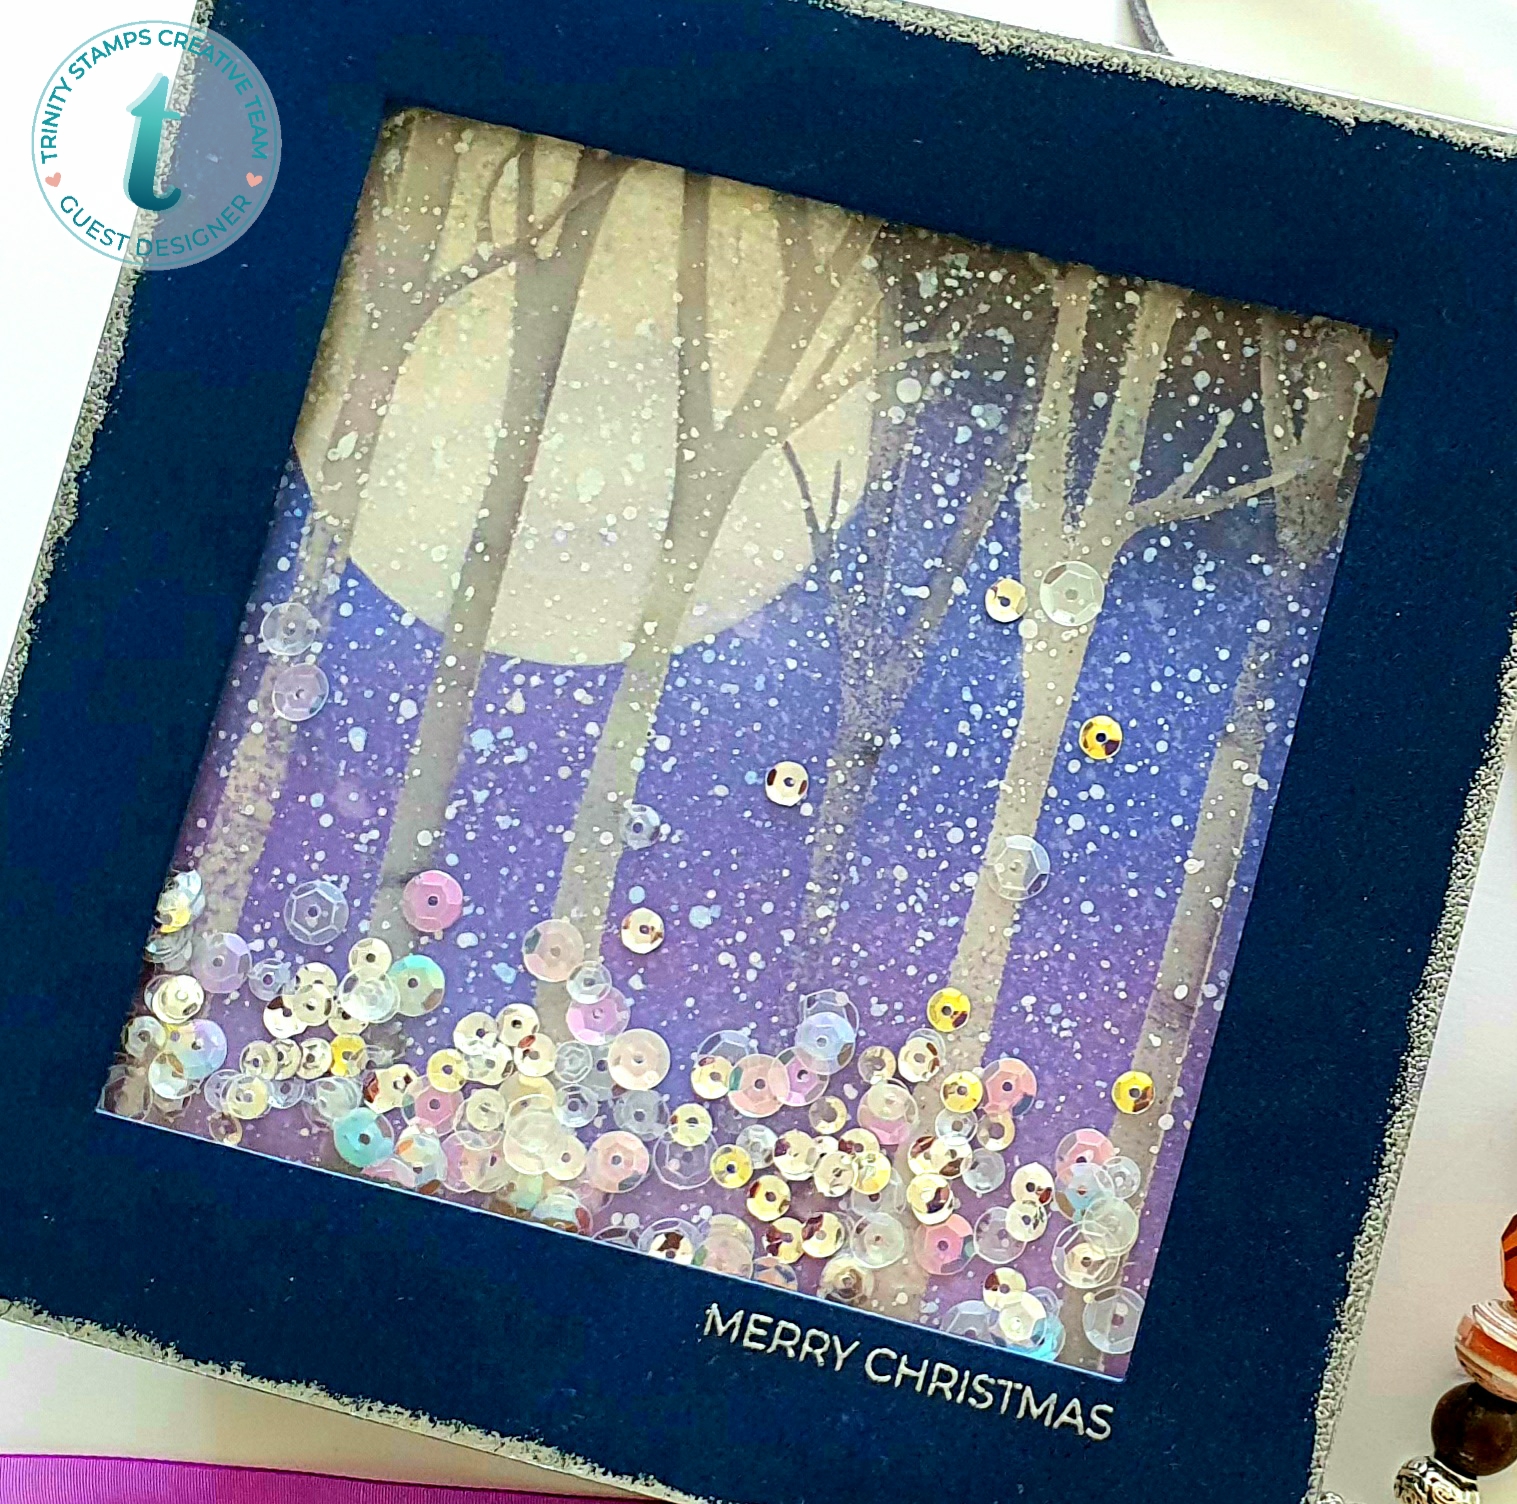
WINTER SCENE SHAKER CARD
To create a shaker card, I took a 6”X 6” piece of navy cardstock and cut out 4.25”x4.25” square window using a square die. To add additional interest, I heat embossed the edges of the cardstock by swiping some Versamark embossing ink and adding silver embossing powder. And on the lower righthand corner, I silver-heat embossed the “Merry Christmas” sentiment from the Sentiment for (almost) Every Occasion stamp set. Then I added some clear acetate on the back of the window frame before adding foam tape.
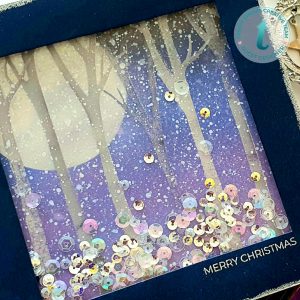
I added some holographic sequins from my stash before adhering the frame onto the panel.
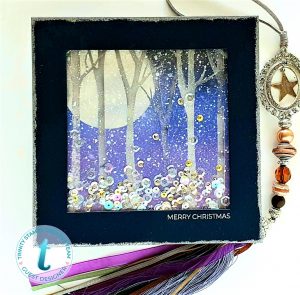
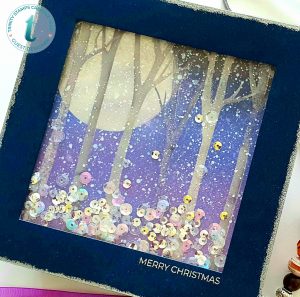
Here is another close-up look at the card I created.
I still have another ink blended panel with a snow-covered ground which I will use for another card.
Hope you were inspired to give this technique a try with your Trinity stencils!
A big thank you to Taniesa and the team at Trinity Stamps for having me as their guest designer!
I hope you all have a wonderful day!
Anna


Love this scene – with & without the snow banks. Thanks for sharing your creative vision & skills! Beditiful!
This is really lovely!