
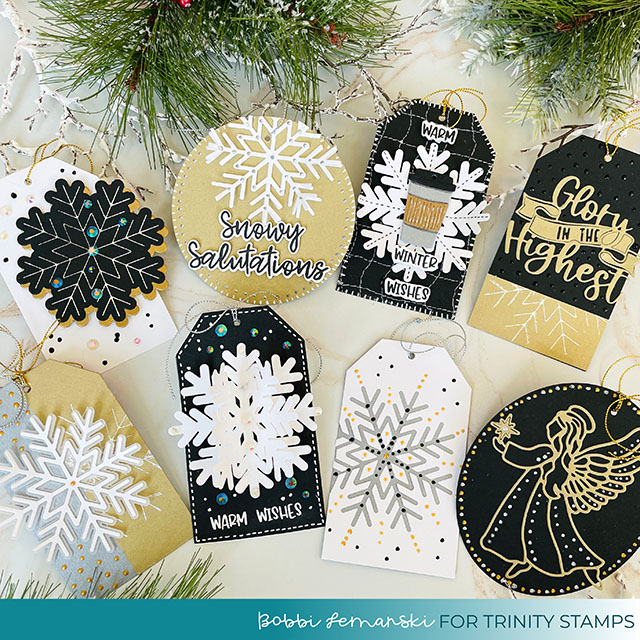
Eight Glorious Tags for the Holidays
I am always in need of lots of pretty tags for the holidays. I start early so that my supply is full when wrapping day is here. That’s never the time to start tags! It’s Bobbi Lemanski here, with eight pretty tags to adorn your holiday gifts this year. All eight tags are made in classic colors – gold, silver, black and white! This combination of colors works with so many holiday wraps. If I don’t have my papers selected or if I’m trying to use up wrap from last year, these colors are a safe choice! For my tags, I’m using the following Trinity Stamps products:
Big Snowflake Cut & Foil Die Set
Winter Winds stamp set and coordinating die set
I started with really no plan, I just allowed myself to create combinations that I thought would be pretty. It’s really a fun way to create. There’s no pressure for the perfect tag, instead eight pretty ones were made! Note: I’ve added a “to/from” on the backs of each tag, however with so many tags, I decided not to share the back sides of each tag. (not shown).
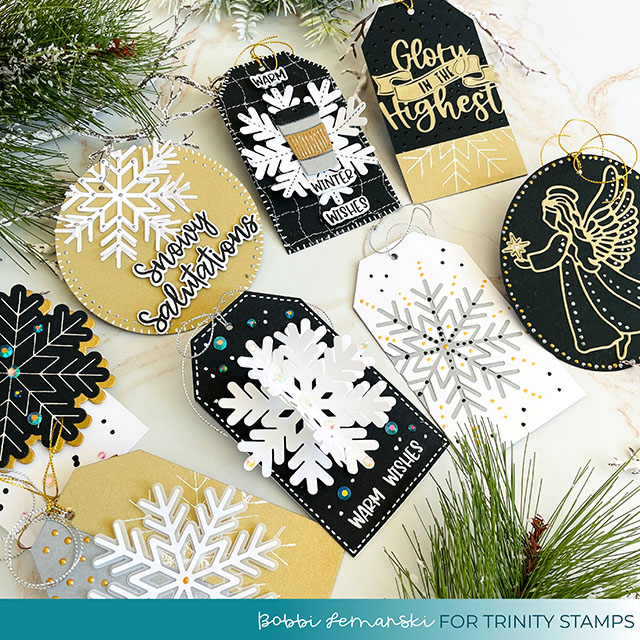
To create these tags, I started by creating the tag bases from metallic gold and silver, and black and white cardstock. I used ovals, circles and clipped corner rectangles to create the bases. Next, I stamped, die cut and even foiled to make this lovely collection.
Tags One and Two
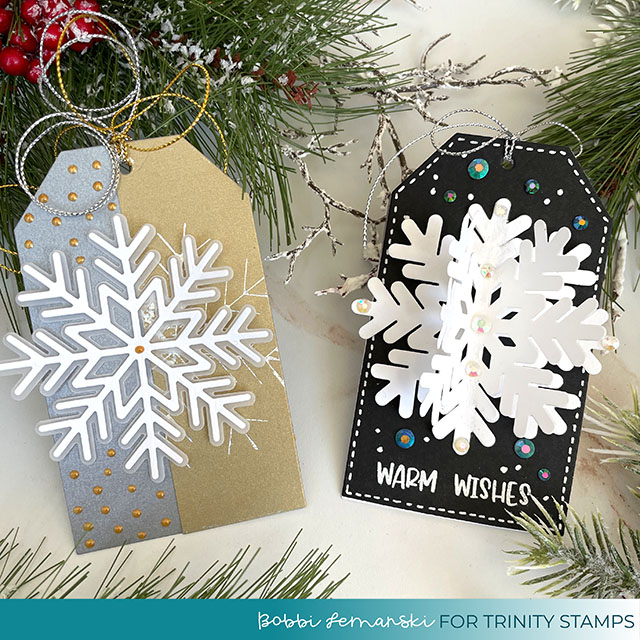
To make tag one, I die cut the Big Snowflake from white cardstock and the shadow from vellum paper. I attached it to a clipped rectangular tag made from silver and metallic cardstock. Notice that on the gold side, the Big Snowflake was foiled in silver on the cardstock. I had an extra foiled piece that was not perfect so I cut it up and used it here! Tags are a great way to use up scraps or imperfect works in your pile. 🙂 A metallic string was attached at the top. Lastly, I added Pearl Pen dots in gold metallic in the center of the snowflake and around the flake. Nuvo Drops would also work. I prefer Pearl Pens because the tip is nice for this type of accent work.
For tag two, I die cut three white shadow layer snowflakes from white cardstock and glued them together to make the flake three-dimensional. I added an iridescent embellishment called, Crystalized Unicorn Tears Rhinestones around the flake and heat embossed the words, “warm wishes” at the bottom. Lastly, I penned faux stitching round the tag’s edge, scattered a few white dots using a white Gelly Roll pen and added a silver metallic string to complete the tag.
Tip: To make the 3-D snowflake, I cut three shadow snowflakes, scored them down the centers of each. Add glue to the right side of the score line of each snowflake and adhered the side to the next snowflake, lining up the score lines of each flake in the middle.
Tags Three and Four
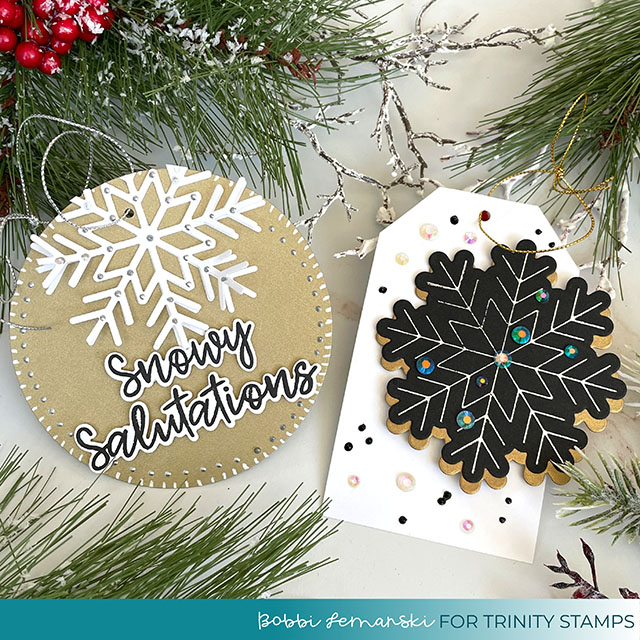
For tag three, I used a round tag design and attached the thin die cut snowflake at the top and layered another flake on top of it. I only glued the center section so that the flake could be 3D, with the top layer’s “arms” sticking out. I stamped, die cut and added “snowy salutations” stamped in black and die cut from Winter Winds stamp set and coordinating die set.
For tag four, I used my Spellbinders Hot Foil machine to foil the thin snowflake in an iridescent foil on black cardstock. I die cut the design using the shadow die. I die cut another shadow die from gold and offset the two so that just a little gold shows. I attached the snowflake design to the tag, allowing 1/3 of the design to fall off the edge. Rhinestones were added on the flake and tag base as well as dots of black Pearl Pen. I attached a gold string at the top.
Tags Five and Six
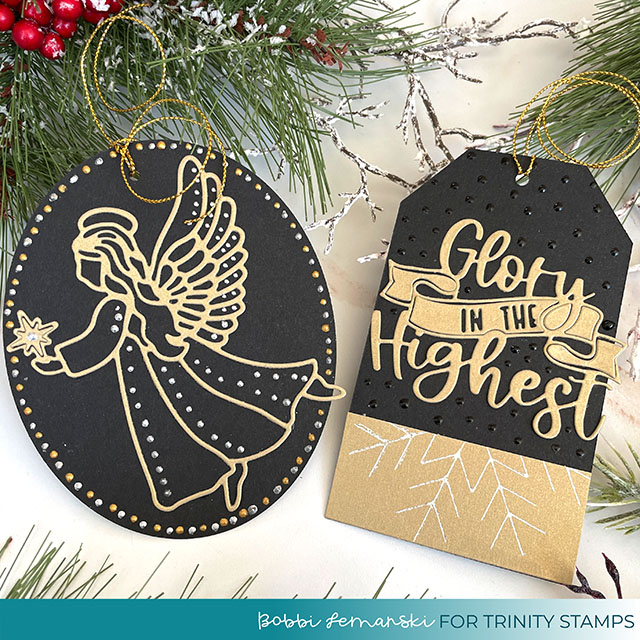
For Tags five and six, I used the Glory in the Highest die set, cut from gold metallic cardstock. Gold looks so elegant on black so both cards used a black base. Notice I used another “scrap” piece of a foiled snowflake on the “glory in the highest” tag! Pearl Pen in silver and gold were used on the first tag and black Pearl Pen on the phrase tag. The dots add sparkle and dimension to the tags!
Tags Seven and Eight
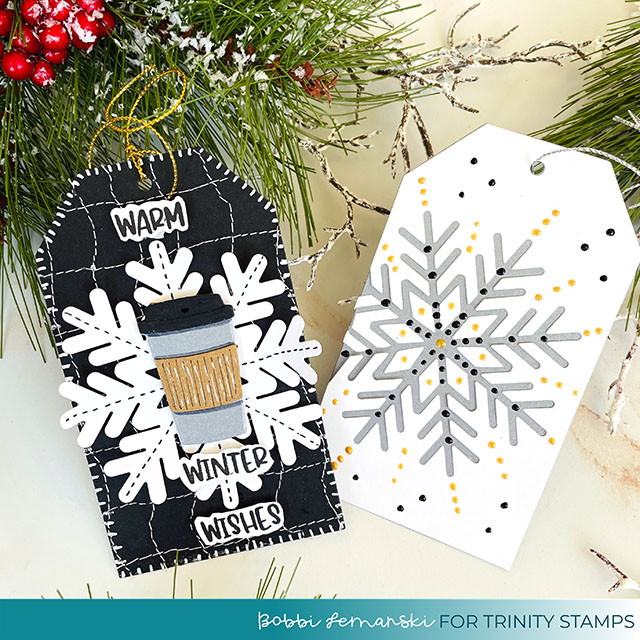
For tag seven, I machine sewed and squiggly grid design on a black rectangle. I clipped the corners to make it look like a tag. I added faux white stitches around the edges of the tag for a very textile look. The white snowflake was added with faux black stitches hand drawn using a fine-tip black marker. I stamped and fussy cut the phrase and added it to the tag, too. Lastly, keeping with the color story, I die cut the coffee cup from silver, gold and black, assembled the pieces and attached to the snowflake center with foam tabs to make it stand out.
Last, but not least, tag eight uses the negative space of the snowflake, allowing a silver tag to peek through the design. I embellished with Pearl Pen in gold and black for a very simple, but striking “Nordic” design.
If you decide to place an order, please use the links in this post so that Trinity Stamps knows what inspired you. I appreciate it very much. It helps me to continue to bring more ideas to you!
Thanks for stopping by today. If you want to see more ideas and inspiration from me, subscribe to my blog, BobbiHartDesign.com. I’ll send you updates on new posts! You can also find me on Instagram as @BobbiHartDesign and on Facebook as BobbiHartDesign.
Bobbi Hartmann Lemanski, Bobbi Hart♥ Design, Adding h♥art into every design


