
Decorate-A-Cake: One Stamp Set, Three ways with Designer Emily!
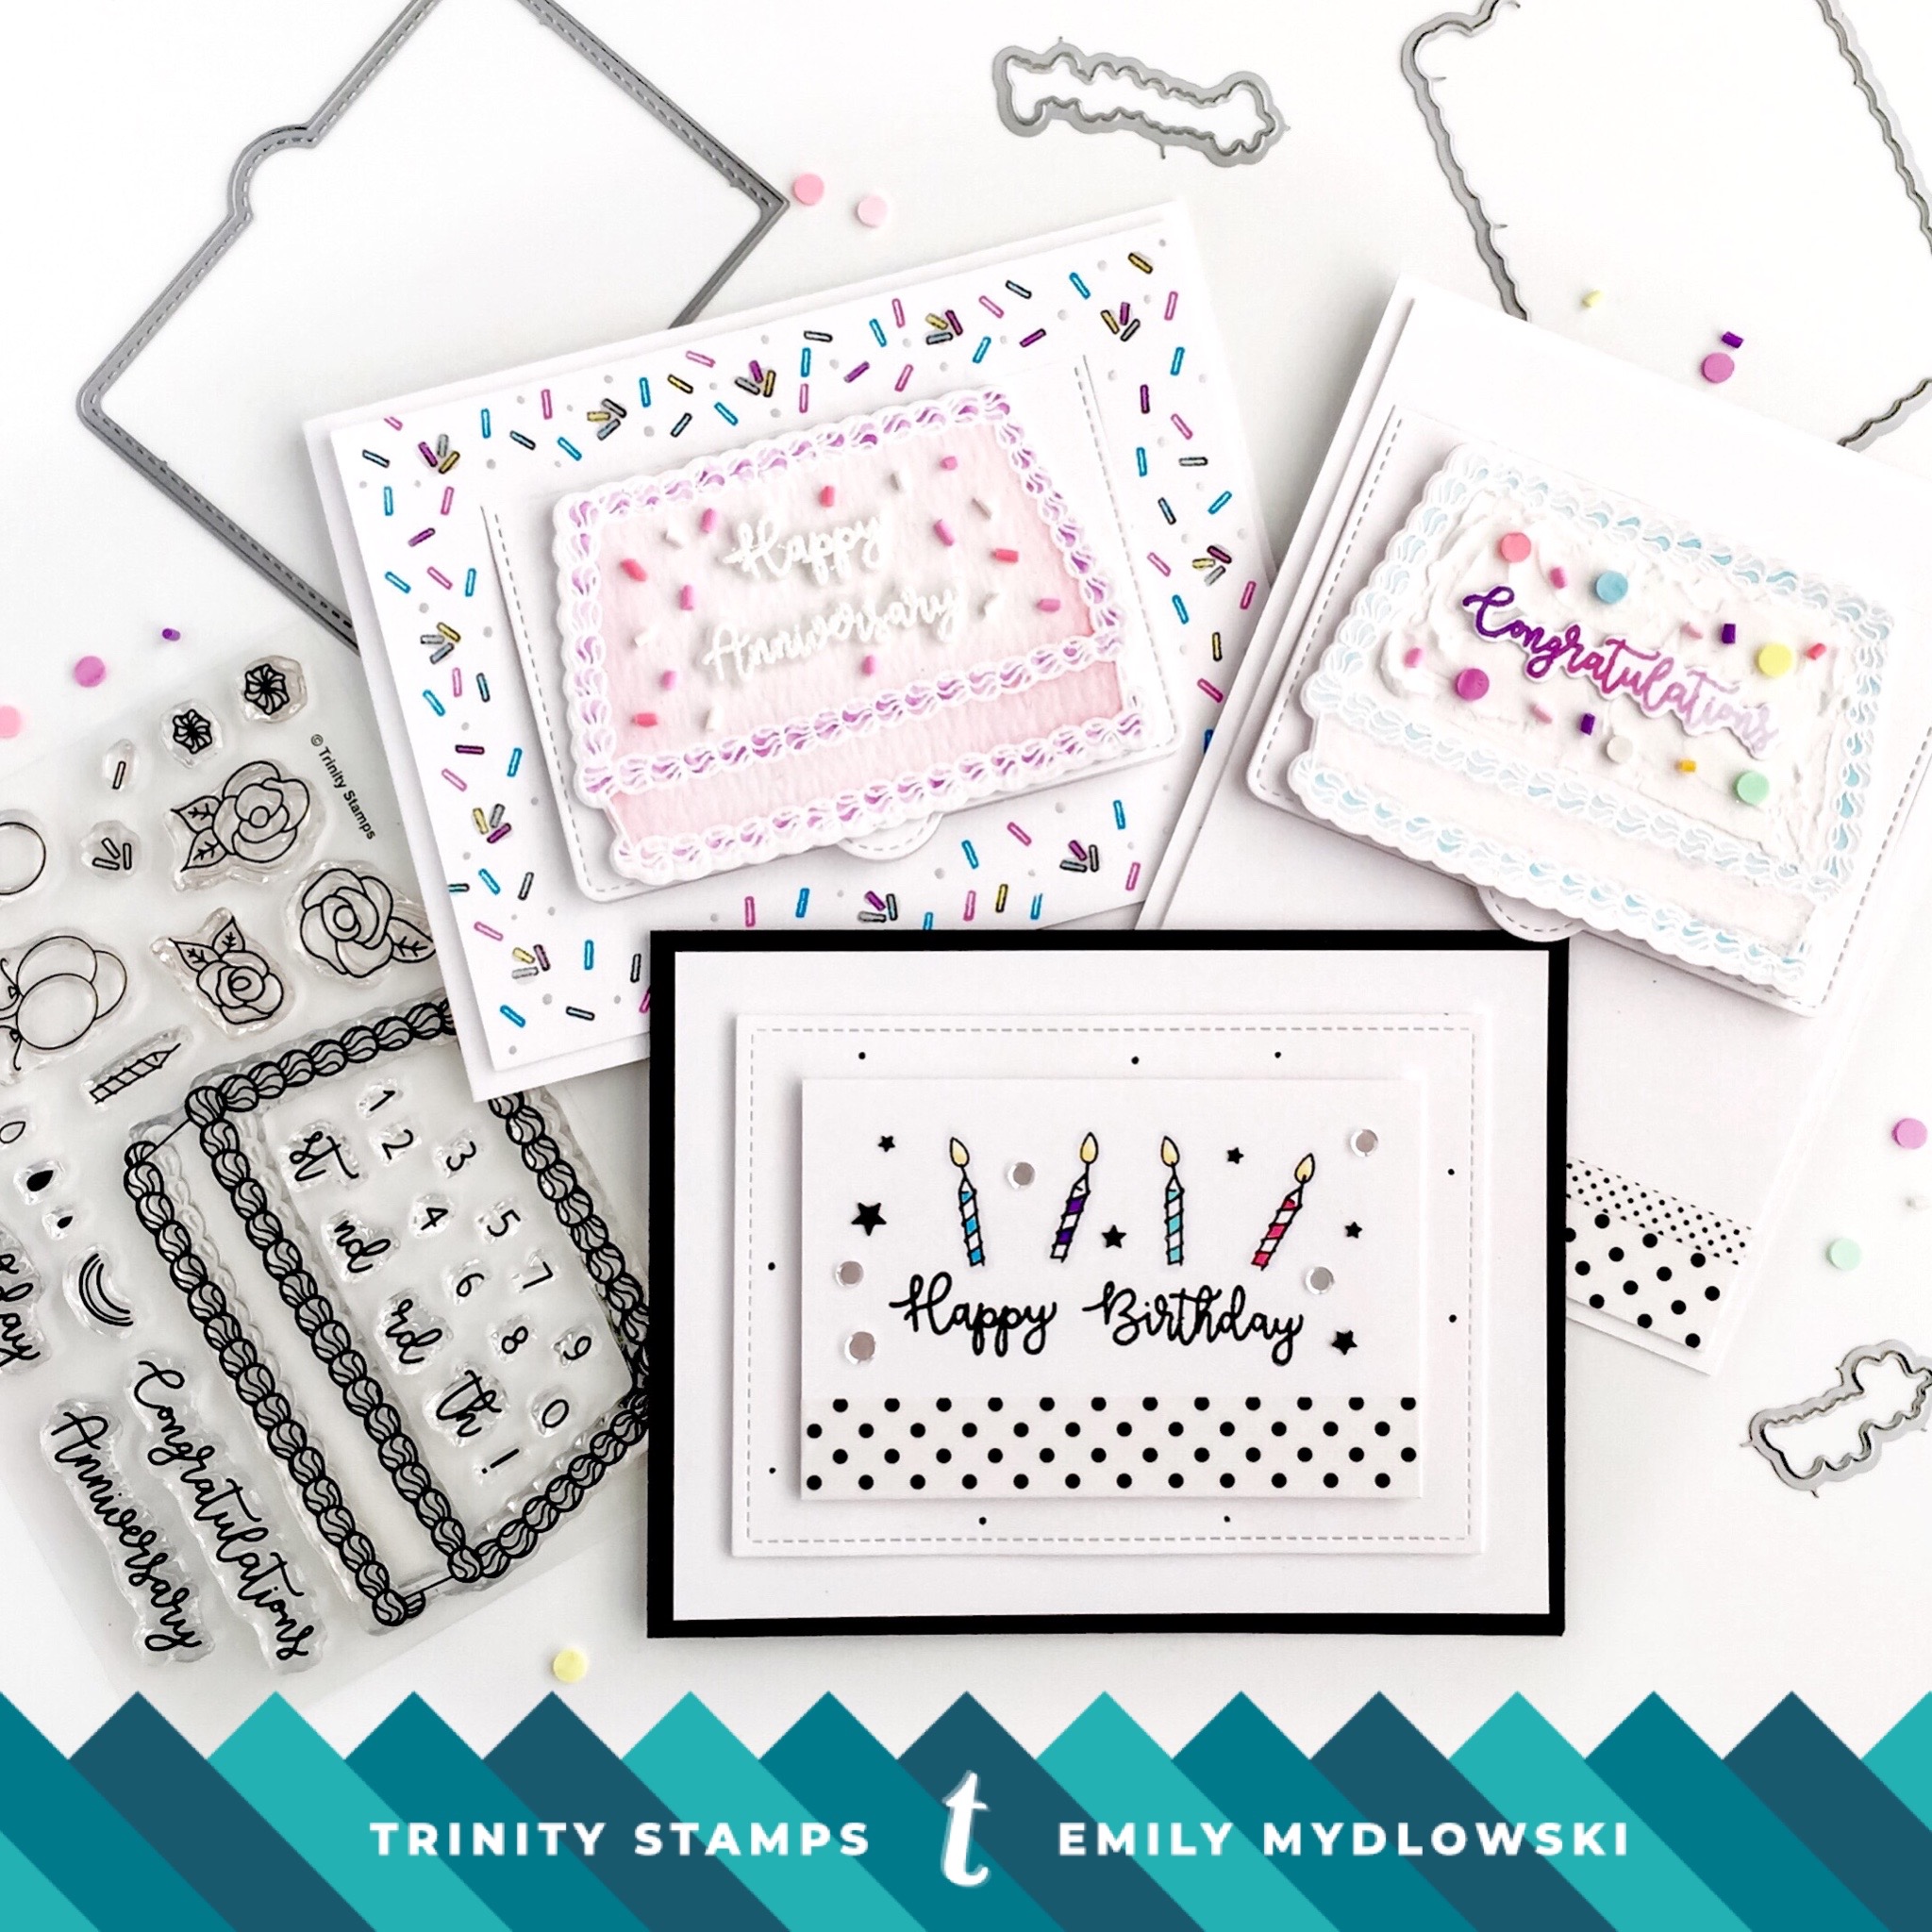
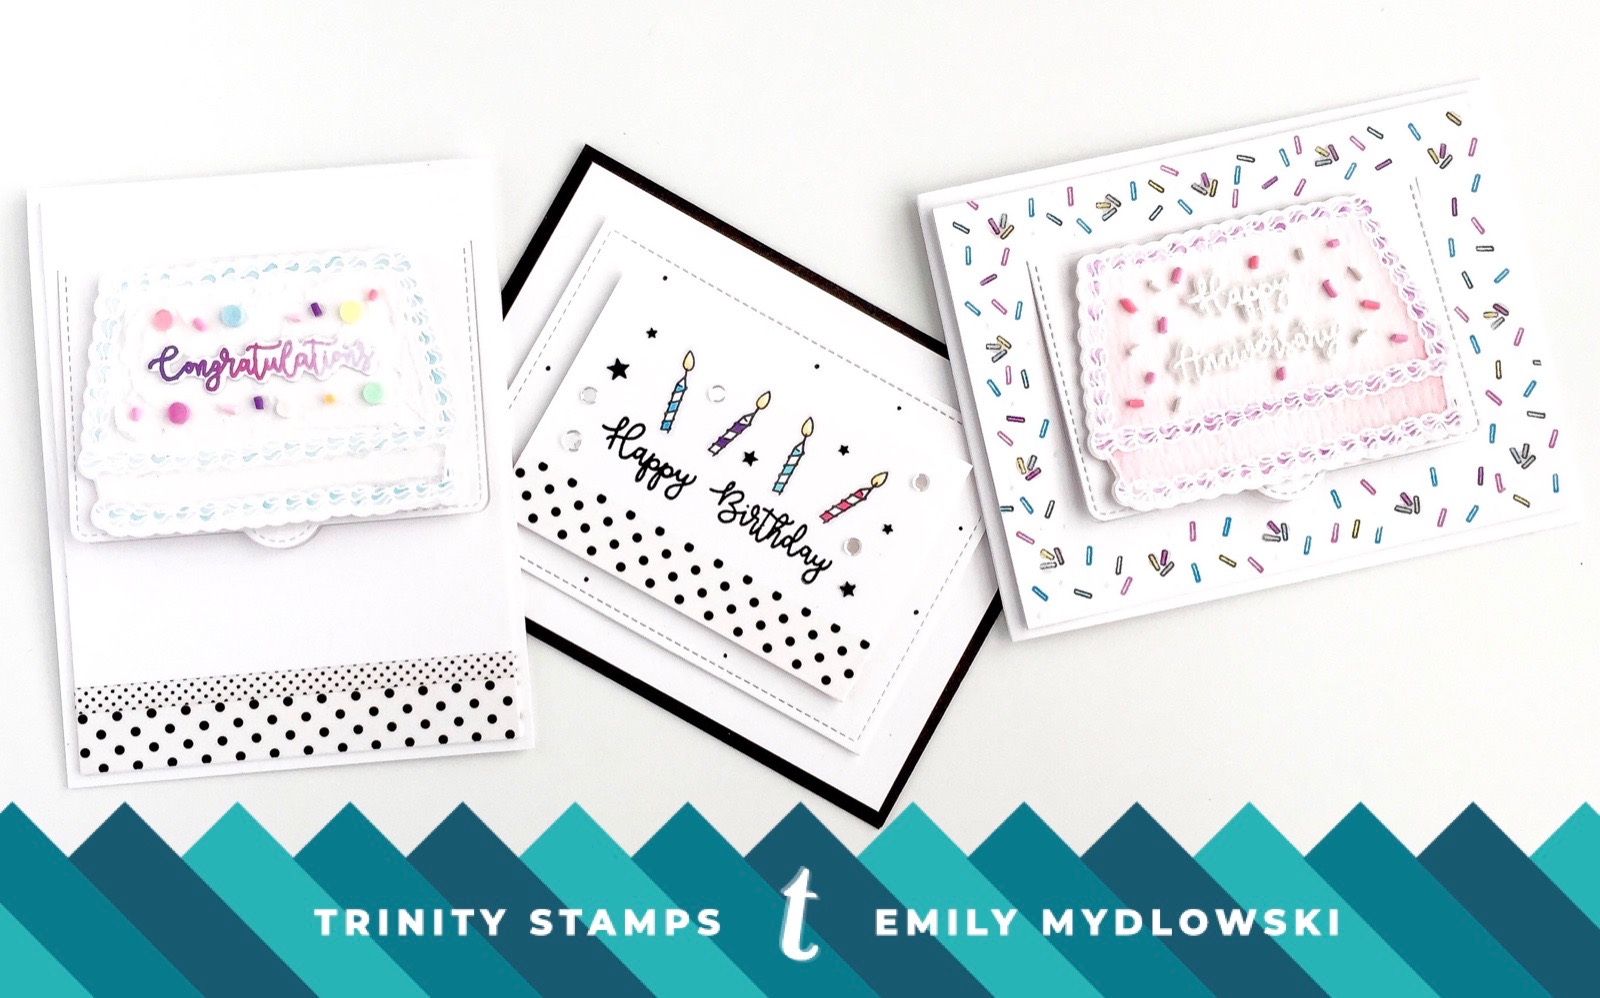
Hello, Friends! Emily here from @popsofpaper to share with you three different projects using the Decorate-a-Cake stamp set and matching dies. I can’t get over how much fun I had with this set! The inspiration for the three cards came from all the celebration sentiments in this set. I knew I wanted to create three occasion cards to add to my stash; a Happy Birthday, Anniversary and Congratulations card.
For the first two cards, I focused on the main cake image. I love to bake so the cake image had my heart at first glance. Then I got “paper-crafty excited” when I realized the cake fit perfect on the largest Lift the Flap die from Lawn Fawn—How fun is that?! My daughter is showing how the interactive flap works in the photo below. I can’t wait to sneak a gift card under these two cakes for a fun interactive card!
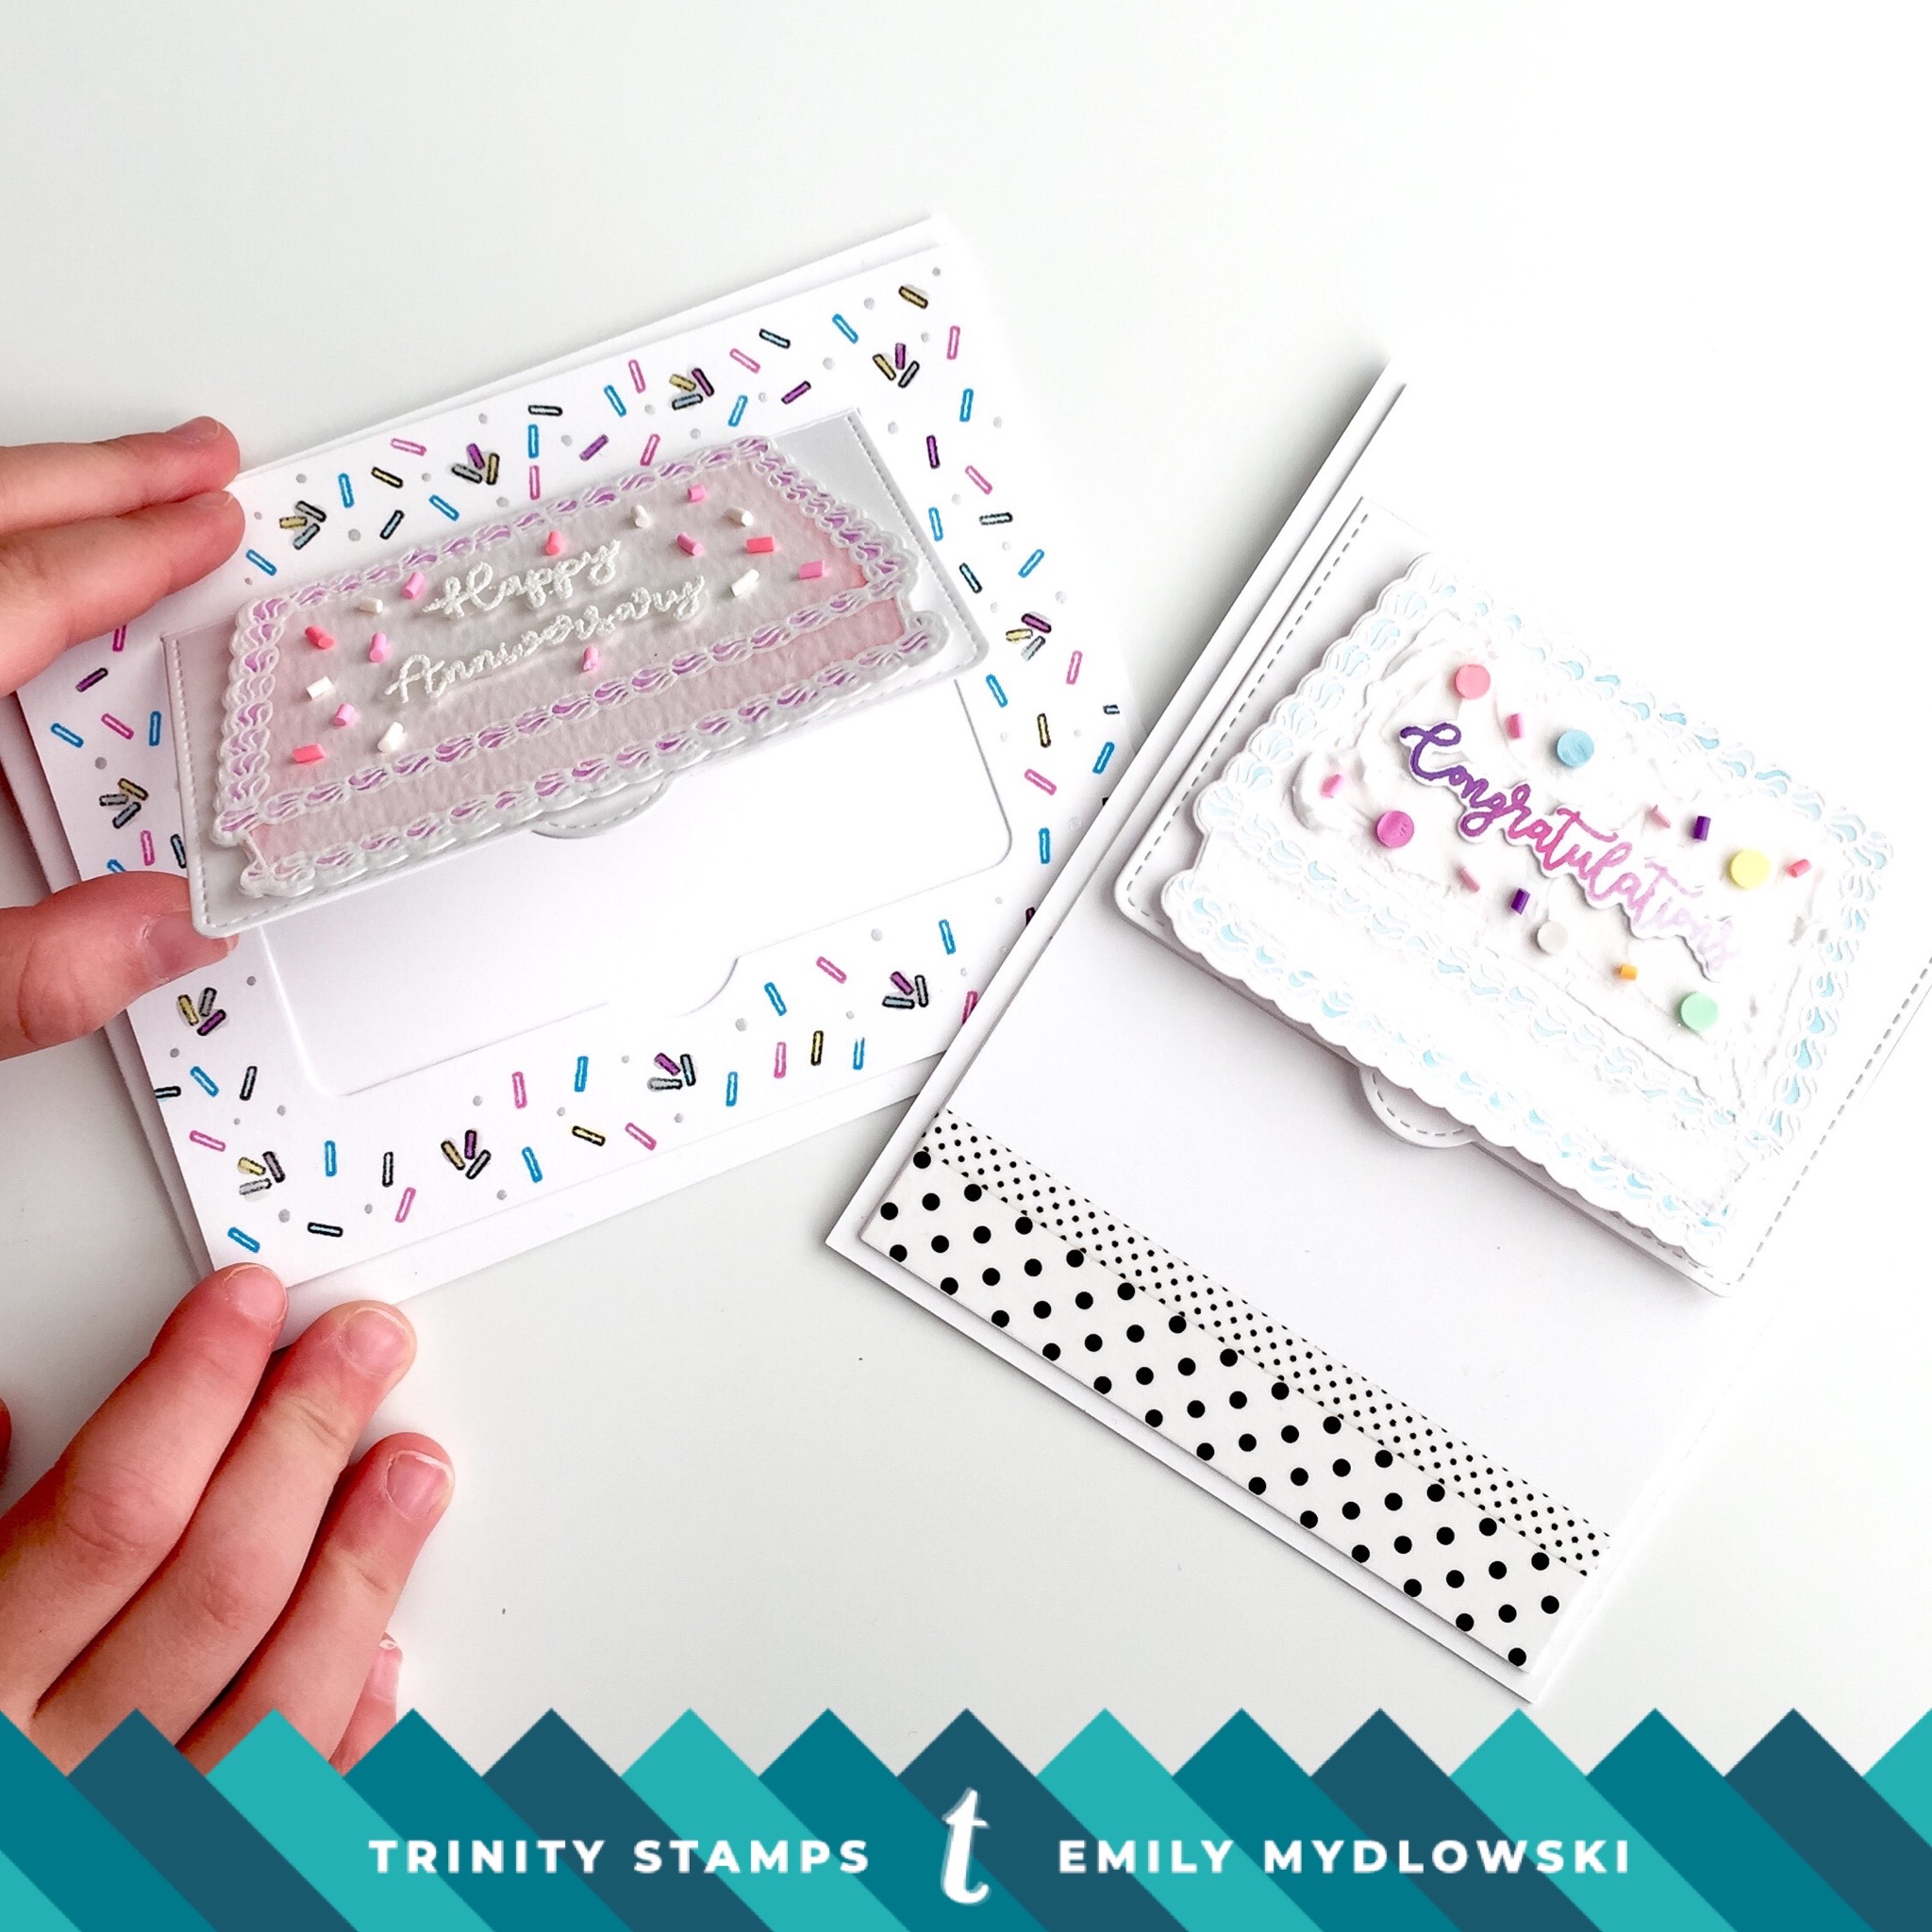
To start creating my cakes for the Lift a Cake Cards, I stamped & embossed the image on watercolor paper with white embossing powder. I then used Zig Clean Color Real Brush Markers (Light Violet, Light Pink, Pink & Cobalt Blue) to create a watercolor effect on each cake. The watercoloring gives a nice gradient frosting look to the piping around the cake.
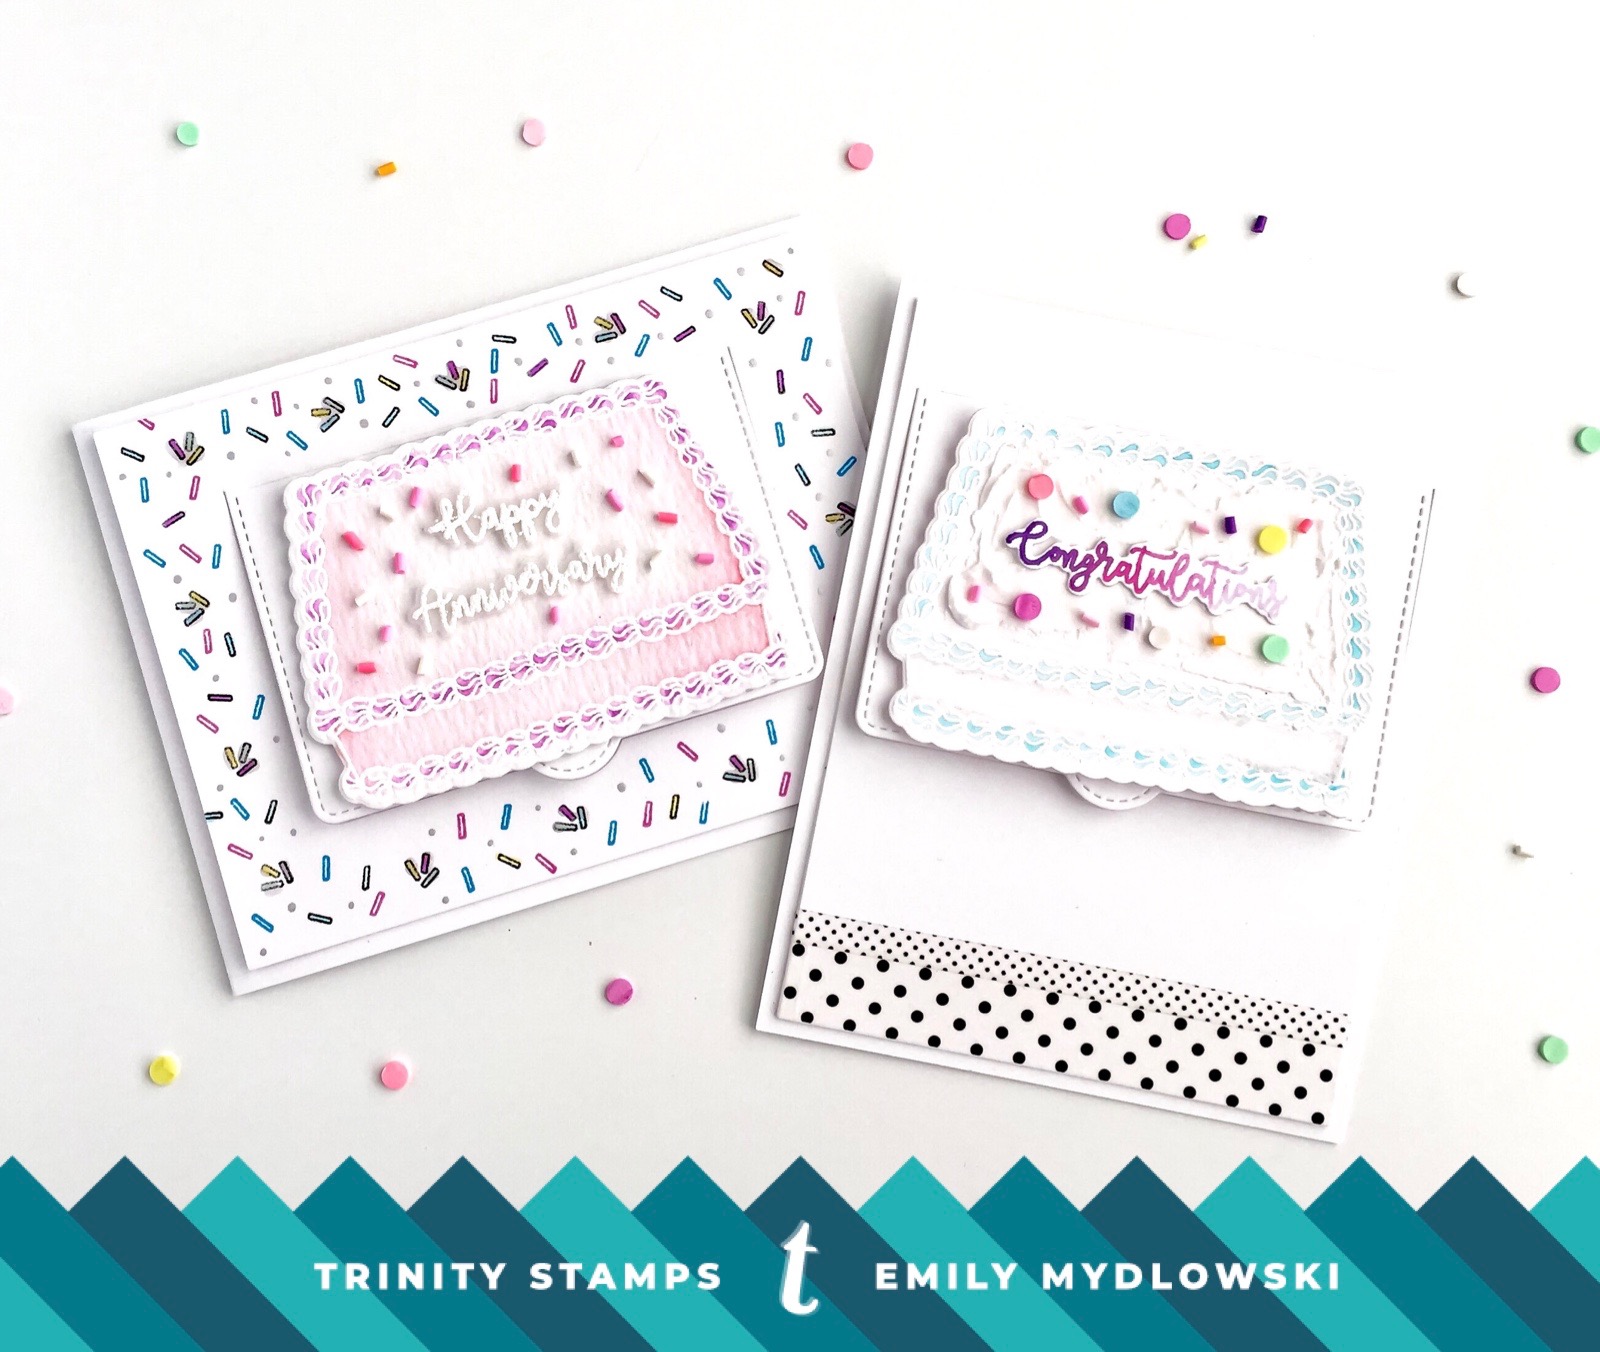
For the Happy Anniversary Card, I embossed the sentiment with WOW White Puff embossing powder on vellum to give it a “piped-frosted-writing” effect. Then I stamped and colored the little confetti images to create a frame around the cake.
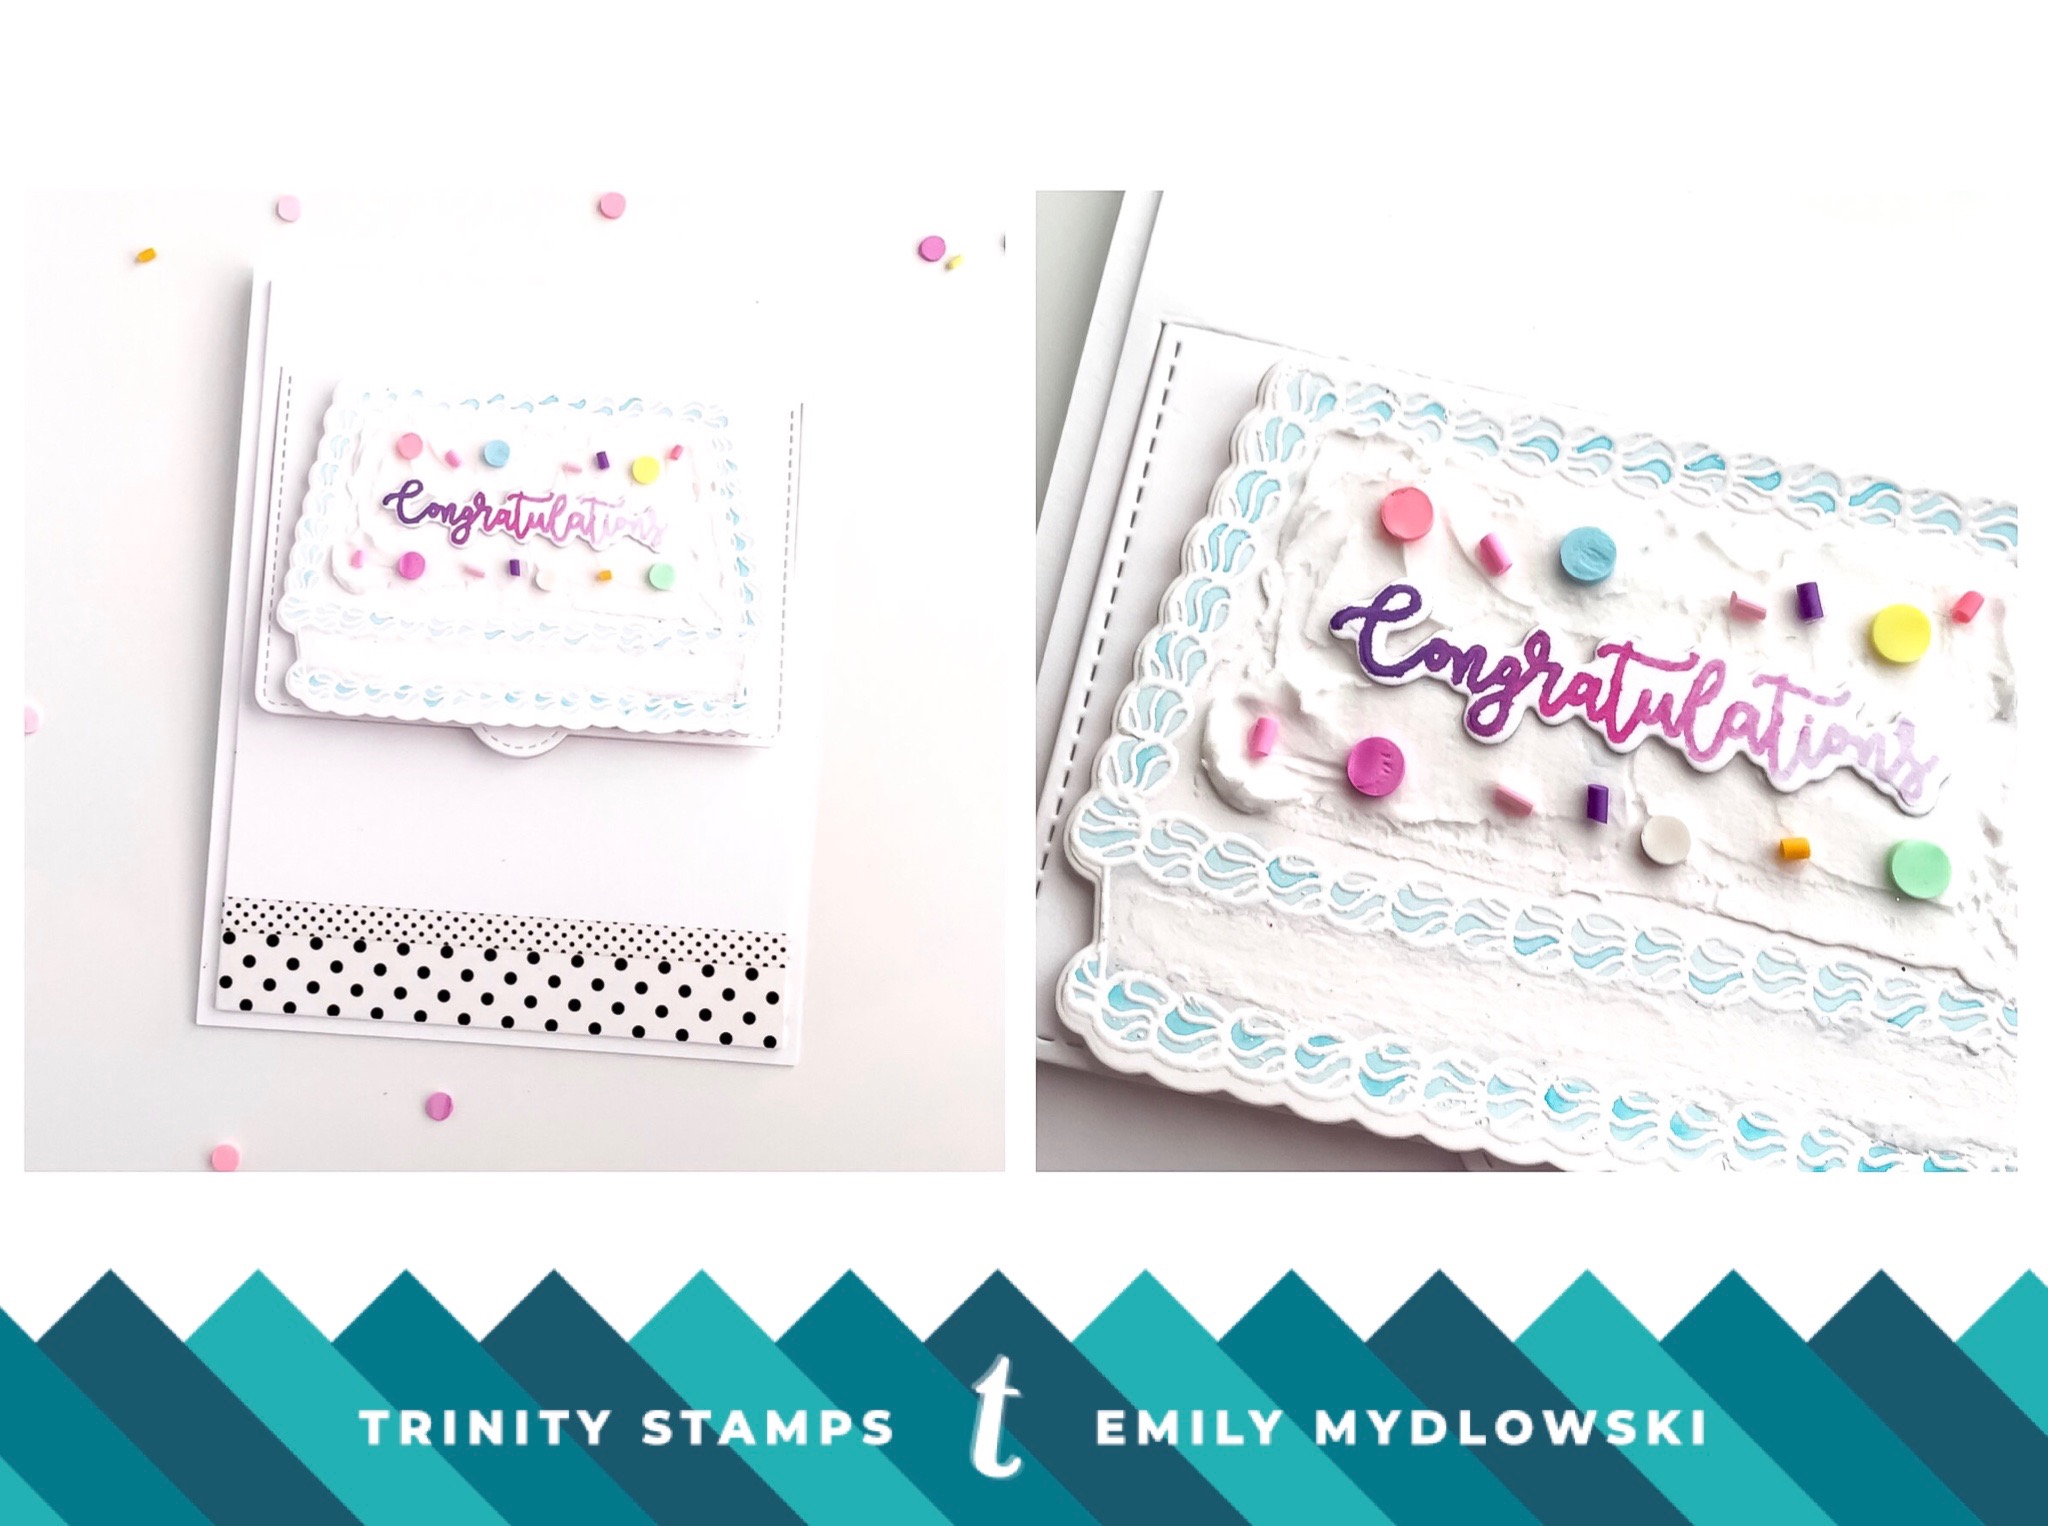
For the Congratulations Cake, I made the frosting using Ranger Texture Paste, then gradient-stamped Congratulations & die cut using the matching dies. I love fussy cutting images but words are hard for me so the matching die is a game-changer. Then I decorated the cake with Birthday Cake Sprinkles and Candy Confetti Sprinkles embellishments. To finish the card I added some b/w washi tape for extra pop.
For the third card, I thought it would be fun to take one of the smallest images (the candle) and make it a focal point on the card. I stamped four candles and then colored with Copics. I added some b/w polka dot washi, Rock Candy Confetti Mix and star embellishments and then stacked it a couple times with rectangle nesting dies and foam tape for dimensional pop.

There you have it three (two interactive) occasion cards with only one stamp set! Now I’m craving frosting so off to the kitchen for some baking time.
Don’t forget today is the last day for the 25% off your $30 purchase; use LABORDAY25 at check-out. Go grab some fun stamps, dies and embellishments!
Big Paper Hugs! 🤗
Emily


Wonderful cards! Excited about the series!
Thanks, Michelle!
Brilliant! I love the pop up,idea, and these are lovely!
These are beautiful!