
Easter Shaker Card with Sugar Egg Builder Stamp and Die
In this tutorial, we’ll create a simple Easter Shaker Card using the Trinity Stamps’ Sugar Egg Builder Stamp and Die set. This is a very simple card to put together thanks to Trinity’s Shaker pouches. All you need to do is choose your favourite pattern paper and coordinating Trinity Stamps embellishments!
Who This Tutorial is For
- Beginner cardmakers
- Crafters who enjoy shaker cards
- Anyone looking for Easter card ideas
- Paper crafters who love die cutting and ink blending
What is a Shaker Card?
A shaker card contains embellishments that are placed inside a enclosed area which creates movement and noise when shook. Trinity Stamps has a huge collection of embellishments in a range of colours, shapes and sizes!
Supplies Used
To create this card, I used the following supplies:
- Sugar Egg Builder stamp
- Sugar Egg Builder coordinating dies
- Blending Buddies
- Bearly Art glue
- Aurora Chunky Shreds embellishments
- Green Gleam Chunky Shreds embellishments
- A-2 Card Layer 4″ x 5.25″ – Flat Acetate Shaker Pouches
- Brown, Kraft and Blue cardstock
- Brown, blue, and embossing ink
- White embossing powder
- Pattern Paper
Step-By-Step Instructions
Step 1 – Stamp the Egg Elements
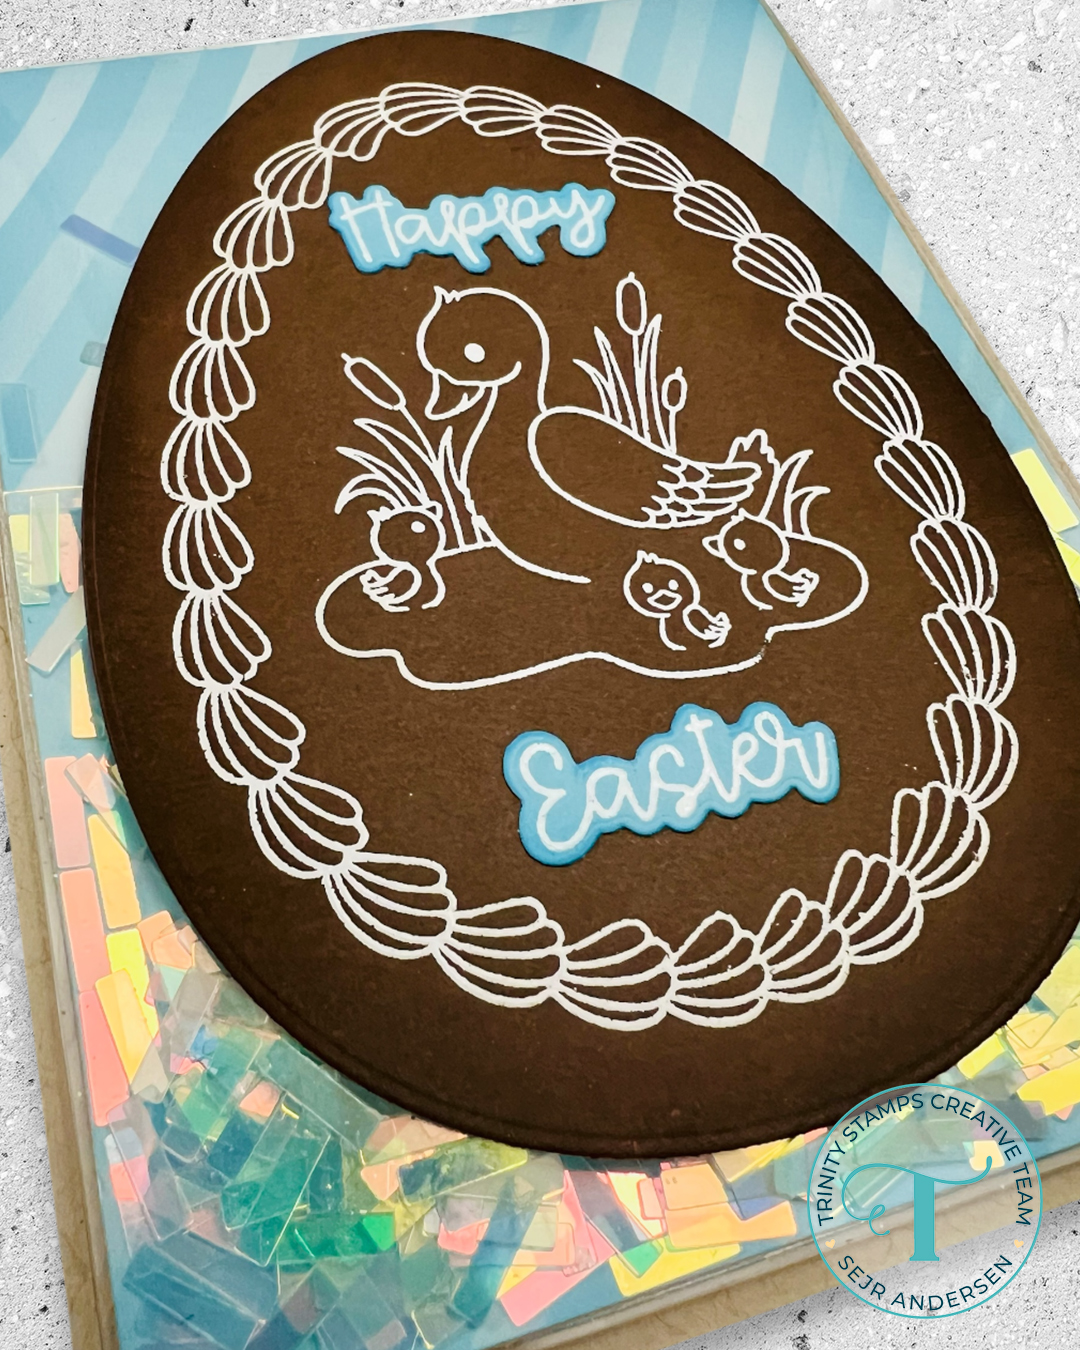
On a piece of brown cardstock, measuring roughly 4″ x 5.25″, stamp the icing and the ducks with embossing ink. Try to keep them as centred on the cardstock as possible, because we will need the room to die cut it out.
I recommend using a stamping platform so that you can stamp it again if you don’t get good coverage the first time.
Step 2 – Heat set with Embossing powder
Grab a piece of printer paper to catch any excess embossing powder as you poor it overtop your stamped image.
Once the image is completely coated, take a heat gun and melt the embossing powder until you have a nice glossy white outline around the whole image. Let it sit for a minute before touching it to ensure it is completely dried.
Step 3 – Die cut and Ink Blend
Take the second largest egg shaped die from the Trinity Stamps Sugar Egg Builder Coordinating Die set and centre it around your embossed image, and use your die cutting machine to cut out the egg.
Lightly ink your blending brush with some brown ink and blend around the perimeter of the egg and softly blend to the centre of the egg. you can make it a bit darker on the edge to give more interest.
Step 4 – Assemble Shaker Pouch
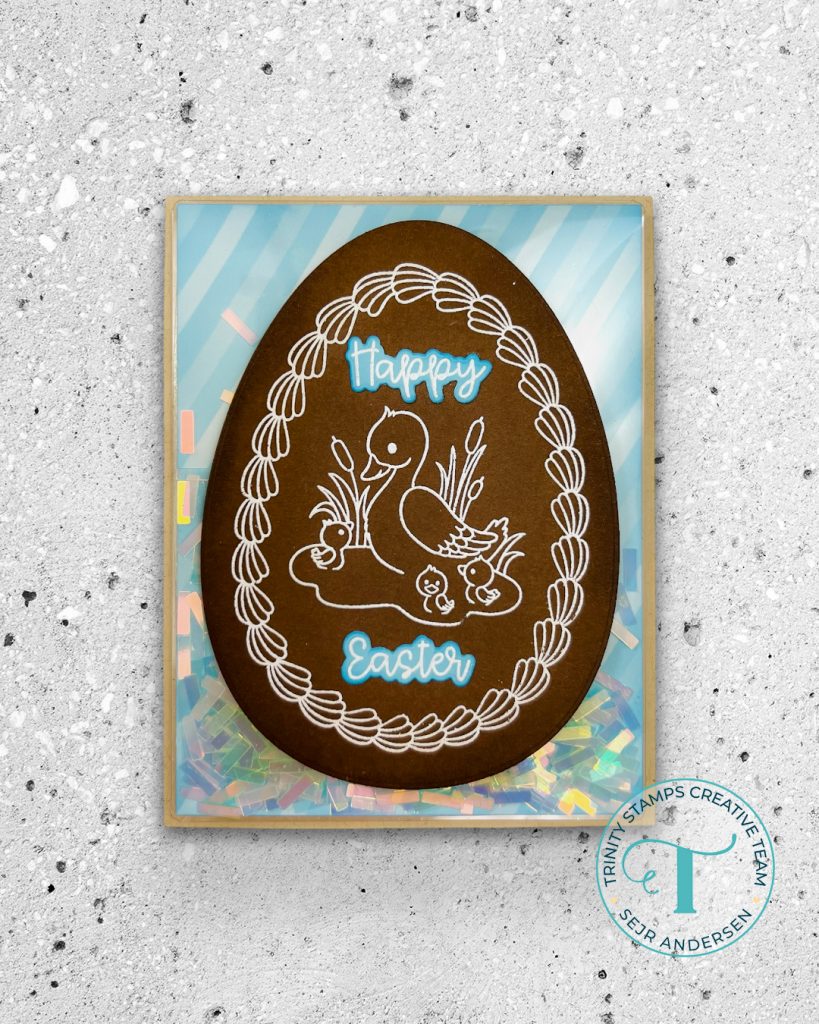
Take your pattern paper and cut it down to 4″ x 5.25″, and ink around the edge with a colour similar to your paper. For my card, I used blue ink, and made it darkest at the corners and softer towards the centre. You do not need a lot of ink, so start light and reapply if needed.
Take the shaker pouch and add 1/8″ double sided tape on all 4 tabs, then take off the release paper for the left, bottom and right sides. Keep the top open so that we can dump in our Trinity Stamps embellishments inside!
Set your pattern paper face down, and then folder the 3 tabs over and press to ensure good adhesion. You can now pour in your shaker bits and seal it closed. I used the new Green Gleam and Aurora Chunky Shreds embellishments.
Step 5 – Add the Sentiment
Stamp the sentiments “Happy” and “Easter” from the Trinity Stamps Sugar Egg Builder stamp set in embossing ink on blue cardstock. Heat emboss in white and ink the edges with the same blue ink after they’ve been die cut.
Glue the word Happy above the ducks and the word Easter below. Then, glue the finished egg onto the shaker pouch to complete the shaker element.
Step 6 – Add to Card Base
Glue the shaker to an A2 size kraft coloured card base, ensuring to centre, leaving an 1/8″ border.


