
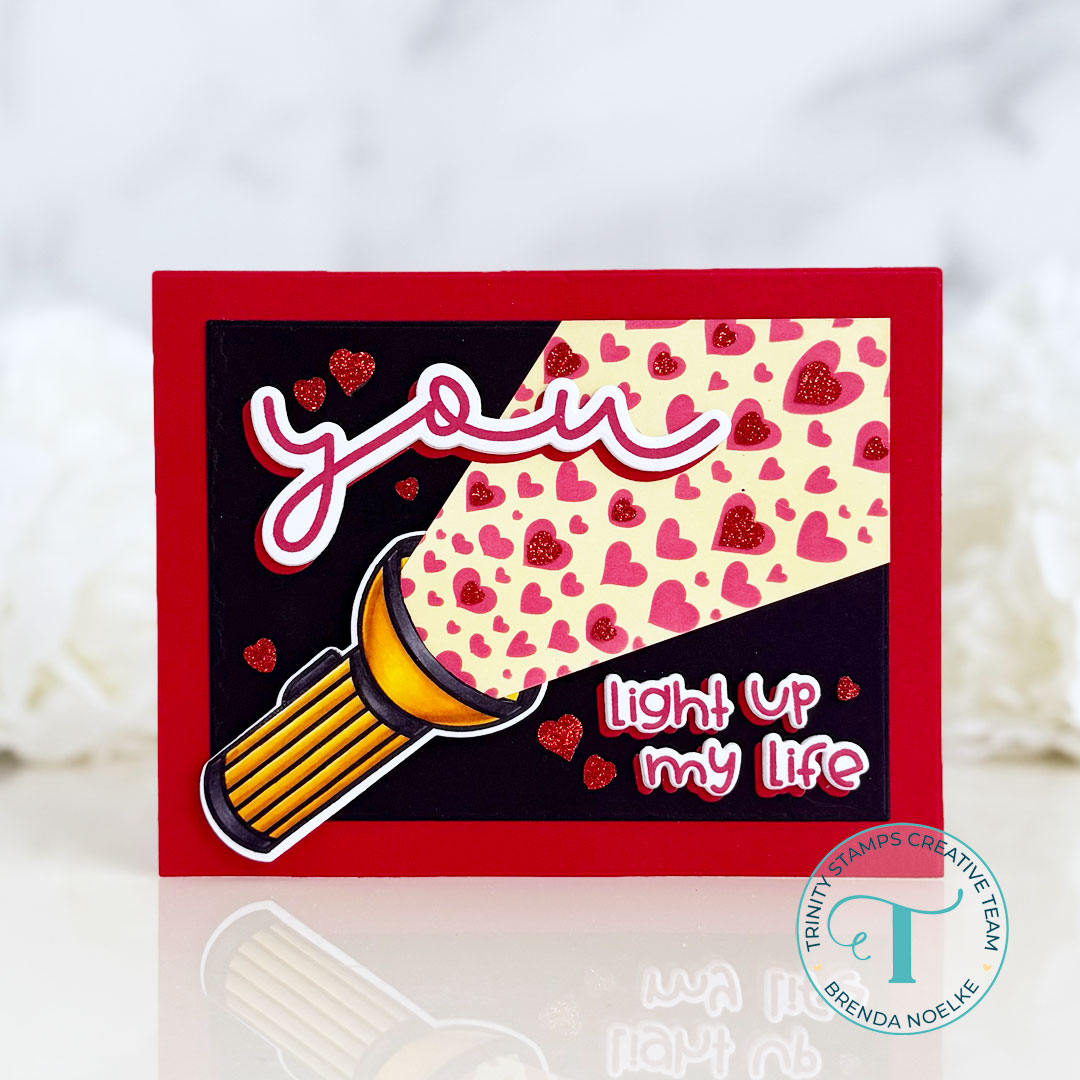
You Light Up My Life
Happy Thursday, friends!! Brenda back with a fun card featuring some goodies from the latest release!!
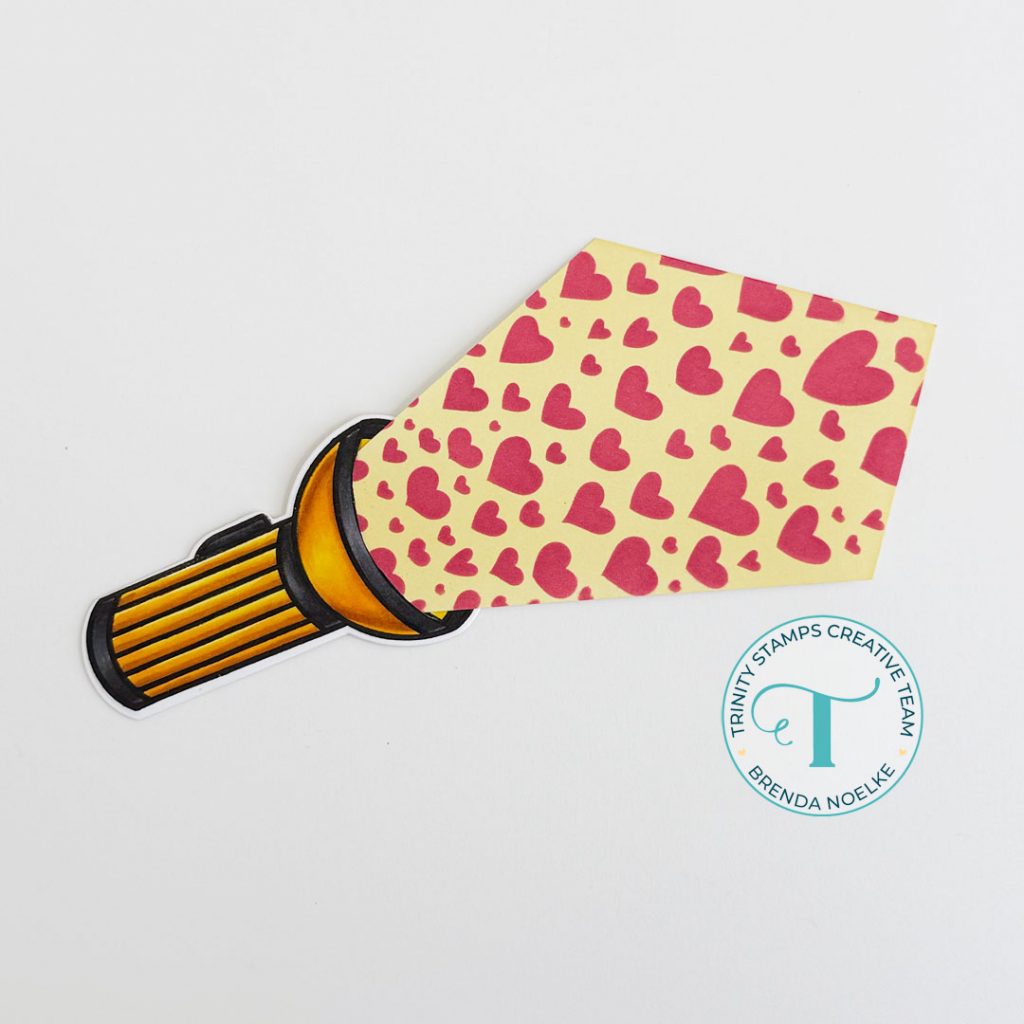
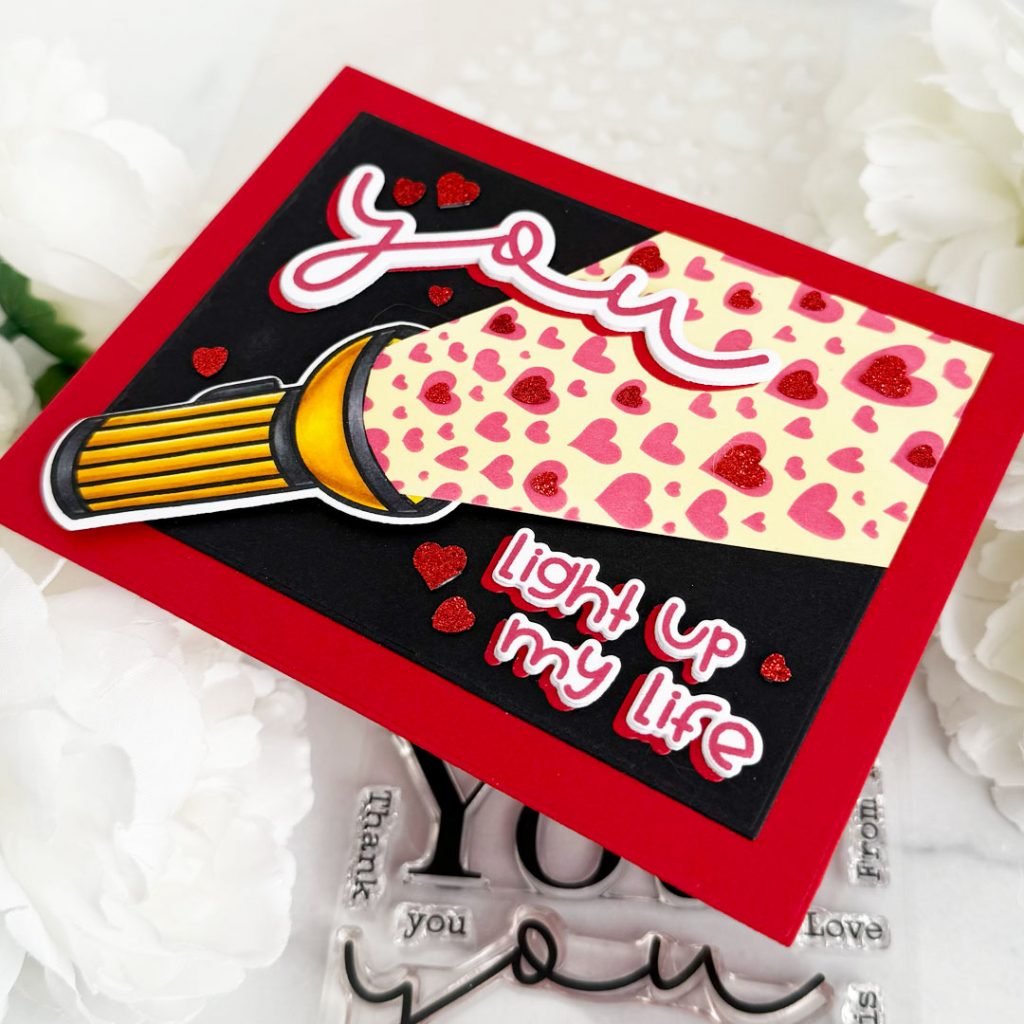
I began by stamping the flashlight from the Recharge Stamp Set onto white cardstock with Copic-friendly black ink. I colored it with Copic markers, then used the Coordinating Die to cut it out.
Next, I masked off a triangular portion in the upper, right corner of a panel of white cardstock and blended a bit of yellow dye ink onto it with a Blending Buddy Brush. I used the shape of the Beaming with Love Stencil as a guide. I added the Beaming with Love Stencil over the opening, then added red dye ink with another Blending Buddy. I removed the masking, then trimmed it out along masked lines. I used a craft knife to cut along the inside of the flashlight opening to slide the stenciled shape into.
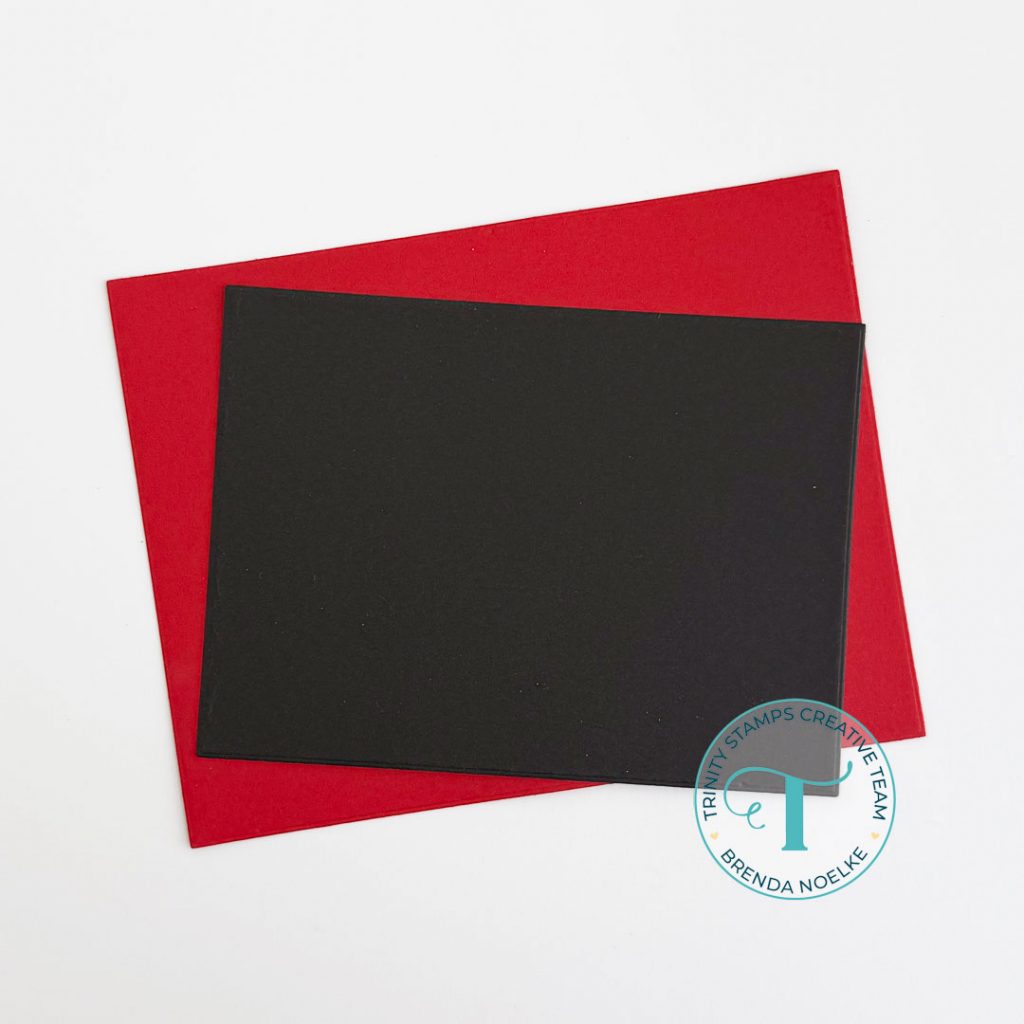
The largest die in the Clean Cut A2 Rectangles Die Set A Die Set was cut from red cardstock and the third largest was cut from black cardstock.
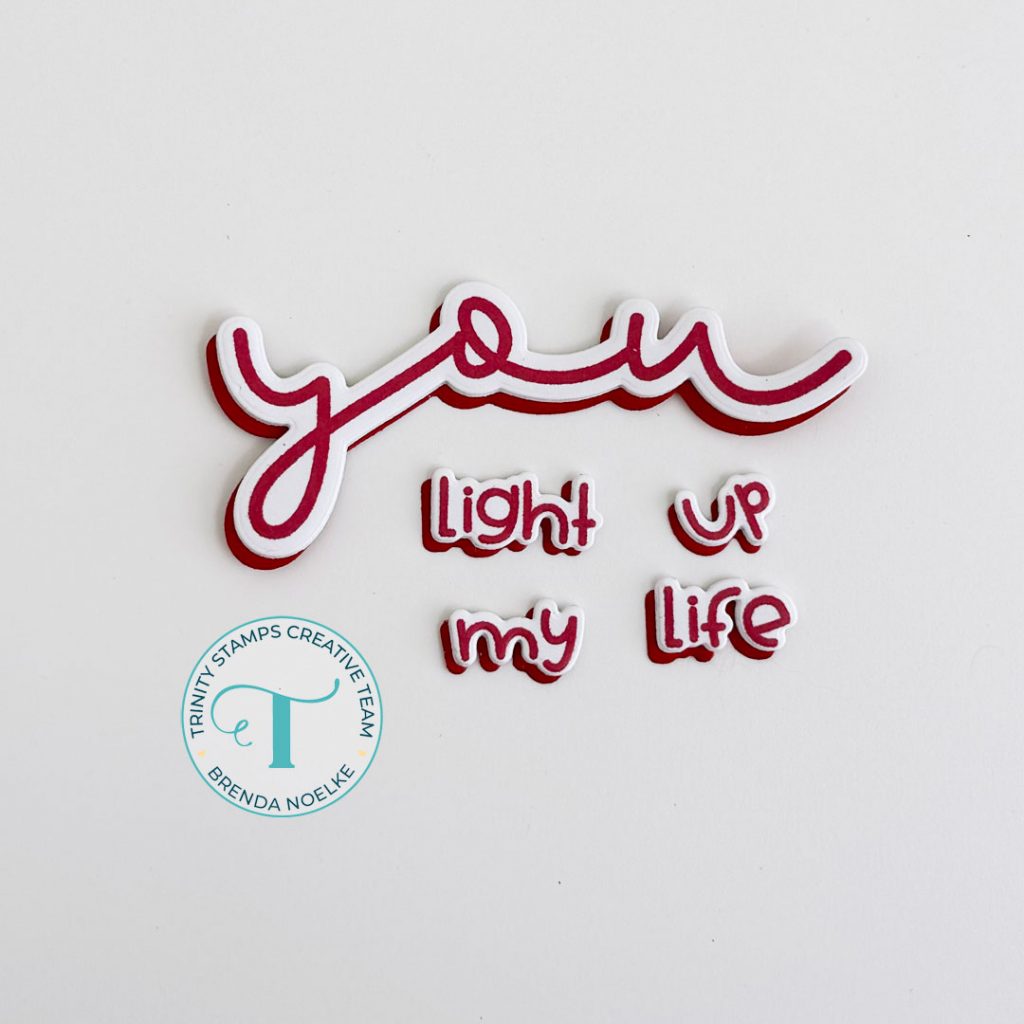
For the sentiment, I stamped “you” from the Simply Sentimental: You Stamp Set and the rest of the sentiment from the Recharge Stamp Set onto white cardstock with red dye ink. The Simply Sentimental: You Die Set and Recharge Die Set were used to cut them out. I also die-cut three more layers from heavyweight white cardstock and one layer from red cardstock. The layers were stacked and adhered together with liquid glue, with the red layer slightly offset.
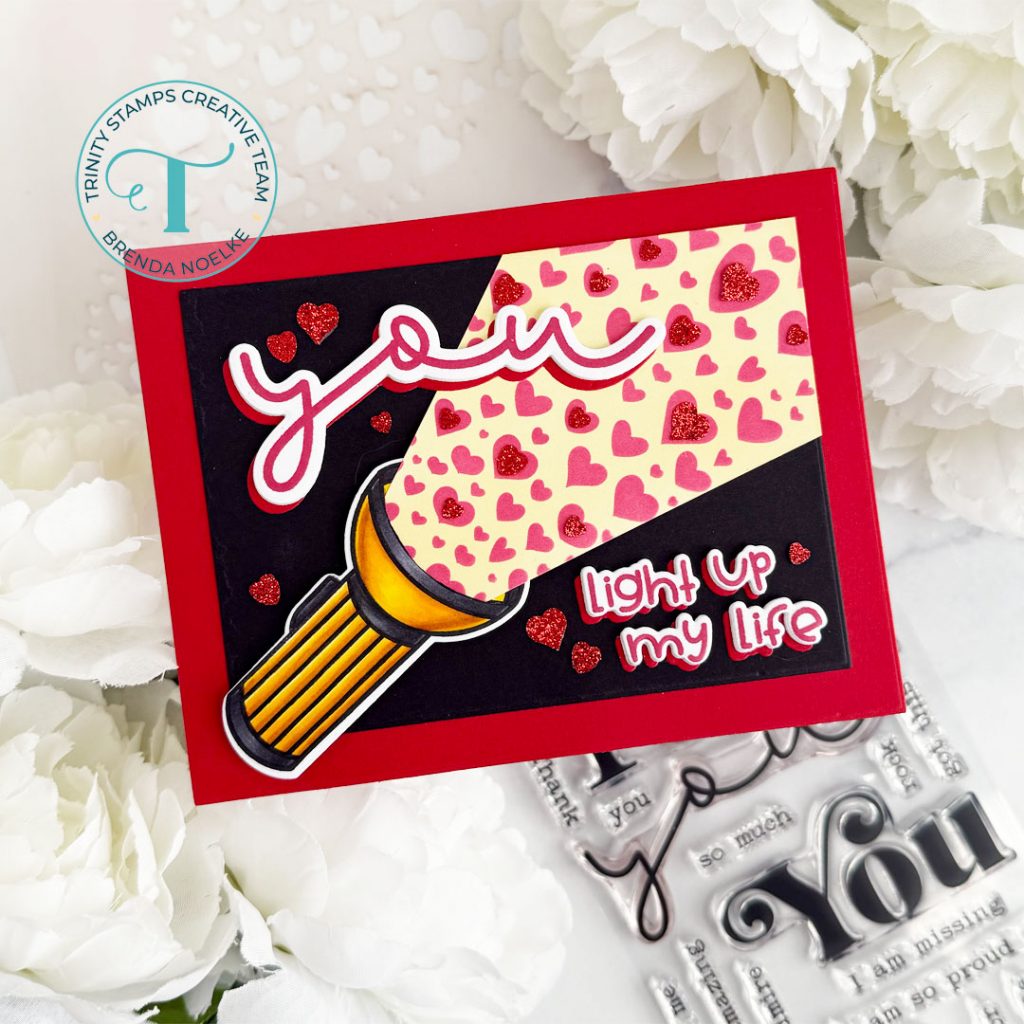
The two rectangle layers were adhered together with liquid glue. The light beam was slid into the opening in the flashlight and adhered to the back of the flashlight. The beam was adhered into the corner of the black panel with liquid glue and the flashlight was popped up with foam squares.
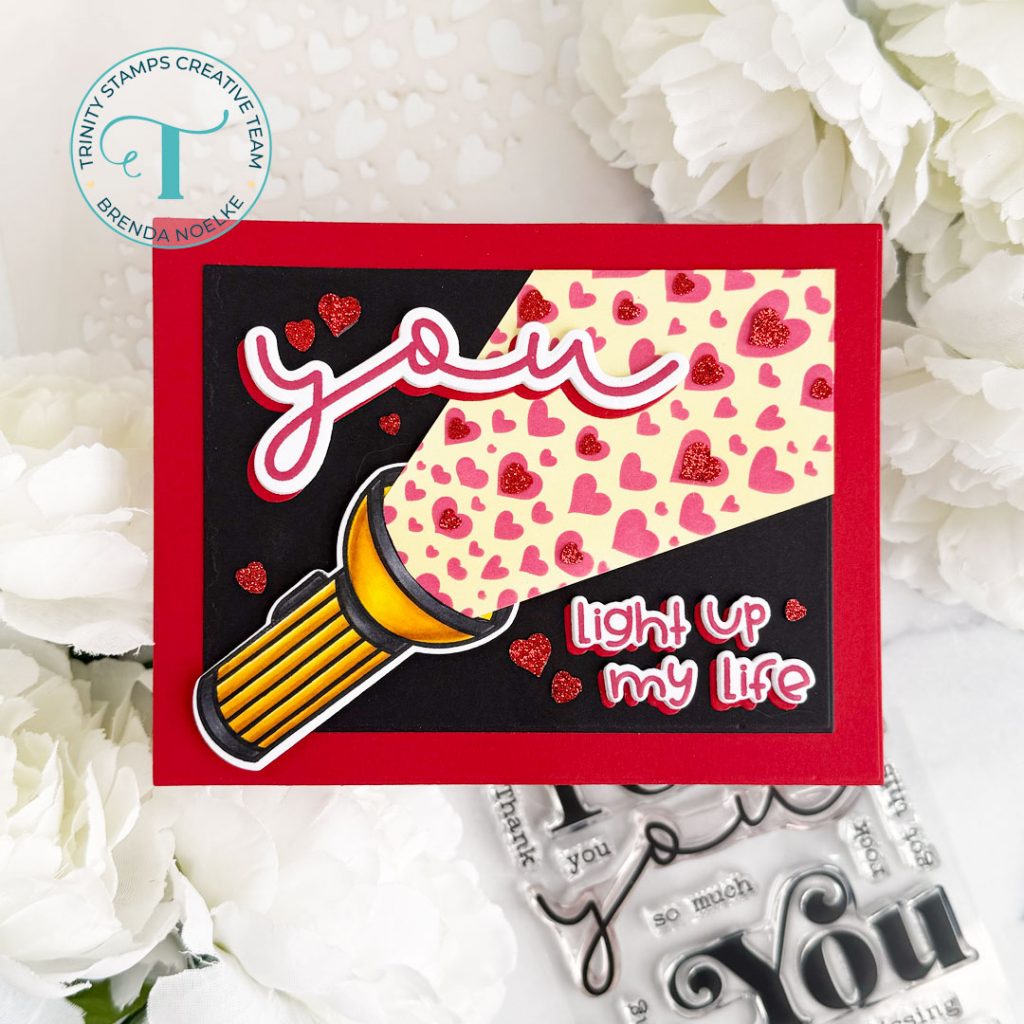
The stacked sentiments were adhered with liquid glue.
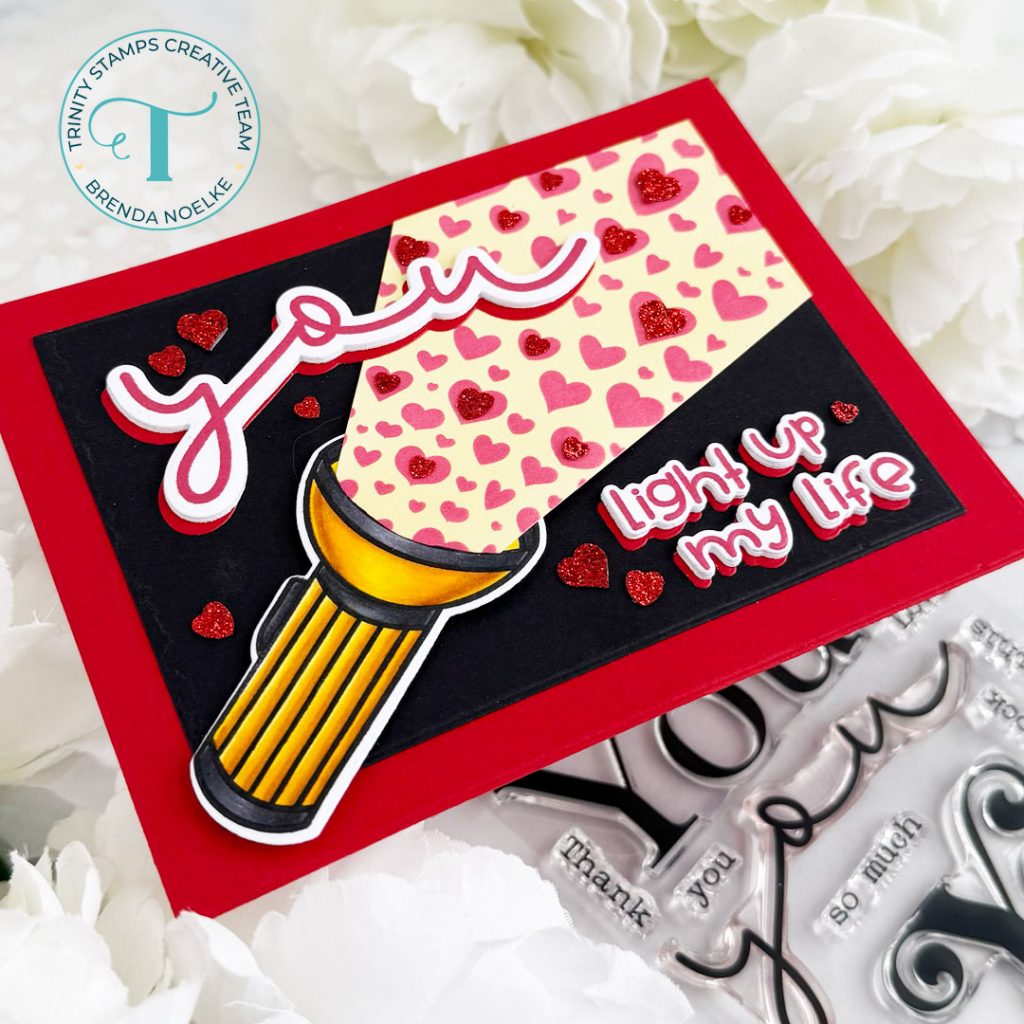
I added lots of Ruby Red Sparkle Hearts Confetti to the stenciled hearts and around the sentiments to finish off the card.
I love how this turned out and hope you do, as well!!
That does it for me today!! Thank you so much for stopping by!!


