
Wishing You A Special Birthday Easel Card
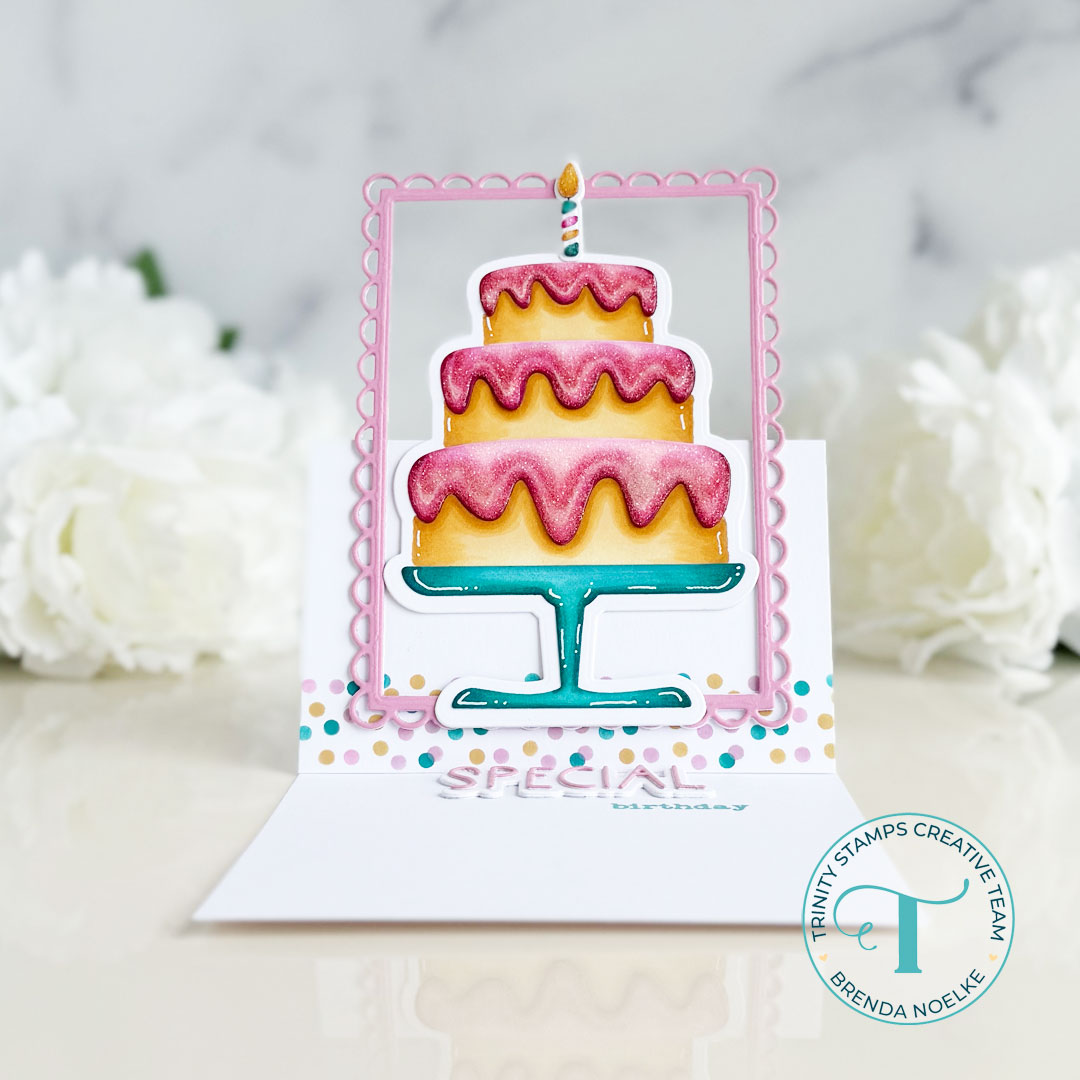
Happy Thursday, crafters!! Brenda here with a birthday easel card featuring the Cake Layers Stencils and Cut The Cake Die Set!!
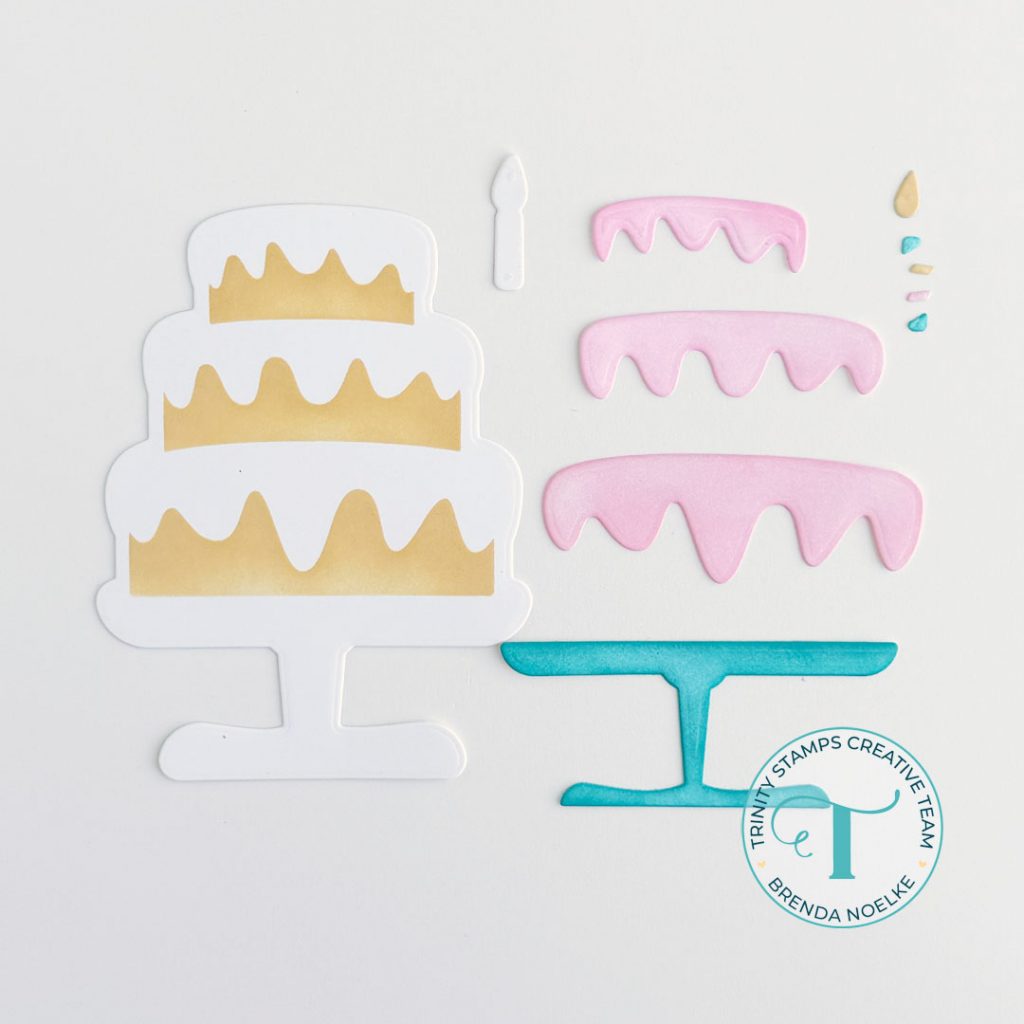
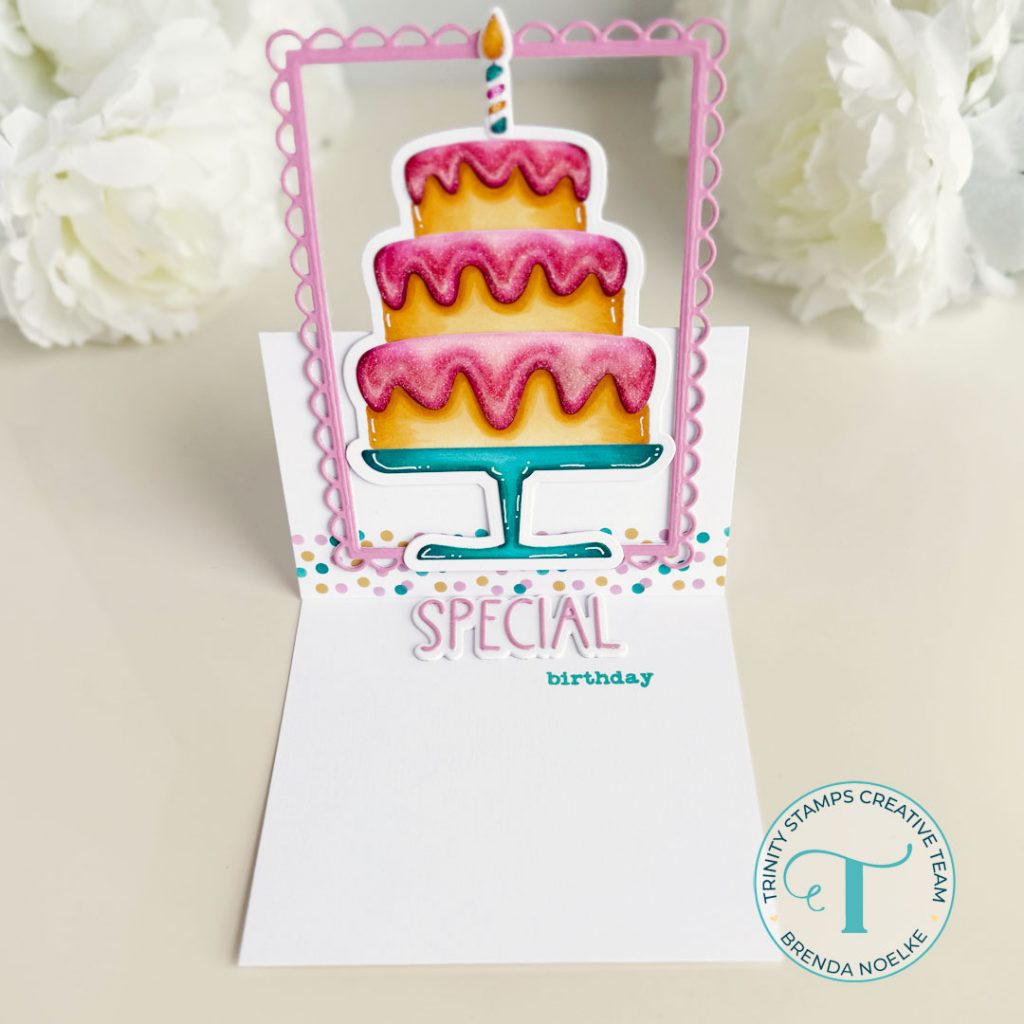
I began by die-cutting the cake, frosting, candle and cake stand in the Cut The Cake Die Set from smooth white cardstock. I blended the cake with Scattered Straw Distress Ink using the Cake Layers Stencil, the frosting with Kitsch Flamingo and the cake stand with Peacock Feathers Distress Ink using Shading Sidekick Brushes. The pieces for the top layer of the candle were blended with the same inks.
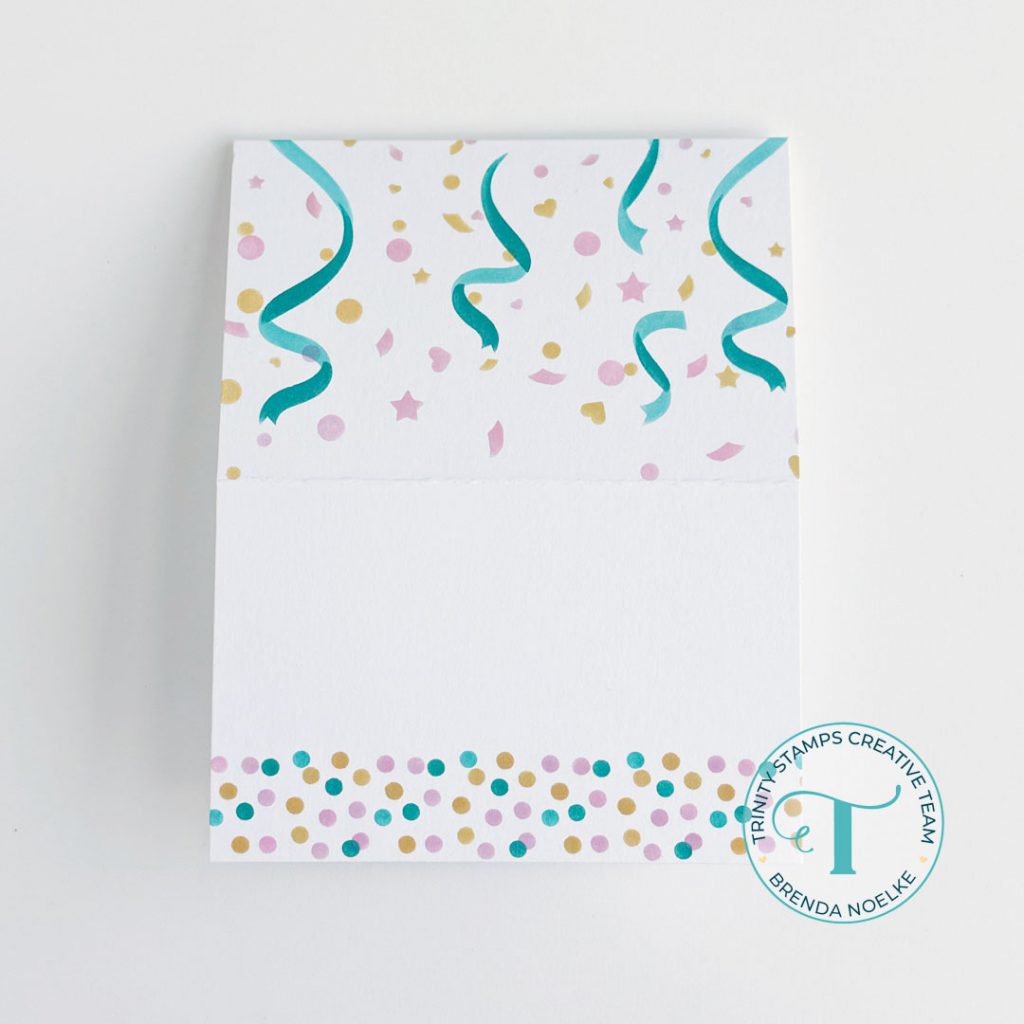
Next, I blended the Layered Confetti Stencils and the Sprinkled Border Stencil with the same inks onto the front of an A2 white card base with Shading Sidekick Brushes. I used the Teflon Folding Tool to score the center of the card base horizontally at 2 1/8″, folded and reinforced the score line with the Teflon Folding Tool.

I added more shading to the die-cuts using OLO markers, then adhered them together with liquid glue.
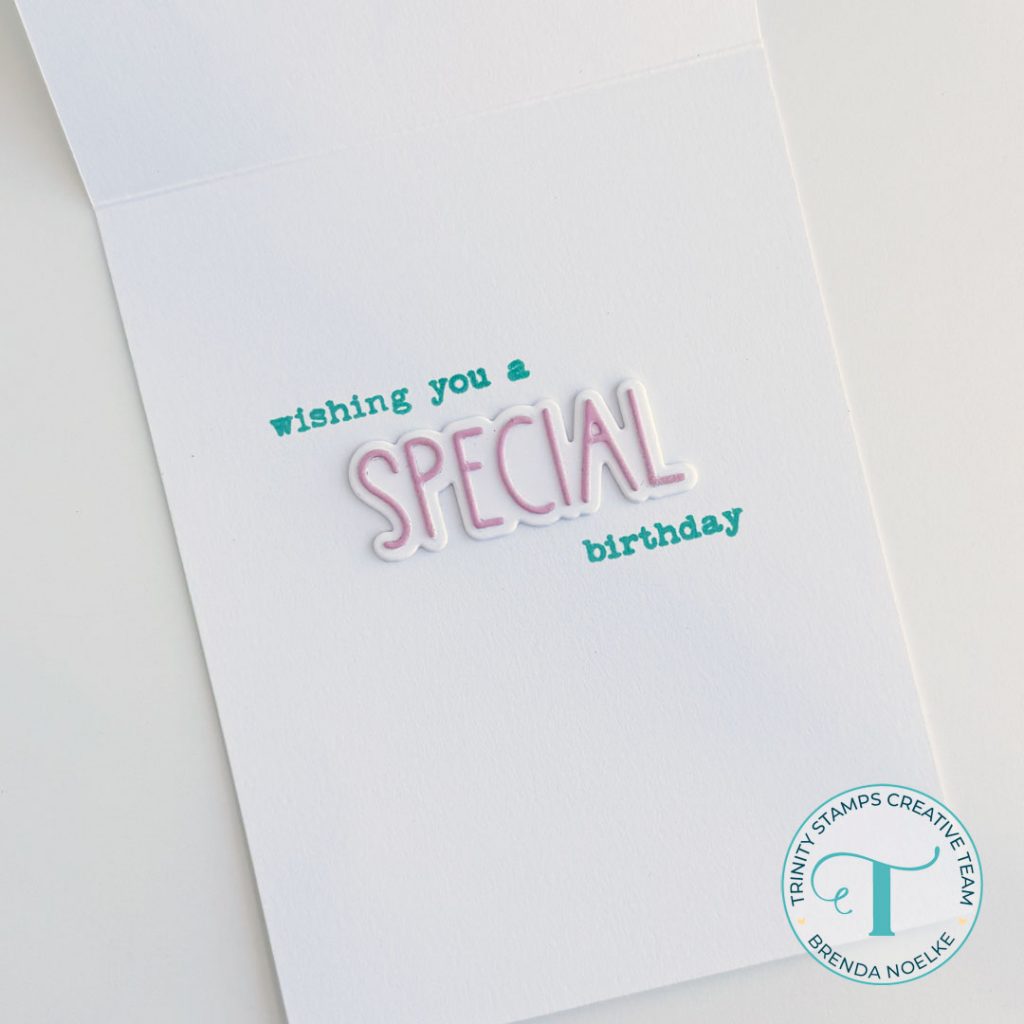
The sentiment was stamped inside with teal ink using the Simply Sentimental: Special Stamp Set. The top layer of “Special” from the Simply Sentimental: Special Die Set was cut once from pink cardstock and once from white cardstock. The shadow layer was cut three times from heavyweight white cardstock. They were stacked and adhered together with liquid glue, then adhered to the inside of the card.
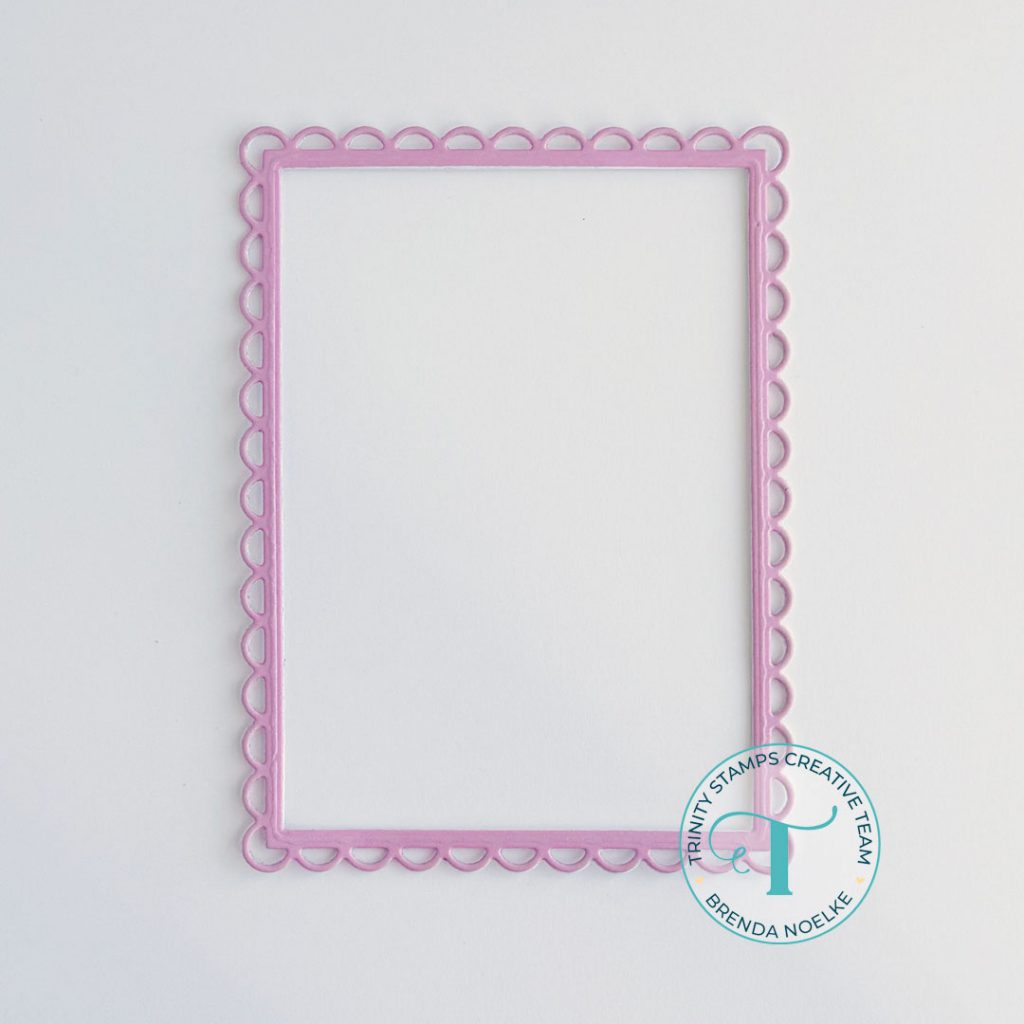
I created a frame by taping the second largest die in the Dainty Scallop Rectangles Die Set and the seventh largest die in the Clean Cut A2 Rectangle Layers Set A Die Set and die-cutting it once from pink cardstock and two times from heavyweight white cardstock . They were also stacked and adhered together with liquid glue.
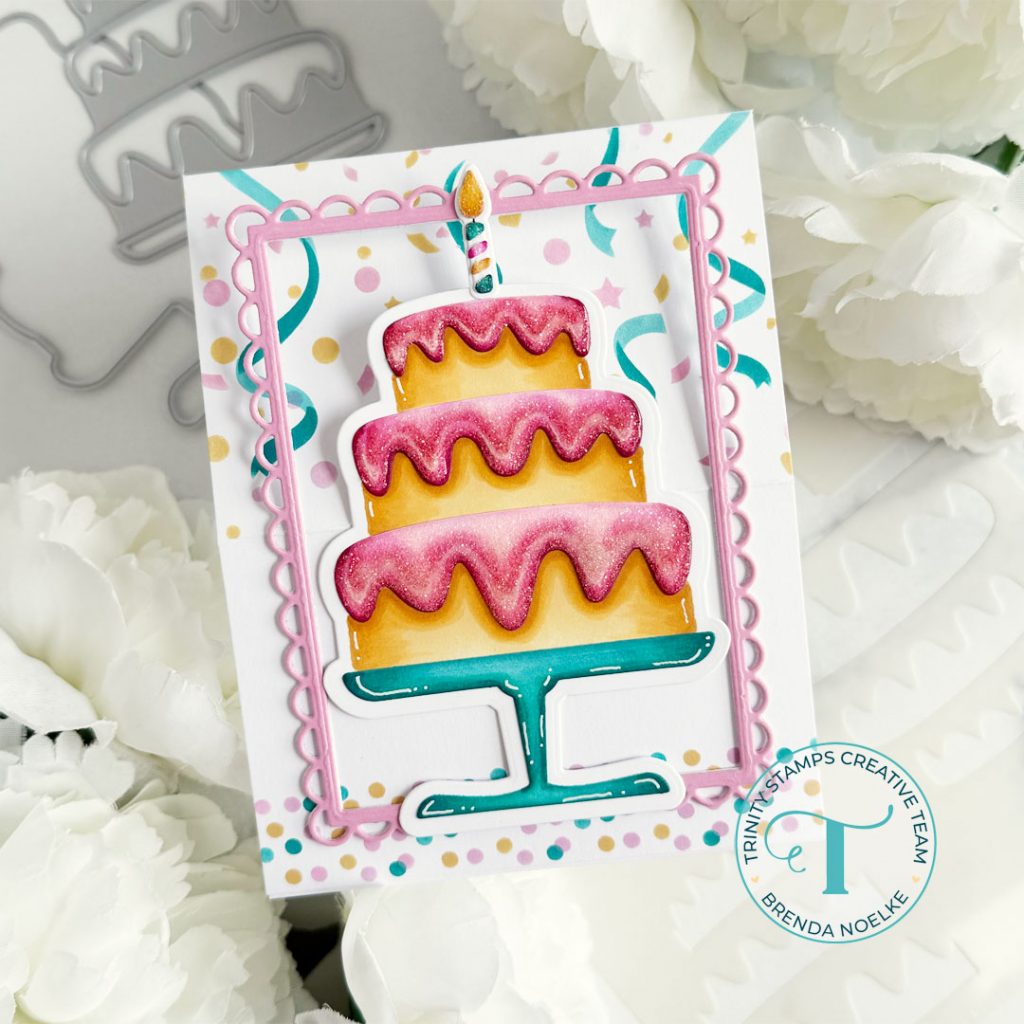
The frame and cake were adhered to the bottom of the front of the card, adding liquid adhesive only to the back of the die-cuts where they touch the bottom of the card base, below the fold.
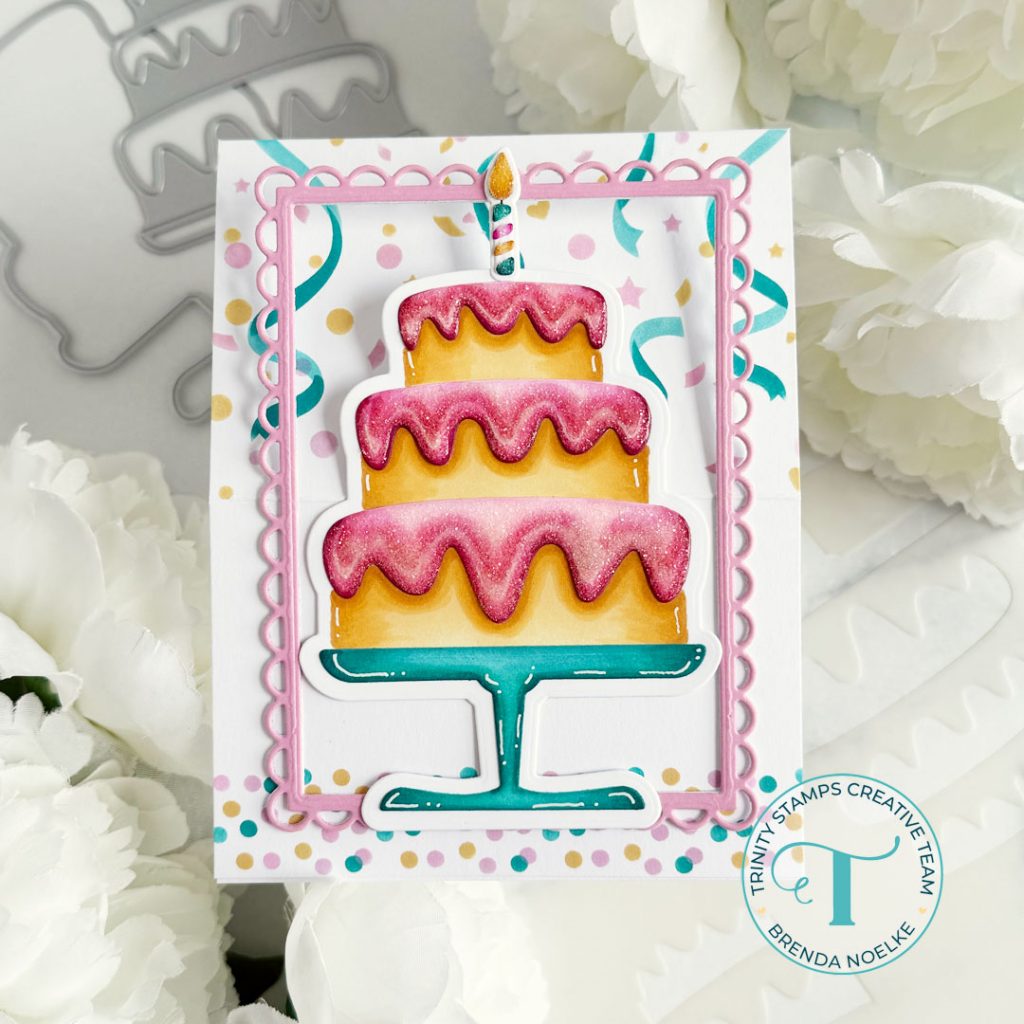
I used a white gel pen to add highlights to the die-cuts.

Glossy Accents was added to the frosting and the candle, then I sprinkled on Rock Candy Glitter.
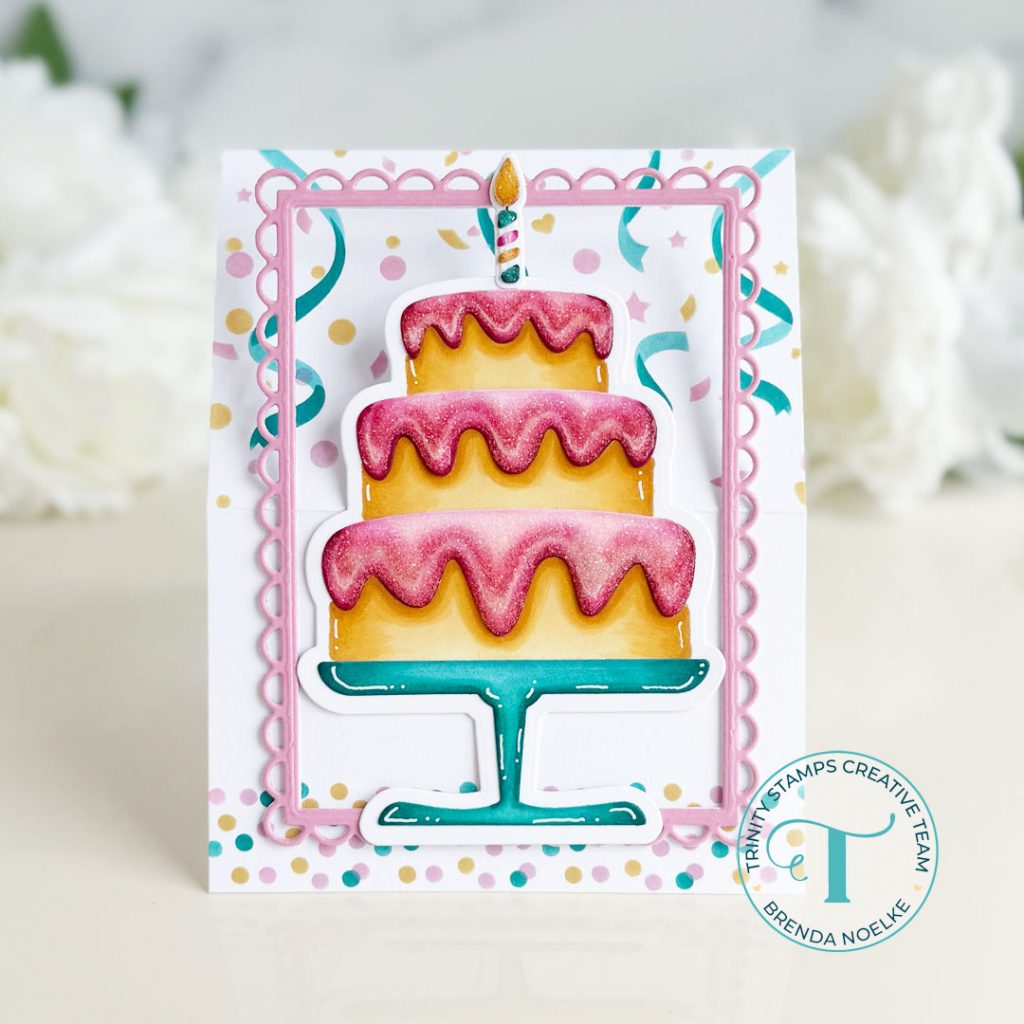
Once the Glossy Accents was dry, I tapped off the extra glitter and this card was finished.
It stands up so nicely on display!! Have you ever created and easel card?
That does it for me today!! Thanks so much for stopping by!!


